Lawn
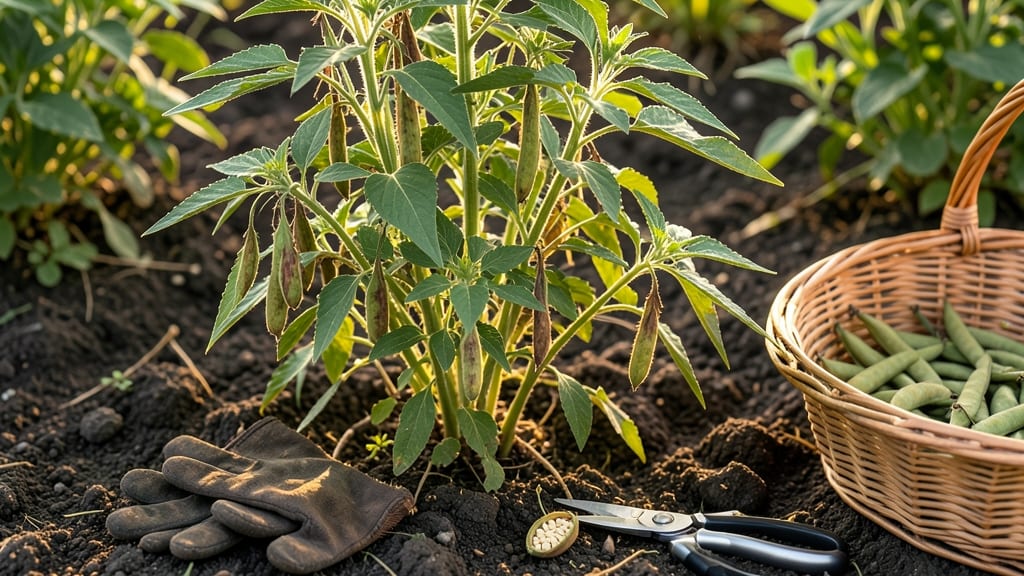
Growing sesame seed pods that pop open naturally feels like unlocking a tiny, golden treasure chest. 🌱 The key is patience—these delicate plants need warm soil, consistent moisture, and just the right timing to develop those prized pods that split effortlessly when ripe.
My first attempt nearly gave up after seeing only a few pods form, but I learned the tricks to coax full harvests from homegrown sesame.
Sesame thrives in hot, dry climates (think zones 7-11) where temperatures stay above 75°F after planting.
Start seeds indoors 8-10 weeks before your last frost, then transplant seedlings when nighttime temps hit 60°F. Well-draining soil with a pH of 6.0-7.5 gives you the best shot at healthy plants, while regular watering—about 1 inch per week—keeps them from bolting too soon.
The secret to those perfect popping pods? Letting them dry completely on the plant before harvesting.
By late summer, you'll spot those familiar brown pods forming along sturdy stems. When they turn completely dry and split open naturally (no twisting required!), it's harvest time.
A single healthy plant can yield up to 100 pods—enough for homemade tahini, decorative arrangements, or sharing with neighbors who love unique garden treasures. The nutty aroma alone makes the effort worthwhile.
For maximum yield, avoid overwatering once pods form, and watch for spider mites that love dry conditions. If you live outside the ideal climate, try growing sesame in containers and bring them indoors during cooler months.
The pods store well once dried, so you can enjoy homegrown sesame long after the harvest ends.
📚 In This Guide
- What you need
- Instructions
- Tips and common mistakes
- Wrapping up and next steps
What you need
- ● Sesame seeds: 1–2 packets (organic, non-GMO preferred; look for varieties like Sesamum indicum for reliable pod production).
- ● Well-draining potting soil: 1–2 bags (mix with perlite or vermiculite for aeration—sesame roots hate soggy feet!).
- ● Containers or garden bed: For containers: 5–10-inch deep pots (1–2 per plant; sesame plants grow 2–4 feet tall!).
- ● For in-ground: Full-sun spot (6+ hours/day) with loose, sandy soil (pH 6.0–7.5).
- ● Watering can or hose: With a gentle spray nozzle (sesame seeds drown if overwatered!).
- ○ Fertilizer (optional but helpful): Balanced 10-10-10 or compost (apply lightly at planting and when flowers appear).
- ● Avoid high-nitrogen fertilizers—sesame prefers lean soil!
- ● Trellis or stakes: For taller varieties (if growing in windy areas).
- ● Row cover or shade cloth: To protect seedlings from pests or harsh sun.
- ● Pruning shears: For trimming leggy stems to encourage bushier growth.
- ● Journal or labels: To track planting dates, watering schedules, and pod development.
Step-by-step instructions for growing sesame plants with perfect pods
Here's how to grow sesame plants that produce pods opening naturally—no twisting required.
🌱 Step 1: Start Seeds Indoors for Strong Starts
Sesame seeds need warmth to germinate, so I start them indoors 6-8 weeks before the last frost. Fill small seedling trays with light, well-draining potting mix (I use a blend of 50% coco coir and 50% perlite for fast drainage). Plant seeds ¼ inch deep, spacing them 1 inch apart—they germinate quickly, so don’t crowd them.
Keep the soil consistently moist but not soggy, and maintain a warm environment of 75-85°F using a heat mat if needed. Sesame seeds sprout in 5-10 days, so check daily for tiny green shoots. Once seedlings have 2-3 true leaves, they’re ready to transplant outdoors after hardening off for 7-10 days.
☀️ Step 2: Plant Outdoors in Full Sun and Warm Soil
Sesame thrives in hot, sunny conditions, so choose a spot with at least 8 hours of direct sunlight daily. The soil should be warm (70°F or above)—sesame plants wilt in cooler temperatures. Before planting, loosen the soil to 6 inches deep and mix in compost for nutrients.
Transplant seedlings 12 inches apart in rows 18 inches apart to allow airflow and prevent disease. Water deeply at planting but avoid wetting the leaves to prevent fungal issues. Sesame plants are drought-tolerant once established, so only water 1-2 times per week unless the soil feels bone-dry.
💧 Step 3: Monitor Water and Fertilizer for Healthy Growth
Sesame plants grow fast—60-90 days to maturity—but they’re sensitive to overwatering. Water only when the top 2 inches of soil feel dry, and do so at the base to keep foliage dry. Too much moisture causes pods to split prematurely, ruining harvest quality.
Fertilize lightly with a balanced 10-10-10 formula at planting and again when plants reach 12 inches tall. Avoid high-nitrogen fertilizers—they encourage leafy growth at the expense of pod development. Instead, focus on potassium-rich fertilizers to boost flowering and pod formation.
⏰ Step 4: Prune and Support for Maximum Pod Production
When sesame plants reach 18-24 inches tall, they may need staking or support, especially in windy areas. Use bamboo stakes or cages to keep stems upright—this prevents pods from rubbing against the ground and ensures clean, twist-free harvests.
Remove any yellow or diseased leaves promptly to redirect energy to pod development. Sesame plants naturally self-prune, so avoid heavy trimming. Instead, focus on airflow—thin crowded stems if necessary, but leave at least 6 inches of space between plants for optimal pod formation.
🌿 Step 5: Harvest When Pods Turn Yellow and Dry
The key to twist-free sesame pods is timing. Harvest when pods turn golden-yellow and dry—this usually happens 90-120 days after planting. Gently twist pods by hand; they should pop open easily, revealing seeds inside. If pods resist, they’re not fully ripe yet.
Cut entire stalks and hang them in a dry, well-ventilated area for 7-10 days to finish drying. Once fully dry, rub pods between your hands to release seeds. Store seeds in an airtight container away from moisture to keep them fresh for up to 1 year.
Tips & tricks for perfect sesame pod growth
Here's what I've learned from years of growing sesame plants that actually pop open naturally—no frustrating twisting required.
Seedling Temperature Secret: Those 75-85°F indoor temperatures are non-negotiable for germination. I've tried cooler setups and ended up with spotty sprouts. Use a heat mat if your home runs cool, and keep the seedling tray on top of the fridge if needed. The goal is consistent warmth—sesame seeds won't tolerate temperature swings during this critical 5-10 day sprouting window.
Outdoor Planting Hack: The 70°F+ soil temperature check is easier than it sounds—just press your finger into the soil about 2 inches deep. If it feels warm to your touch (like a summer sidewalk), it's ready. I've planted too early in cooler soil, and the seedlings just wilted despite my best efforts. Wait for that warm soil—it makes all the difference for strong root development.
Watering Wisdom: That 1-2 times per week guideline assumes your climate is hot and dry. In humid areas, you might need to water less frequently—just check the top 2 inches of soil. Overwatering is the #1 reason sesame pods split prematurely. I learned this the hard way after losing an entire crop to soggy soil. When in doubt, let the soil dry out more than you think it should.
Harvest Timing Tell: The golden-yellow color is your best indicator, but there's a trick to confirm ripeness: gently squeeze a pod. If it feels papery and crinkly with no give, it's ready. I've harvested too early when pods were still greenish, and the seeds never fully developed. Patience here pays off—wait for that perfect crispness before twisting.
Pro Tips for Sesame Seed Pod
- Here's what I've learned from years of growing sesame plants that actually pop open naturally—no frustrating twisting required.
- Seedling Temperature Secret: Those 75-85°F indoor temperatures are non-negotiable for germination.
- Outdoor Planting Hack: The 70°F+ soil temperature check is easier than it sounds—just press your finger into the soil about 2 inches deep.
Frequently asked questions
Got questions about growing sesame seed pods? You’re not alone! Here are some of the most common inquiries—plus straightforward answers to help your sesame plants thrive.
How long does it take for sesame seed pods to mature?
Sesame seed pods typically mature in 70–100 days after planting, depending on your climate and variety. Watch for pods to turn yellowish-brown and split open naturally—this signals peak harvest time. If pods stay green too long, they may shatter before you can collect seeds.
Why aren’t my sesame pods popping open?
Pods may refuse to open if they’re harvested too early or exposed to excessive moisture. Ensure pods are fully dry before picking, and avoid overwatering late in the season. If pods stay closed, try drying them in a well-ventilated, sunny spot for a few extra days.
Can I grow sesame seed pods in containers?
Yes! Sesame plants thrive in 5–7 gallon pots with at least 12 inches of depth. Use a light, well-draining soil mix and place containers in full sun (6+ hours/day). Just ensure pots have drainage holes to prevent root rot—sesame hates soggy feet!
What’s the best climate for sesame seed pods?
Sesame loves warm weather (ideal temps: 70–90°F) and low humidity. Avoid planting in areas with heavy rain or frost—sesame is a tropical/subtropical crop. If you live in a cooler zone, opt for shorter-season varieties or start seeds indoors 4–6 weeks before the last frost.
Are there alternatives if sesame pods don’t grow well?
If sesame struggles in your area, try these similar pod-bearing plants:
- Fenugreek – Edible leaves/seeds, drought-tolerant.
- Basil – Some varieties produce tiny seed pods.
- Mustard greens – Fast-growing and cold-hardy.
Wrapping up and next steps
Growing sesame seed pods may seem tricky at first, but with the right techniques—like proper spacing, consistent moisture, and a little patience—you’ll soon be rewarded with pods that pop open naturally and reveal those tiny, nutrient-packed seeds. 🌱 Whether you’re aiming for a thriving garden or just a fun experiment, the key is observation and care—and trust us, it’s worth the effort!
Ready to take the next step? Start small—plant a few seeds in a pot or a dedicated garden bed—and watch your sesame plants flourish. Once you’ve mastered the basics, you can even experiment with different growing conditions to see what works best in your climate. Happy growing! 🌿