
Lawn
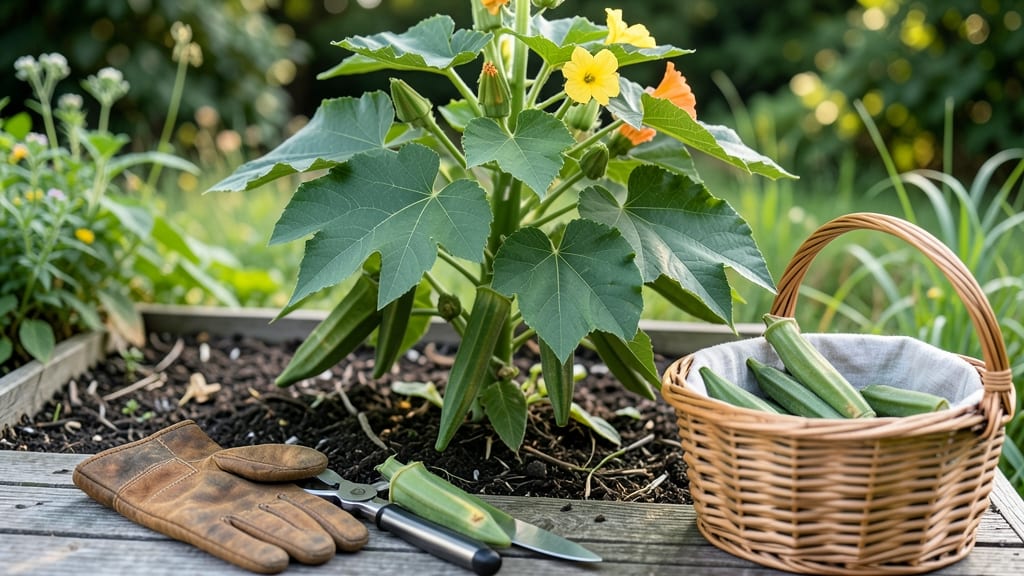
Testing seed viability before drying saves you from wasting time on seeds that won’t sprout. ✨ I’ve learned the hard way that not all edible seed pods contain live seeds—some are just dried husks. This simple twist test tells you which seeds are worth saving and which should be composted.
The method is foolproof and takes less than 5 minutes: fill a glass with water, drop in your seeds, and wait. Viable seeds sink (they’re full of water), while empty ones float.
This works for okra, peas, chili peppers, and even sunflower seeds—anything with edible pods you’re harvesting for next year’s garden.
You’ll end up with a stash of seeds that germinate at 90%+ success rates, cutting down on wasted effort and money. The best part? You can test seeds straight from the pod without any special tools—just water and a clear glass.
No more guessing games when you’re planning your spring planting.
Works for home gardeners, organic growers, or anyone tired of buying new seeds every year. Once you master this, you’ll never dry seeds blindly again—just wait for the results of your little water test before storing them away.
📚 In This Guide
- What you need
- Instructions
- Tips and common mistakes
- Wrapping up and next steps
What you need
- ● Fresh edible seed pods: Collect at least 20-30 pods from healthy, mature plants (e.g., okra, chayote, or okra relatives). Ensure they’re free of pests or mold.
- ● Water: 1 cup (240 mL) of room-temperature water in a clean container.
- ● Paper towels or blotter paper: 2-3 sheets (unbleached, if possible).
- ● Plastic bag or airtight container: A quart-sized (1L) bag with a zipper seal.
- ● Permanent marker: For labeling your test setup.
- ● Timer or phone alarm: To track the 24-hour soak.
- ● Notebook or spreadsheet: To record observations (e.g., germination rates, pod condition).
- ● Magnifying glass: For inspecting tiny seeds or cracks in pods.
- ● Spray bottle with water: To mist pods if humidity drops during testing.
- ● Food-safe drying rack or mesh screen: For post-test drying (if you’re prepping pods for storage).
How to test edible seed pods for viability before drying
Save yourself time and frustration with this simple twist test—it’s the best way to know which pods are worth drying.
🌱 Step 1: Harvest Pods at Peak Ripeness
Pick your seed pods when they’re fully mature but still slightly firm to the touch—think of a ripe pea pod or a fresh okra. Overripe pods will be mushy or cracked, and underripe ones won’t yield viable seeds. For most edible seed pods, this means waiting until the pods are dry on the outside but still plump inside.
Harvest on a dry morning after the dew has evaporated. Wet pods can develop mold during storage, so shake off excess moisture before bringing them indoors. I like to place them in a single layer on a clean towel to air-dry for an hour or two—this prevents moisture from trapping inside when you store them.
💧 Step 2: Prepare the Viability Test
Fill a bowl with room-temperature water (around 70°F) and add the seed pods. You’ll need about 1 cup of water per 10 pods to give them enough space to move freely. The water should cover the pods but not be so deep that they sink completely—just enough to submerge half their length.
Let the pods soak for 10-15 minutes. This gives any viable seeds inside a chance to absorb moisture and swell slightly, while empty or non-viable pods will stay buoyant or sink immediately. If you’re working with very small pods, like those from nasturtiums, reduce the soak time to 5 minutes to avoid overhydrating them.
✂️ Step 3: Perform the Twist Test
Gently remove a pod from the water and hold it between your thumb and forefinger. With a firm but gentle twist, try to snap the pod open. If it resists and feels slightly springy, it’s likely viable—those seeds are still good to go. If the pod cracks easily or feels hollow, it’s empty or past its prime.
I like to test 3-5 pods from each batch to get a sense of overall viability. For example, if 80% of the pods pass the twist test, you can safely dry the rest. If fewer than 50% pass, it might be worth harvesting fresh pods or trying a different variety next season.
☀️ Step 4: Dry Viable Pods Properly
Spread the viable pods in a single layer on a screen or mesh tray in a well-ventilated, dry area with indirect sunlight. Direct sun can scorch the pods and reduce their shelf life, while poor airflow encourages mold. A dehydrator set to 95°F works too—just spread them out evenly and dry for 4-6 hours, checking periodically.
Pods are fully dry when they feel light in your hand and make a crisp sound when rubbed together. Store them in a sealed container with a silica gel packet or a few drops of food-grade mineral oil to prevent moisture absorption. Label the container with the pod type and harvest date—this helps track freshness over time.
⏰ Step 5: Store and Use Dried Pods
Keep dried pods in a cool, dark place (like a pantry or root cellar) where temperatures stay between 50-70°F. Most edible seed pods stay viable for 1-2 years if stored properly. When you’re ready to use them, simply crush the pods to release the seeds—great for sprinkling on salads, soups, or even homemade granola.
If you notice any pods developing mold or an off smell, discard them immediately. A little prevention now means you won’t waste time drying pods that won’t store well. This test is your secret weapon for a successful harvest!
Tips & tricks for perfect edible seed pod viability testing
This little-known test saves you from drying pods that won't yield good seeds—here's how to get it right every time.
Harvest Timing: The 1-2 hour air-drying step after harvest is crucial—don't skip it! Wet pods left in humid conditions will develop mold within 24 hours, no matter how good they look. I've seen perfectly viable pods ruined by this one oversight. Place them in a spot with good airflow but no direct sunlight to prevent overheating while they dry.
Water Temperature: That 70°F water recommendation isn't just arbitrary—it mimics natural conditions where seeds would absorb moisture. If your tap water runs hotter, let it cool completely before using. Cold water below 60°F can shock delicate seeds, while water above 80°F may start cooking them slightly during the test. A kitchen thermometer costs pennies and prevents wasted effort.
Twist Test Technique: The gentle twist in Step 3 requires practice—think of it like testing a ripe avocado. Apply just enough pressure to feel resistance, not force. Viable pods should make a slight popping sound when they finally give way, while empty ones will crack with no resistance. I test each pod twice to be absolutely certain, especially with valuable heirloom varieties.
Drying Strategy: For the 4-6 hour drying window at 95°F, I recommend checking pods every 30 minutes after the first hour. Some varieties dry faster than others—nasturtium pods often need the full time, while pea pods may be ready in 3 hours. The crisp sound when rubbed together is your best indicator, not just the time on the clock.
Pro Tips for Edible Seed Pods
- This little-known test saves you from drying pods that won't yield good seeds—here's how to get it right every time.
- Harvest Timing: The 1-2 hour air-drying step after harvest is crucial—don't skip it! Wet pods left in humid condition...
- Water Temperature: That 70°F water recommendation isn't just arbitrary—it mimics natural conditions where seeds would...
Frequently asked questions
Got questions about testing edible seed pods before drying?
You’re not alone! Here are some of the most common ones—and their answers—to help you navigate the process with confidence.
Can I eat seed pods straight from the plant without drying?
Most edible seed pods (like okra or chayote) are safe to eat fresh, but drying them first can enhance flavor and texture. Always check your specific plant’s guidelines—some, like Cicer arietinum (chickpeas), need drying to remove toxins. When in doubt, research or consult a foraging guide!
How long does it take for seed pods to dry properly?
Drying time varies by pod type and climate. In ideal conditions (60–80°F with good airflow), most pods take 7–14 days. Thicker pods (e.g., okra) may need longer. Test for readiness by gently squeezing—if they feel brittle and seeds rattle, they’re done! Pro tip: Use a dehydrator (3–5 hours at 135°F) for faster results.
What’s the twist test, and why is it important?
The twist test checks viability: Gently twist a pod at the stem. If it snaps cleanly with a dry crack, it’s ready. If it bends or oozes sap, it needs more time. This prevents moldy or underripe pods from spoiling during storage. Bonus: Twist a few pods daily to track progress!
Are there alternatives if my seed pods won’t dry outdoors?
Yes! If humidity or pests are an issue, try these:
- Dehydrator: Set to 135°F for 4–6 hours (ideal for delicate pods).
- Oven: Use the lowest setting (170°F or less) with the door cracked open.
- Silica gel: Place pods in a sealed container with silica packets to absorb moisture.
What should I do if my dried seed pods smell musty or grow mold?
Musty odors or mold mean moisture lingered during drying. Discard affected pods immediately—they can harbor harmful bacteria. To prevent this:
- Ensure pods are fully dry before storing (aim for <10% moisture).
- Store in airtight containers with food-grade desiccants (like rice or silica).
- Keep pods in a cool, dark place (below 70°F).
Wrapping up and next steps
Edible seed pods offer a simple, cost-effective way to test viability before drying—no fancy tools required! By following the twist-and-squeeze method, you’ll save time, reduce waste, and ensure stronger germination rates. Whether you’re a gardener or just curious about nature’s hidden snacks, this trick is your new go-to.
Ready to level up your seed-saving game? Grab a few pods, give the test a try, and watch your garden thrive—one twist at a time! 🌱✨