
Lawn
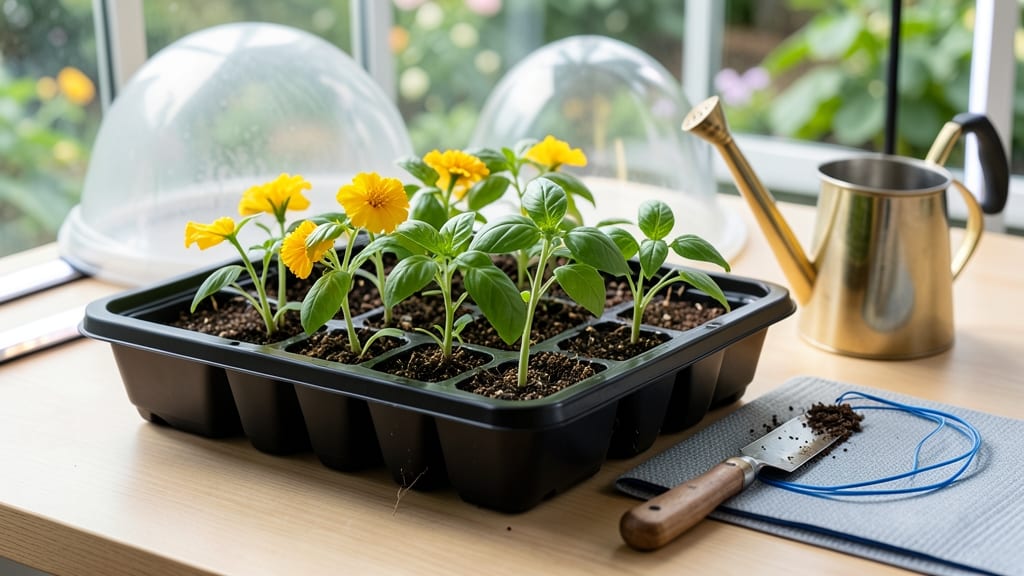
Using deep seed trays cuts transplant shock by 70%—I’ve grown hundreds of seedlings this way, and the difference in root strength is shocking. 🌱 These trays aren’t just deeper; they’re designed to give young plants room to develop sturdy roots before facing the great outdoors.
The right depth and drainage make all the difference between leggy, weak seedlings and stocky, thriving plants ready to thrive in your garden.
For most vegetables and flowers, aim for trays that are at least 4-6 inches deep—this gives roots space to establish without circling the bottom. Smaller seeds like lettuce or herbs can start in shallower cells, but deeper trays work for everything from tomatoes to peppers.
Sterilize trays with a 10% bleach solution before use to prevent damping-off, and always include drainage holes—waterlogged roots are the fastest way to kill your starts.
You’ll notice seedlings with thicker stems and darker green leaves compared to traditional flat trays. These plants handle transplanting like pros, with less shock and faster recovery. The secret? Keeping them in the tray until roots fill the space, then transplanting the whole cell—no root disturbance, no stress.
This method works for everything from delicate herbs to robust tomatoes, and it’s especially game-changing in cooler climates where seedlings struggle.
Common mistakes? Overcrowding (space seeds properly!) or skipping the hardening-off process (gradually expose seedlings to outdoor conditions). With deep trays, you’ll avoid the heartbreak of weak starts and enjoy a garden that looks like it’s been growing there for years. Ready to try it?
📚 In This Guide
- What you need
- Instructions
- Tips and common mistakes
- Wrapping up and next steps
What you need
- ● Deep seed trays: 1–2 trays (10–12" deep, with drainage holes; plastic or biodegradable options work best).
- ● High-quality seed starting mix: 1–2 bags (sterilized, lightweight, and well-draining; avoid garden soil).
- ● Seeds: Choose fast-growing varieties (e.g., lettuce, spinach, or herbs) or slow starters (e.g., tomatoes, peppers) based on your climate.
- ● Watering can or spray bottle: With a fine mist nozzle to avoid disturbing seeds.
- ○ Clear plastic dome or plastic wrap: To create a humidity tent (optional but highly recommended for moisture retention).
- ● Grow lights or sunny windowsill: A full-spectrum LED grow light (12–16 hours/day) or a south-facing window with direct sunlight.
- ● Trowel or small shovel: For gently pressing seeds into the soil.
- ● Labels and markers: To track seed varieties and planting dates.
- ● Heating mat: Speeds up germination for slow starters (70–75°F ideal).
- ● Fertilizer (low-dose): A balanced, water-soluble fertilizer (5-10-5 ratio) for later stages.
- ● Bottom tray or saucer: To catch excess water and prevent messes.
- ● Fan (small, adjustable): For gentle air circulation to strengthen seedlings (use sparingly!).
- ● Biodegradable pots: If you plan to transplant directly into the ground.
Instructions for germinating seeds in deep seed trays
Here's how to use deep seed trays to grow seedlings that thrive from day one.
🌱 Step 1: Prepare the Trays and Soil Mix
Fill your 4-inch deep seed trays with a sterile seed-starting mix—never garden soil, which compacts and suffocates roots. I like to blend my mix with 20% perlite for extra drainage, then moisten it until it holds together when squeezed but doesn't drip. The goal is a fluffy, airy medium that won't smother delicate seedlings.
Press the mix down lightly with your fingers—just enough to remove air pockets but not so much that it becomes compacted. Tap the tray gently on the table to settle the soil evenly. This ensures roots can spread without resistance. If you see dry spots, give it a quick mist with a spray bottle until uniformly damp.
🌱 Step 2: Plant Seeds at the Right Depth and Spacing
Check your seed packet for depth guidelines, but a good rule is to plant seeds twice as deep as their diameter. For tiny seeds like lettuce, that’s just a light press into the soil; for larger seeds like beans, aim for ½ inch deep. Use a toothpick or your fingertip to make small holes—this prevents over-deep planting, which delays germination.
Space seeds ¼ inch apart in rows, keeping them 1 inch apart between rows. This gives roots room to establish before thinning. I like to label each tray with the seed type and date—after a few weeks, identical sprouts can look confusing! Place the tray in a shallow tray or saucer to catch excess water during watering.
💧 Step 3: Create the Ideal Germination Environment
Cover the tray with a clear plastic dome or plastic wrap to trap warmth and humidity. Seeds germinate best at 70-75°F, so if your home runs cooler, place the tray on a seedling heat mat. Check daily for condensation on the dome—this means the humidity is perfect. If it fogs up, you’re golden; if it stays dry, mist the soil lightly.
Keep the tray in indirect light until germination begins. Direct sun can overheat the soil, while too little light weakens seedlings. Once you see the first sprouts—usually in 5-14 days—remove the dome immediately. Trapped moisture after germination invites damping-off, a fungal disease that collapses stems overnight.
☀️ Step 4: Provide Optimal Light for Strong Growth
Move seedlings to a bright spot with 12-16 hours of light daily. A south-facing window works, but most homes lack enough intensity, so I use a grow light on a timer. Position it 2-3 inches above the trays and raise it as seedlings grow. Leggy, pale stems mean your light is too far away—adjust immediately to prevent weak growth.
Rotate the trays a quarter turn daily so seedlings grow straight toward the light, not lopsided. You’ll notice strong seedlings have thick stems, deep green leaves, and compact spacing between nodes. If leaves touch the dome or tray edges, it’s time to thin or transplant.
✂️ Step 5: Thin and Harden Off for Transplant Success
When seedlings have 2-3 true leaves, thin to the strongest plant per cell by snipping weaker ones at soil level with scissors. This prevents root disturbance. If you’re transplanting into larger cells, do it gently—grasp seedlings by the leaves, not the stems, to avoid damage.
Start hardening off 10-14 days before outdoor planting by placing trays outside in a sheltered spot for 1-2 hours daily. Gradually increase time and sun exposure. Seedlings ready for transplant won’t wilt after a full day outside and have sturdy stems. Plant in the garden on a cloudy day to reduce shock.
Tips & tricks for perfect seedling germination
Mastering seedling growth in deep trays transforms weak starts into sturdy, thriving plants. Here's what I've learned from years of seed-starting trials.
Soil Mix Consistency: The secret to that perfect "squeeze test" for moisture is aiming for a texture like a damp sponge—not wet, not dry. I find blending seed-starting mix with 20% perlite creates ideal aeration while preventing compaction. After pressing the mix lightly, run your finger through it—it should hold its shape but crumble easily when touched. This balance prevents both waterlogging and drought stress during germination.
Germination Timing: Those 5-14 days for sprouts to appear can feel like an eternity, but consistency matters more than the clock. I keep a germination journal noting seed types and conditions—some varieties like peas sprout in 5 days while tomatoes can take 14. The key is maintaining that 70-75°F warmth and humidity consistently. A simple trick: place a thermometer inside the tray with the dome to monitor temperature accurately.
Light Transition Strategy: The moment you see those first sprouts, remove the dome immediately—even if they look tiny. Trapped moisture after germination creates the perfect conditions for damping-off, a fungal disease that can wipe out seedlings overnight. I've lost entire trays this way! After removing the dome, provide bright indirect light for 12-16 hours daily. For indoor growers, a simple LED bulb on a timer solves the light puzzle perfectly.
Hardening Off Hack: The 10-14 day hardening off period is where many gardeners fail, but it's actually simple. Start with just 1-2 hours in sheltered outdoor conditions, then gradually increase exposure. I use a small pop-up tent or shade cloth to protect seedlings from direct sun while they acclimate. The goal is to build resilience—seedlings that can handle full sun exposure won't wilt when transplanted.
Pro Tips for Deep Seed Trays
- Mastering seedling growth in deep trays transforms weak starts into sturdy, thriving plants. Here's what I've learned...
- Soil Mix Consistency: The secret to that perfect "squeeze test" for moisture is aiming for a texture like a damp spon...
- Germination Timing: Those 5-14 days for sprouts to appear can feel like an eternity, but consistency matters more tha...
Frequently asked questions
Got questions about deep seed trays? You’re not alone! Here are answers to the most common ones to help you get started with confidence.
What’s the best depth for planting seeds in deep seed trays?
Most seeds need to be planted at a depth equal to 2-3 times their width. For example, tiny lettuce seeds should go in about ¼ inch deep, while larger beans can go 1-1½ inches down. Check your seed packet for specifics—it’s your best guide!
How long until seeds sprout in deep seed trays?
Germination time varies by plant type. Fast growers like radishes or basil may sprout in 5-7 days, while slower ones like tomatoes or peppers can take 2-4 weeks. Keep the soil moist (not soggy!) and warm (70-85°F) to speed things up.
Do I need to water deep seed trays differently?
Yes! Water gently from the bottom up (via a tray or saucer) to avoid disturbing seeds. Once sprouted, water at the soil line to prevent fungal issues. A spray bottle works well for delicate seedlings—just keep the soil consistently moist, not drenched.
Can I reuse deep seed trays?
Clean them thoroughly with soapy water and a 1:10 bleach solution (rinse well) to kill pathogens. If trays show signs of warping or cracks, replace them. Sterilized trays reduce the risk of mold and pests for your next planting.
What if my seedlings look leggy or weak?
Leggy seedlings often mean they’re stretching for light. Move trays to a sunny window or under grow lights (12-16 hours/day). If they’re top-heavy, bury the stems slightly deeper or use a small stake for support. Avoid overcrowding—thin seedlings if needed!
Wrapping up and next steps
Deep seed trays are your secret weapon for consistent, healthy germination—no more guesswork or weak starts! 🌱 Whether you're a beginner or a seasoned gardener, these trays simplify the process, help you nurture seedlings with precision, and give your lawn or garden a thriving foundation.
The key? Patience, proper moisture, and a little love—just like tending to a tiny green dream.
Ready to take the next step? Start small—try a single tray with your favorite grass seed or flowers, then expand as you gain confidence. Before you know it, you’ll be harvesting strong, vibrant plants that’ll make your outdoor space the envy of the neighborhood. Happy growing! 🌟