
Propagation
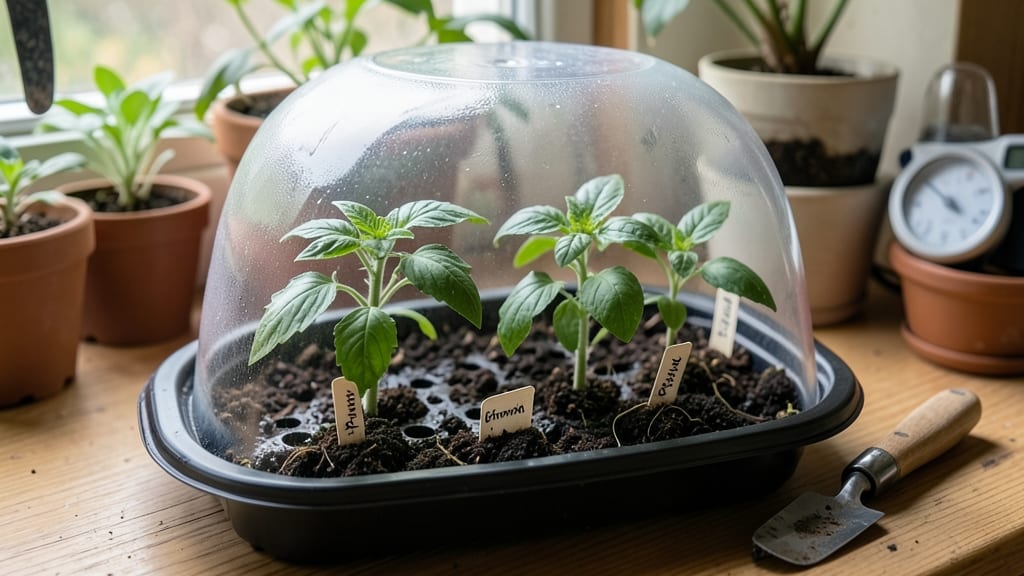
A clear humidity dome turns your seed-starting setup into a moisture fortress that speeds up germination by days. 🌱 I’ve used these simple setups to get seedlings popping in half the time—especially for finicky seeds like lettuce and snapdragons that need consistent dampness to break through soil.
The magic is in trapping warmth and moisture right where seeds need it most. You’ll need a clear plastic dome (or even a plastic bag), a seed tray, and your favorite seed-starting mix. The dome keeps humidity high while letting light through, creating the perfect mini-greenhouse effect.
Just don’t let it get too hot—ventilation is key to avoiding mold. Once your seedlings hit the two-leaf stage, they’ll outgrow the dome’s cozy confines. That’s when you’ll start seeing sturdy stems and vibrant leaves, ready to transition to brighter light.
The right timing means fewer leggy seedlings and more robust plants. Works for vegetables, herbs, and flowers alike—just adjust the dome size to your tray. Here’s how to set it up without the guesswork!
📚 In This Guide
- What you need
- Instructions
- Tips and common mistakes
- Wrapping up and next steps
What you need
- ● Seed trays or containers – 1-2 shallow trays (4-6" deep) with drainage holes. Plastic or biodegradable options work well.
- ● Seed starting mix – 1 bag (1-2 quarts) of high-quality, sterile potting mix (avoid garden soil).
- ● Seeds – Your chosen variety (follow packet instructions for planting depth).
- ● Clear plastic dome or lid – A humidity dome (often included with seed trays) or a clear plastic clamshell (like a takeout container) to cover the tray.
- ● Spray bottle – 1 with water (for gentle misting).
- ● Tweezers or pencil – 1 pair (for precise seed placement).
- ● Scissors or knife – 1 (to trim excess plastic if needed).
- ● Heating mat – 1 (to speed up germination for slow starters like peppers or tomatoes).
- ● Humidity gauge – 1 (to monitor moisture levels, ideally 70-90% humidity).
- ● Ventilation holes – Small holes poked in the dome (use a hot nail) to prevent mold once seeds sprout.
- ● Grow lights – 1-2 LED bulbs (if starting indoors without natural light).
- ● Labeling tags – 10-20 (to track seed varieties and planting dates).
How to use a humidity dome for faster seed germination
Here's how I speed up germination by trapping warmth and moisture—no fancy equipment needed.
🌱 Step 1: Prepare Your Seeds and Soil
Start with a clean, moist seed-starting mix in your containers. I like to water it until it feels like a damp sponge—squeeze a handful and see if it holds together without dripping. This ensures seeds have consistent moisture right from planting. If your mix is too dry, germination slows dramatically.
Place your seeds at the correct depth—usually about ¼ inch below the soil surface—unless the packet says otherwise. I tap the seed packet gently to release one seed at a time, then cover it lightly with soil. Pressing too hard can bury seeds too deep, delaying their emergence.
💧 Step 2: Assemble the Humidity Dome
Cover your seed trays with a clear plastic dome or plastic wrap, sealing it tightly around the edges. The goal is to create a mini greenhouse effect that traps warmth and moisture. I use a clear plastic lid that fits snugly over my seed trays, but a cut-to-size piece of plastic wrap works just as well.
Place the covered trays in a warm spot—ideally between 70-80°F. A seedling heat mat set to 75°F works wonders if your home runs cooler. Without this warmth, seeds may take twice as long to sprout, if they germinate at all.
☀️ Step 3: Monitor and Maintain Moisture
Check your seeds daily but resist opening the dome unless necessary. Condensation on the inside is a good sign—it means the humidity is right. If you notice the soil surface drying out, mist the inside of the dome lightly with water to restore moisture without disturbing the seeds.
Watch for the first signs of germination—tiny green sprouts pushing through the soil. This usually happens within 5-10 days, but some seeds (like peppers) can take up to 2 weeks. Once 50% of your seeds have sprouted, remove the dome immediately to prevent damping-off disease, which thrives in overly humid conditions.
⏰ Step 4: Transition to Normal Growing Conditions
After removing the dome, move your seedlings to a well-lit area with 12-16 hours of light daily. I use a grow light on a timer to ensure consistent light exposure. Without enough light, seedlings stretch toward the source (called "legginess"), and they never recover proper strength.
Water gently from the bottom by placing the trays in a shallow dish of water for 10-15 minutes. This encourages roots to grow downward and prevents soil-borne diseases. You'll know moisture is right when the soil surface looks slightly damp but not glistening.
Tips & tricks for perfect seed germination with a humidity dome
Here's what I learned after watching hundreds of seeds sprout—these little tricks make all the difference between waiting weeks and seeing sprouts in days.
Soil Moisture Secret: The "damp sponge" test in Step 1 is your best friend. If the soil feels like a wrung-out sponge (no dripping), you're golden. Too dry? Germination slows to a crawl. Too wet? You risk rot before sprouts even appear. I keep a spray bottle nearby to add just a few drops when the surface starts drying.
Temperature Matters: That 70-80°F range in Step 2 isn't just a suggestion—it's critical. If your home runs cooler, a seedling heat mat at 75°F is worth every penny. I've seen germination times double when seeds sit in a 65°F kitchen instead of a warm spot. Pro tip: Place your dome on top of the fridge (not inside) for consistent warmth without overheating.
Germination Timeline: The 5-10 day window in Step 3 is a guideline, not a rule. Tiny seeds like lettuce might sprout in 5 days, while stubborn peppers can take 14. I mark my calendar with the 50% sprout threshold—once half are up, I remove the dome immediately. This prevents that dreaded damping-off disease that turns sprouts to mush overnight.
Light Transition: That 12-16 hours of light in Step 4 is non-negotiable for sturdy seedlings. I use a simple grow light on a timer—no fancy setup needed. The key is consistency. If your seedlings start stretching toward the light (leggy growth), they're begging for more light. Move them closer or add a second light source immediately.
Pro Tips for Seed Starting Humidity Dome
- Here's what I learned after watching hundreds of seeds sprout—these little tricks make all the difference between wai...
- Soil Moisture Secret: The "damp sponge" test in Step 1 is your best friend. If the soil feels like a wrung-out sponge...
- Temperature Matters: That 70-80°F range in Step 2 isn't just a suggestion—it's critical. If your home runs cooler, a ...
Frequently asked questions
How often should I open the humidity dome?
Open your humidity dome for 5–10 minutes daily once seedlings sprout and develop their first true leaves. This prevents mold () and allows airflow. If condensation is heavy, increase ventilation—just avoid cold drafts!
When can I remove the humidity dome?
Remove it 7–14 days after germination or when seedlings show 2–3 sets of true leaves. Over-reliance on humidity can weaken stems. Test readiness by gently lifting the dome for a few hours daily before full removal.
What can I use if I don’t have a humidity dome?
DIY alternatives work great! Try:
- Plastic wrap (secure with rubber bands)
- Clear plastic bag (poke holes for airflow)
- Glass jar (with lid slightly ajar)
- Plastic clamshell container (from produce)
Why are my seedlings developing mold?
Mold thrives in excess moisture + poor airflow. Fix it by:
- Opening the dome immediately to dry surfaces
- Spraying seedlings with neem oil (natural antifungal)
- Reducing bottom-watering frequency
- Using a fan on low for 10 mins/day
Does temperature affect humidity dome performance?
Yes! Warmer temps (70–85°F) boost humidity naturally, while cooler temps (below 60°F) may need extra moisture (mist lightly). Avoid placing near heat sources—consistent warmth (not heat spikes) keeps condensation balanced.
Wrapping up and next steps
Mastering the art of seed starting with a humidity dome is a game-changer for any gardener! 🌱 By trapping moisture and warmth, you create the perfect microclimate for seeds to sprout faster and stronger.
Whether you're a seasoned green thumb or just starting out, this simple tool can boost your success rate and save you time.
Now that you’re equipped with the know-how, it’s time to put your new skills into action. Grab your supplies, set up your humidity dome, and watch your seeds transform into thriving seedlings in no time! Happy growing! 🌿