
Size
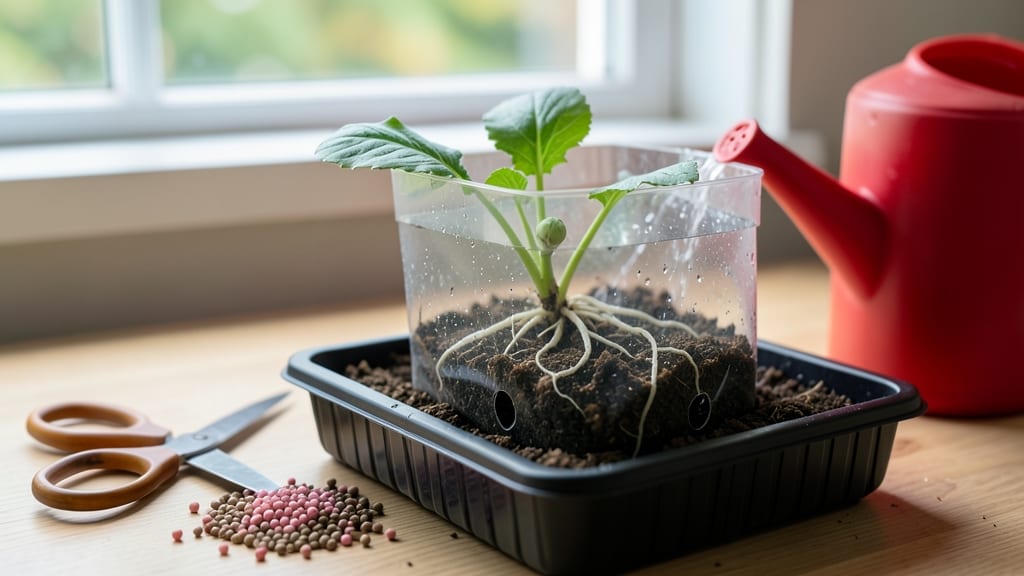
Growing seeds in a bag lets you sprout seedlings anywhere—no soil, no mess, just a bag and a sunny windowsill. 🌱 I tried this method after killing my first batch of seedlings from overwatering, and now I swear by it for fast, fuss-free starts.
The best part? You can use any bag—paper grocery bags, plastic produce bags, even repurposed mailers—and skip the expensive seed-starting kits.
Start with fast-growing seeds like lettuce, radishes, or herbs—they thrive in this method and give you results in under two weeks. You’ll need just a few supplies: your chosen bag, a spray bottle, seeds, and a bright spot.
The key is keeping the bag slightly damp (not soaked) and giving it indirect light until sprouts appear. No fancy setups, no complicated steps—just watch those little green shoots push through in days.
Once your seedlings have a few true leaves, you’ll transplant them straight into soil or pots without shocking their roots. The bag method actually strengthens seedlings by encouraging them to stretch toward light, so they’re hardier than store-bought starts.
Plus, you’ll cut waste by reusing bags and avoid the heartbreak of damping-off disease that ruins so many seedling trays.
This works for balconies, dorm rooms, or even your kitchen counter—anywhere with a little light. The only challenge is keeping the bag from getting too wet, but a spray bottle solves that. Try it with your next batch of seeds and see how easy growing can be!
📚 In This Guide
- What you need
- Instructions
- Tips and common mistakes
- Wrapping up and next steps
What you need
- ● 1 reusable grocery bag (preferably cotton or mesh, ~12" x 18" or larger) – No plastic!
- ● 1/4 to 1 cup of seeds (alfalfa, lentils, radish, or sunflower work best for beginners)
- ● Water (room temperature, ~1 cup per batch)
- ● 1 rubber band or hair tie (to seal the bag)
- ○ Optional but helpful: A spray bottle (for gentle misting)
- ● Scissors (to trim excess bag material)
- ● A sunny windowsill or small grow light (for sprouting)
Step-by-step instructions for growing seeds in a bag
This zero-waste method turns a simple bag into a self-watering sprouting station—no soil, no mess, just fresh greens in days.
🌱 Step 1: Choose and Soak Your Seeds
Pick 4 tablespoons of seeds (alfalfa, broccoli, or radish work best) and place them in a clean quart-sized zip-top bag. Add 1 cup of water—enough to fully submerge the seeds. I like to use a glass jar first to rinse seeds thoroughly, then transfer them to the bag with the water. This removes debris and prevents mold.
Seal the bag, then gently squeeze and release to mix the seeds and water. Let them soak for 8-12 hours at room temperature. You’ll know they’re ready when they’ve doubled in size and feel plump to the touch. If you forget, don’t worry—just start fresh with a new batch.
💧 Step 2: Drain and Position for Sprouting
After soaking, unzip the bag just enough to let the water drain out completely. Hold it over the sink and tilt gently to release the water, then reseal it. Lay the bag flat on its side in a warm, dark spot—like a pantry or cabinet. The goal is to keep it consistently moist but not soggy. I place mine near a slightly open window for airflow, but no direct light yet.
Every 12 hours, open the bag, reseal it, then gently squeeze and release to redistribute moisture. You’ll see tiny sprouts appear in 2-3 days. If the bag feels dry inside, add a teaspoon of water directly to the seeds before resealing. Overwatering here is the fastest way to invite mold, so less is always better.
☀️ Step 3: Introduce Light for Greening
Once sprouts reach ½ inch tall (about 3-5 days in), move the bag to a bright, indirect light source. A sunny windowsill works, but avoid direct midday sun, which can overheat the bag. If your sprouts start looking pale or leggy, they’re stretching for light. Rotate the bag quarter-turn daily so they grow evenly.
Continue rinsing twice daily by unzipping, draining, and resealing. After 5-7 days total, you’ll see first true leaves—that’s your cue to rinse one last time, then store the bag upright in the fridge. The sprouts will stay fresh for 5-7 days this way. For extra crunch, give them 12 hours of light before eating.
✂️ Step 4: Harvest and Reuse the Bag
Snip the sprouts just above the base with clean scissors, leaving a ¼-inch stub. Rinse the bag again, then pat it dry with a paper towel. Store it in a cool, dark place until your next batch. I reuse the same bag 3-4 times before switching to a fresh one—just wash it with hot, soapy water and let it air dry completely.
Here’s the thing—don’t toss the leftover seeds! If they still look plump, soak them again for another round. Most seeds will give you 2-3 harvests before they’re spent. For extra flavor, try soaking seeds in apple cider vinegar (1 tablespoon per cup of water) for the first soak—it adds a tangy kick without extra effort.
Tips & tricks for perfect zero-waste sprouting
This clever method turns a simple bag into a self-watering sprouting station—here’s how to avoid common pitfalls and get the best results.
Seed Selection: Not all seeds sprout equally! Alfalfa and broccoli are the most forgiving for beginners, while radish seeds grow fastest (ready in just 3-4 days). If you want variety, try mixing seeds—just remember each type has different sprouting times. For example, broccoli takes about 5-7 days total, while radish might be ready in 4-5 days.
Soaking Secret: The 8-12 hour soak is non-negotiable for most seeds—this is when they activate enzymes that break down their hard outer shells. I’ve learned the hard way that skipping this step leads to poor germination. Pro tip: If you’re short on time, soak for the full 12 hours instead of cutting it short. The extra time won’t hurt, and you’ll get better germination rates.
Moisture Management: The biggest mistake people make is overwatering during the sprouting phase. After draining, your bag should feel damp but not wet—like a wrung-out sponge. If you’re unsure, squeeze the bag gently: one drop of water should come out when you press. This balance prevents both mold and dry, stunted sprouts. Remember, you’re aiming for "consistently moist but not soggy" as the instructions say.
Light Transition: When moving your sprouts to light at the ½-inch mark, don’t rush it! Pale, leggy sprouts mean they’re stretching for light too quickly. Start with bright, indirect light and gradually increase exposure over 12-24 hours. A simple kitchen window works perfectly—just avoid the harsh midday sun that can overheat your bag and cook the delicate sprouts.
Pro Tips for Grow A Seed In A Bag
- This clever method turns a simple bag into a self-watering sprouting station—here’s how to avoid common pitfalls and get the best results.
- Seed Selection: Not all seeds sprout equally!
- Soaking Secret: The 8-12 hour soak is non-negotiable for most seeds—this is when they activate enzymes that break down their hard outer shells.
Frequently asked questions
Got questions about growing seeds in a bag? You’re not alone! Here are some of the most common ones—and their simple, zero-fuss answers to help you sprout like a pro.
How long does it take for seeds to sprout in a bag?
Most seeds (like lentils, chickpeas, or radishes) sprout in 3–7 days, depending on the type and temperature. Keep your bag in a warm, dark spot (like a pantry) and rinse twice daily. If you’re growing slower seeds (e.g., alfalfa), give them up to 10–14 days. Patience is key—no rushing nature!
Do I really need to rinse the seeds every day?
Yes! Rinsing 2x daily (morning and night) keeps seeds hydrated and prevents mold. Use a fine-mesh strainer or colander to drain excess water—never leave them soggy. If you forget, don’t stress: a quick rinse the next day is better than none. Just avoid overcrowding the bag to improve airflow.
What if my seeds smell bad or get moldy?
Bad smells or fuzzy mold mean too much moisture or poor airflow. Dump the seeds immediately (they’re unsafe to eat) and start fresh with a clean bag. To prevent this:
- Use fresh, high-quality seeds (no old or damaged ones).
- Rinse gently—no harsh scrubbing!
- Store the bag in a breathable spot (not sealed tight).
Can I grow anything in a sprouting bag?
Not all seeds work—stick to small, edible seeds like:
- Lentils, chickpeas, mung beans (fast & easy!)
- Alfalfa, radish, or broccoli sprouts (nutrient-packed!)
- Avoid large seeds (e.g., sunflower) or toxic seeds (e.g., raw kidney beans).
What can I do with leftover sprouts or seeds?
Don’t toss them! Here’s how to repurpose:
- Overgrown sprouts: Chop into salads, smoothies, or sandwiches (they’re still nutritious!).
- Stale seeds: Compost them (if mold-free) or use as fertilizer for houseplants.
- Bag reuse: Wash and dry the mesh bag for future sprouting or store it for small items (like jewelry!).
Wrapping up and next steps
Growing a seed in a bag is more than just a clever hack—it’s a simple, sustainable way to bring fresh, nutritious greens into your home with zero waste or fuss.
Whether you’re a beginner or a seasoned gardener, this method proves that small spaces and big results go hand in hand. 🌱✨
Now that you’re armed with the know-how, why not start with one seed today? Try your hand at sprouting mung beans, lentils, or sunflower seeds, and watch your kitchen transform into a mini greenhouse. Next, experiment with flavors—add your sprouts to salads, sandwiches, or even smoothies! Happy growing!