
Lawn
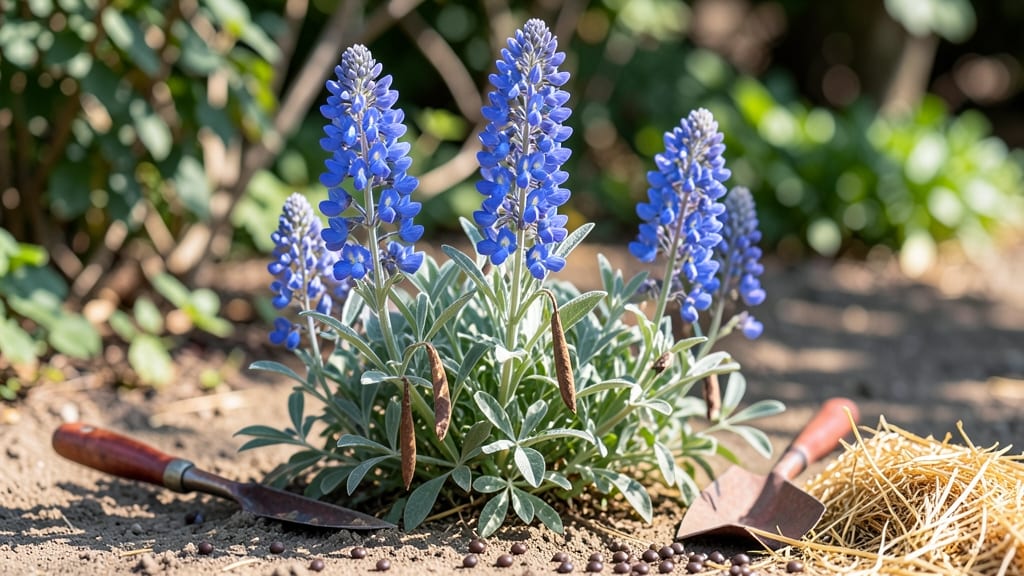
Planting baptisia seeds in September unlocks their natural cold stratification—no fancy equipment needed. 🌱 I’ve watched these tough perennials emerge reliably after a winter in the ground, while friends who planted in spring struggled with uneven germination.
The key is timing: September gives seeds just enough chill to break dormancy before winter sets in.
You’ll need well-draining soil, a sunny spot, and patience—baptisia takes 2-3 years to bloom but rewards you with decades of drought-tolerant beauty. In colder zones (4-6), September planting works perfectly; in warmer areas (7-9), wait until October or use a cold frame.
The secret? Plant seeds shallowly (½ inch deep) and mark their location—you’ll forget where they are by spring!
What you’ll get is a low-maintenance garden staple that thrives on neglect once established. The deep blue-green foliage alone makes it worth the wait, and by year three, you’ll have clusters of fragrant purple blooms that hummingbirds adore. Just avoid overwatering—they hate soggy roots.
For late September planters in frost-prone areas, a thin layer of mulch protects seeds from early freezes. And if you’re in a mild-winter zone, sowing in November still works—just adjust for your first frost date. The goal is to mimic nature’s timing, not fight it.
📚 In This Guide
- What you need
- Instructions
- Tips and common mistakes
- Wrapping up and next steps
What you need
- ● Baptisia seeds: 10–20 seeds (adjust based on desired plant density; Blue False Indigo is a popular variety).
- ● Cold stratification setup: 1–2 paper towels or peat moss (moistened).
- ● 1 ziplock bag or airtight container (quart-sized or larger).
- ● 1 label (to track seed type and planting date).
- ● Planting containers (for spring): 2–4 4-inch pots or seed trays with drainage holes.
- ● 1 bag well-draining potting mix (e.g., 50/50 blend of perlite and peat moss or coco coir).
- ○ Outdoor planting spot (optional for direct sowing): 1 sunny, well-draining garden bed (full sun, 6+ hours/day).
- ● 1 shovel or trowel (for transplanting later).
- ● Seedling heat mat (to speed up germination in spring, if desired).
- ● Misting bottle (for gentle watering during stratification).
- ● Grow lights (if indoor germination is needed before last frost).
- ● Fertilizer (balanced 10-10-10 or slow-release granules for post-transplant care).
- ● Mulch (straw or shredded leaves to protect seeds in winter).
Step-by-step instructions for planting baptisia seeds in September
Here’s how I prepare baptisia seeds for stress-free cold stratification—guaranteed to wake them up just in time for spring planting.
🌱 Step 1: Harvest and Clean the Seeds
Collect baptisia seeds from fully mature pods—wait until they turn brown and split open naturally. I wear gloves because the pods can be prickly. Gently shake seeds into a bowl, then spread them on a paper towel to dry for 24 hours in a shady, well-ventilated spot. This prevents mold and ensures they’re ready for stratification.
Remove any debris or damaged seeds by hand. Healthy seeds are plump and dark brown, while shriveled or hollow ones should be discarded. I like to count them out into small piles of 4 seeds each—that’s how many I’ll plant per pot later. Store them in a paper envelope (not plastic) to allow airflow.
💧 Step 2: Cold Stratify in Moist Sand or Peat Moss
Mix equal parts moist sand and peat moss in a shallow container—just enough to cover the seeds. I use a quart-sized container for my 4 seeds per pot setup. Moisten the mix until it feels like a wrung-out sponge: damp but not dripping. This mimics winter’s natural moisture without soggy conditions.
Place the seeds ½ inch deep in the mix, spacing them 1 inch apart. Cover the container with a breathable cloth (like an old towel) and secure it with a rubber band. Store the container in a garage, unheated shed, or refrigerator where temperatures stay between 35-45°F for 90-120 days. Check the mix every 2-3 weeks—it should stay lightly moist but never soggy.
☀️ Step 3: Verify Germination Readiness in Early Spring
In late February or early March, transfer the container to a bright, cool spot (like a sunny windowsill) to encourage germination. You’ll know it’s working when tiny green shoots appear—usually within 2-4 weeks. If seeds haven’t sprouted by mid-March, I gently check for signs of life by pressing lightly on the mix. If no sprouts, I start over with fresh seeds.
Once sprouts reach 1-2 inches tall, they’re ready to transplant. I use small peat pots (about 2 inches deep) filled with seed-starting mix to minimize root disturbance. Plant each seedling 1 inch deep, firm the soil gently, and place them in a south-facing window or under grow lights for 12-14 hours daily. Keep the mix lightly moist—never soggy.
🪴 Step 4: Harden Off and Plant Outdoors
When nighttime temperatures stay above 50°F (usually mid-April to May, depending on your zone), it’s time to harden off. Move seedlings outside for 1-2 hours the first day, gradually increasing exposure over 7-10 days. Watch for wilting or yellowing leaves—if they appear, they’re not ready yet. Baptisia seedlings are tough, but sudden cold snaps will set them back.
Plant outdoors in full sun with well-draining soil. Dig a hole twice as wide as the root ball but no deeper. Space plants 18-24 inches apart—they’ll spread over time. Water deeply after planting to settle the soil, then reduce watering to encourage deep root growth. Mulch lightly with 2 inches of straw to retain moisture and suppress weeds.
Tips & tricks for perfect baptisia seed stratification
These simple strategies will help you avoid common pitfalls and maximize your baptisia seeds' success rate for spring planting.
Harvesting Timing: Wait until the seed pods are fully brown and starting to split open naturally—this is your cue they're ready. I've learned the hard way that harvesting too early means seeds won't be fully mature and may not germinate properly. The 24-hour drying period is crucial too; this prevents mold while maintaining seed viability. Place your drying seeds in a spot with good airflow but no direct sunlight to prevent overheating.
Stratification Mix Secrets: The equal parts moist sand and peat moss ratio is key for mimicking natural conditions. I've found that using a quart-sized container works perfectly for my 4 seeds per pot setup. To test moisture levels, squeeze a handful of the mix—it should feel like a wrung-out sponge. Too much moisture causes rot, while too little prevents germination. A breathable cloth covering helps maintain humidity without trapping excess moisture.
Temperature Consistency: Maintaining that 35-45°F range is critical during the 90-120 day stratification period. I've had success using unheated sheds or garage spaces that naturally stay in this range. If using a refrigerator, place the container on a shelf rather than the crisper drawer where temperatures can fluctuate more. A simple thermometer in the container helps monitor conditions without disturbing the seeds.
Germination Check: When transferring to a bright spot in late February, watch for those tiny green shoots within 2-4 weeks. I've found that placing the container near a south-facing window provides ideal light without overheating. If no sprouts appear by mid-March, gently press on the mix to check for signs of life. This helps determine whether to start fresh or give it more time—sometimes seeds just need a little patience.
Pro Tips for Baptisia Seed Planting September
- These simple strategies will help you avoid common pitfalls and maximize your baptisia seeds' success rate for spring...
- Harvesting Timing: Wait until the seed pods are fully brown and starting to split open naturally—this is your cue the...
- Stratification Mix Secrets: The equal parts moist sand and peat moss ratio is key for mimicking natural conditions. I...
Frequently asked questions
Got questions about planting baptisia seeds in September? You’re not alone! Here are some of the most common concerns—and straightforward answers—to help you get started with confidence.
Can I plant baptisia seeds directly in the ground in September, or do they need cold stratification?
While some baptisia seeds can be sown directly in fall, most varieties benefit from cold stratification (mimicking winter conditions) to break dormancy. For best results, pre-stratify seeds in the fridge (or outdoors in a protected spot) for 60–90 days before planting. This ensures higher germination rates in spring!
What’s the best way to cold stratify baptisia seeds at home?
Mix your seeds with a moist, sterile potting medium (like perlite or sand) in a sealed container. Store it in your fridge’s crispier drawer (or a cool basement) for 2–3 months. Check moisture weekly—keep it damp but not soggy. Plant outdoors after stratification or in early spring.
Do baptisia seeds need light during stratification?
Nope! Darkness is key during cold stratification. Seeds need moisture and cold, not light, to trigger germination. Once you’re ready to plant (after stratification), expose them to sunlight or a bright indoor window until sprouts appear.
What if my baptisia seeds don’t sprout after planting in spring?
Don’t panic—baptisia seeds can be slow to germinate (sometimes taking weeks to months). Ensure your soil is well-draining and slightly acidic (pH 6.0–7.0). Try soaking seeds in warm water for 24 hours before planting or lightly scarifying the seed coat (nick it with sandpaper) to encourage germination.
Are there easier alternatives to growing baptisia from seed?
If seeds feel too finicky, consider dividing mature plants or buying bare-root seedlings from nurseries. These methods skip the stratification step and deliver faster blooms. Just note: Seed-grown baptisia often produces hardier, more unique varieties than hybrids!
Still stumped? Drop your question in the comments—we’re happy to help you troubleshoot!
Wrapping up and next steps
Planting baptisia seeds in September is a game-changer for gardeners eager to enjoy vibrant spring blooms! By embracing cold stratification naturally, you skip the guesswork and set your seeds up for success.
This low-maintenance method ensures strong, healthy growth—so grab those seeds, prep your soil, and let winter do the work for you.
Ready to take the next step? Mark your calendar for early fall planting and watch your garden transform next spring! 🌱✨