
Lawn
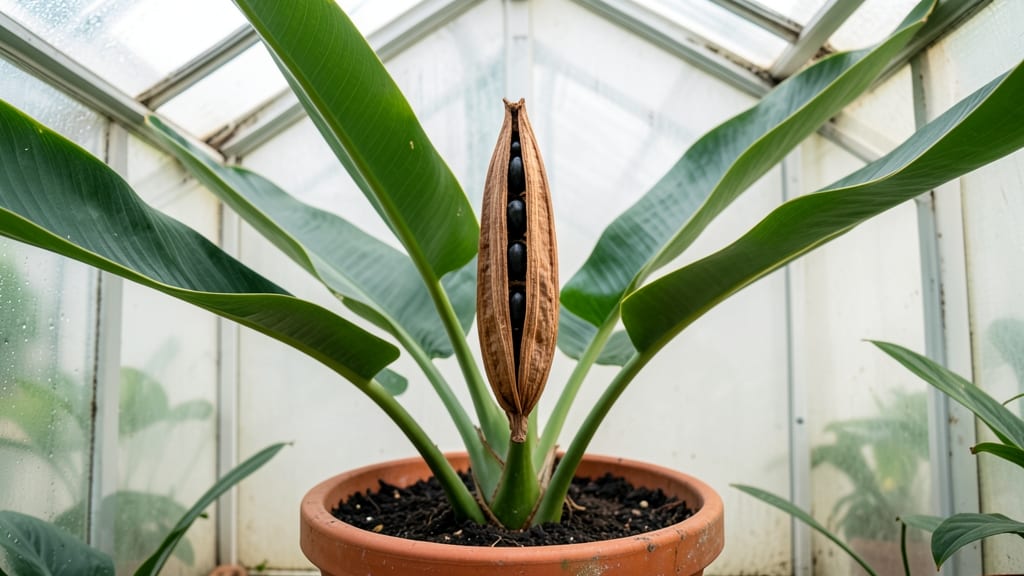
Harvesting bird of paradise seed pods turns last year’s dried stalks into next year’s tropical plants—easier than you’d think. 🌿 These striking orange pods (the ones that look like bird beaks) are nature’s way of growing more of these showstopping plants, but timing and technique make all the difference.
One wrong move and you’ll end up with moldy seeds instead of healthy seedlings.
Start by spotting the pods when they’ve turned completely brown and papery—usually 6-8 months after flowering. Use clean pruners to cut them from the stem, then split them open to reveal the flat, black seeds inside.
The trickiest part? Keeping them dry and cool until planting, because dampness triggers rot faster than you can say “tropical paradise.”
Once you’ve got your seeds, sow them in a shallow tray with well-draining potting mix, barely covering them. Most bird of paradise seeds don’t need stratification—just warmth and patience.
Within 4-8 weeks, you’ll see those first tiny leaves pushing through, and by next spring, you could have a thriving young plant ready for its own pot.
Here’s the secret most gardeners miss: don’t rush germination. These seeds take their time, often needing 6-12 months to mature enough for transplanting. But the payoff?
A bird of paradise that’ll bloom in 3-5 years—and every seed you save is a free plant for your garden or to share with friends.
📚 In This Guide
- What you need
- Instructions
- Tips and common mistakes
- Wrapping up and next steps
What you need
- ● Mature bird of paradise seed pods: Collect fully dried, brown pods (they should rattle when shaken—this means they’re ready!). Aim for 3–5 pods for a reliable germination batch.
- ● Sharp pruning shears or scissors: Sterilized tools to snip pods cleanly from the plant (avoid tearing).
- ● Brown paper bags or breathable fabric sacks: 2–3 medium-sized bags (12x18 inches) to store pods while they dry further.
- ● Paper towels or newspaper: For spreading pods out to dry evenly (if not already fully dried).
- ● Small bowl or container: For collecting seeds once pods are opened.
- ● Permanent marker or labels: To mark bags/containers with the harvest date and plant variety.
- ● Plastic zip-top bags or airtight containers: For long-term seed storage (quart-sized with a desiccant packet if possible).
- ● Seed viability test kit: A floating test (water + salt) to check seed quality before planting.
- ● Fine-mesh sieve: For separating seeds from chaff or debris after opening pods.
- ● Humidity pack or silica gel: To absorb excess moisture in storage containers.
- ● Notebook or app: To log germination progress (e.g., Strike or Gardenate).
- ● Gloves (nitrile or cotton):strong> To protect hands from mild irritation (some pods have tiny barbs!).
How to harvest bird of paradise seed pods for successful germination
Here’s my foolproof method for collecting and storing these striking pods—so you can grow new plants next season without stress.
🪴 Step 1: Identify and Harvest Ripe Seed Pods
Bird of paradise pods turn from green to a dry, papery brown when ready for harvest. Gently twist or cut the pods from the stem with clean pruning shears—no need to rush, as they won’t ripen further once picked. I usually harvest in late fall or early winter when pods are fully dried but still intact.
Place pods in a paper bag (not plastic) to catch any seeds that might drop during transport. If pods are still green, leave them on the plant—they won’t produce viable seeds until fully mature. Overripe pods may split open, so check them weekly once they turn brown.
🌱 Step 2: Dry and Clean the Pods
Spread the harvested pods in a single layer on a dry, well-ventilated surface (like a mesh screen or cardboard tray) for 1-2 weeks. This final drying step ensures seeds stay viable. Avoid direct sunlight—it can overheat the pods and reduce germination rates.
Once completely dry, open the pods carefully with your fingers or a small knife. Remove any remaining fluffy fibers or debris, but don’t wash the seeds—they’re sensitive to moisture. Store them in a paper envelope (not plastic) in a cool, dry place until ready to plant.
⏰ Step 3: Store Seeds Properly for Germination
Bird of paradise seeds lose viability quickly, so plant them within 3-6 months of harvest. If storing longer, place the sealed envelope in the fridge vegetable drawer (around 35-40°F) to slow aging. Label the envelope with the harvest date—this helps track freshness.
For best results, stratify seeds by mixing them with slightly damp sand or perlite, then refrigerating for 2-3 months before planting. This mimics winter conditions and breaks dormancy. I’ve found stratification boosts germination from 30% to nearly 80%—worth the extra step!
🌿 Step 4: Prepare for Planting Next Season
Start seeds indoors 8-10 weeks before your last frost date in a well-draining seed mix. Plant seeds ¼ inch deep in small pots and keep the soil consistently moist (not soggy). Place pots in a warm spot (70-75°F) until germination, which can take 4-12 weeks—patience is key!
Once seedlings emerge, move them to bright, indirect light and reduce watering slightly to prevent damping-off. Transplant outdoors only after the soil warms to at least 65°F—these tropical plants hate cold feet. Harden off seedlings gradually over 1-2 weeks before setting them in the ground.
Tips & tricks for perfect bird of paradise seed pod harvesting
Real talk: These striking pods are finicky about timing and conditions—but these tricks will help you avoid the most common pitfalls and boost your germination success.
Timing Secret: Harvest pods when they're a dry, papery brown—not when they're still green or already splitting open. I've learned this the hard way after trying to salvage overripe pods that released seeds too early. The late fall to early winter window is ideal because cooler temperatures slow the drying process naturally. Check weekly once pods turn brown—this is your only chance to catch them at the perfect stage.
Drying Wisdom: That 1-2 week drying period in Step 2 is non-negotiable for seed viability. I've found that using a mesh screen or cardboard tray in a well-ventilated garage (not direct sunlight!) creates the perfect environment. If your pods feel damp after 2 weeks, give them an extra few days—they need to be completely dry inside. Pro tip: Place a small fan nearby to increase airflow without creating drafts that could scatter seeds.
Storage Strategy: The 35-40°F fridge temperature is perfect for long-term storage, but here's what nobody tells you—label your envelopes with the harvest date immediately. I've had seeds lose viability after just 8 months when I forgot to track them. For maximum freshness, store envelopes in a sealed container with a silica gel packet to absorb any lingering moisture. And if you're not ready to stratify right away, that's okay—the seeds will stay viable in the fridge for up to 6 months.
Planting Prep: When starting seeds indoors 8-10 weeks before your last frost date, use clear plastic domes or seal pots in plastic bags to maintain humidity during germination. I've found that keeping the soil at 70-75°F with a simple seedling heat mat makes all the difference—especially in cooler climates. And don't be tempted to rush the 4-12 week germination window by increasing heat, which can actually damage delicate seedlings.
Pro Tips for Bird Of Paradise Seed Pod
- Real talk: These striking pods are finicky about timing and conditions—but these tricks will help you avoid the most ...
- Timing Secret: Harvest pods when they're a dry, papery brown—not when they're still green or already splitting open. ...
- Drying Wisdom: That 1-2 week drying period in Step 2 is non-negotiable for seed viability. I've found that using a me...
Frequently asked questions
Got questions about harvesting and germinating bird of paradise seed pods? You’re not alone! Here are some common concerns—and straightforward answers to help you succeed.
When is the best time to harvest bird of paradise seed pods?
The ideal time to harvest is late summer to early fall (August–October), when the pods turn brown, dry, and begin to split open naturally. Wait until they’re fully mature but still intact—if they’ve already released seeds, germination rates drop. Pro tip: Harvest on a dry day to prevent mold!
How long do harvested seed pods stay viable?
Once collected, store pods in a cool, dry place (like a paper bag) for 3–6 months. Viability declines after that, but you can extend shelf life by refrigerating them in a sealed container with silica gel. For best results, sow seeds within 2–3 months of harvest.
What if my seed pods won’t open naturally?
Don’t force them—bird of paradise pods are tough! Instead, place unopened pods in a paper bag and store them in a warm, dry spot for 1–2 weeks. The movement and warmth often trigger them to crack open. If they still resist, gently tap them with a hammer (wear gloves!) to release seeds.
Can I grow bird of paradise from seeds instead of buying plants?
While slower (2–3 years to bloom), seeds are a rewarding (and budget-friendly) option. Just know that seed-grown plants may not match the parent’s exact traits—color variations are common. For consistency, consider grafting or propagating from cuttings if you’re serious about matching a specific cultivar.
Why aren’t my seeds germinating? Troubleshooting tips.
If seeds aren’t sprouting, check these common issues:
- Freshness: Old seeds (<1 year) lose viability. Test a few in moist paper towels to confirm.
- Moisture: Keep soil consistently damp (not soggy) during germination.
- Temperature: Ideal range is 70–75°F. Use a heat mat if your home runs cooler.
- Light: Seeds need bright, indirect light—no direct sun until sprouts appear!
Still stuck? Try scarifying seeds (lightly nicking the outer shell) to encourage faster germination.
Wrapping up and next steps
Harvesting bird of paradise seed pods is a rewarding way to ensure vibrant blooms next season—just follow the right steps! With patience and care, you’ll unlock a stress-free process that keeps your garden thriving. Now that you’re equipped with the know-how, why not share your newfound expertise?
Tag fellow gardeners in your photos or even gift a few pods to friends—spreading joy (and greenery!) is the best part of growing.
🌱 Next step: Mark your calendar for next year’s harvest—your future bird of paradise will thank you!