
Lawn
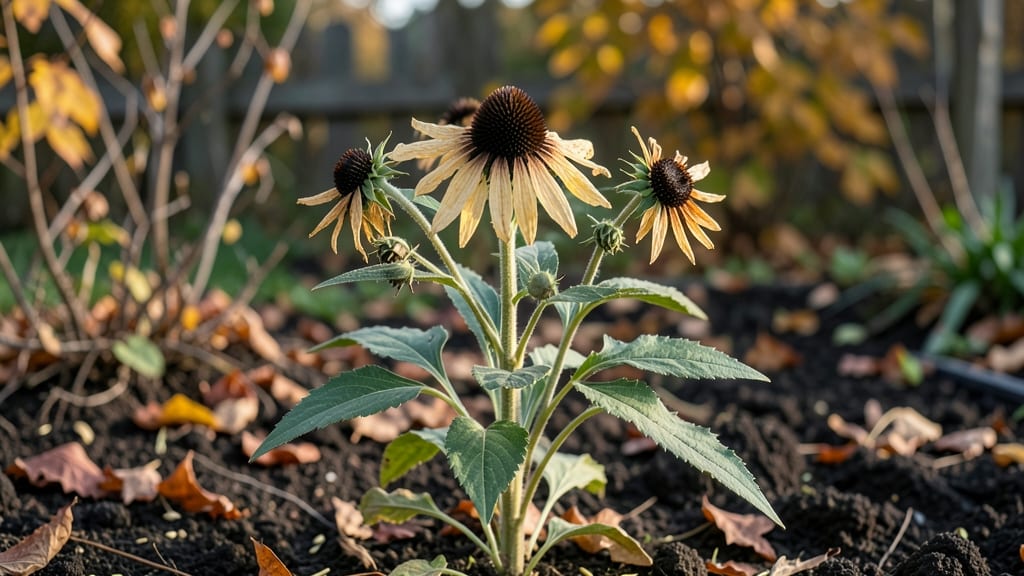
Saving black-eyed Susan seed heads means next summer's golden blooms start now. ✨ These cheerful flowers drop seeds effortlessly, but collecting them at the right time ensures you'll have fresh plants without buying new ones.
The secret lies in timing—harvest when the seed heads turn brown and papery, usually in late fall or early winter. You'll need just a few simple tools: scissors or pruners, paper bags for drying, and a cool, dark storage spot.
Once dried, the seeds stay viable for years, ready to sprout new plants that thrive in full sun. No fancy equipment needed—just a little patience and the right moment to collect. What you end up with is a stash of seeds that produce vibrant, drought-tolerant blooms year after year.
You can replant them directly in your garden or share them with friends—every seed head holds potential for another season of golden cheer. The best part? You can also leave some seed heads on the stems for winter interest or turn them into rustic dried arrangements.
Here's how to make the most of them!
📚 In This Guide
- What you need
- Instructions
- Tips and common mistakes
- Wrapping up and next steps
What you need
- ● Black Eyed Susan seed heads – Harvested from healthy, mature plants (ensure they’re fully brown and dry).
- ● Paper bags or brown paper lunch bags – 1 per seed head (or a large bag for multiple heads).
- ● Scissors or pruning shears – Sharp and clean for cutting stems.
- ● Permanent marker – For labeling bags with the plant variety and year.
- ● Dry, well-ventilated storage area – A cool, dark place (like a garage or shed) with low humidity.
- ● Seed envelope or small glass jar – For storing seeds if you prefer a more compact option.
- ● Silica gel packets – To absorb excess moisture in storage (great for humid climates!).
- ● Notebook or garden journal – To track seed varieties, harvest dates, and germination notes.
- ● Fine mesh bag or breathable fabric sack – If you want to air-dry seeds outdoors before storage.
Step-by-step guide to harvesting and saving black Eyed Susan seed heads
Here's how to collect, dry, and store seeds for next year's vibrant blooms—no special tools needed.
🌿 Step 1: Identify and Harvest Mature Seed Heads
Wait until the seed heads turn completely brown and papery—this means the seeds are fully mature and ready for collection. I like to harvest on a dry, sunny morning when the heads are crisp. Use clean, sharp scissors or pruners to cut the stems about 2-3 inches below the seed head. This extra stem helps support the drying process.
Don't rush—harvesting too early means immature seeds that won't sprout. You'll know they're ready when the center cone splits open slightly, revealing tiny black seeds inside. Gather 4-6 healthy heads for enough seeds to start a small patch next season.
💧 Step 2: Dry Seed Heads Thoroughly
Spread the harvested heads in a single layer on a clean, dry surface like a mesh screen or newspaper. Place them in a warm, dry, well-ventilated spot away from direct sunlight—too much heat can scorch the seeds. I use a sunny windowsill with indirect light, which takes about 1-2 weeks for complete drying.
Check daily by gently shaking a head over a piece of paper. If seeds scatter easily, they're ready. If they stick together or feel damp, keep drying. The goal is 100% dryness—any moisture left will cause mold during storage. Avoid using a fan or heater, which can blow seeds away before they're ready.
✂️ Step 3: Extract and Store Seeds Properly
Once completely dry, place each seed head in a paper bag and shake vigorously to release the seeds. I like to do this outside or over a bowl to catch any stray seeds. Remove any debris like chaff or empty seed pods by hand—pure seeds store best. You should yield about 1 teaspoon of seeds per head.
Store the seeds in an airtight container like a small glass jar or envelope. Label it with the variety and date—Black Eyed Susans stay viable for 2-3 years if stored in a cool, dark place. I keep mine in the fridge for maximum freshness. Check periodically for moisture or pests, and transfer to a fresh container if needed.
🌱 Step 4: Test Viability Before Planting Next Year
Before sowing, test a few seeds by placing them in a damp paper towel between two plates. Keep them in a warm spot (65-75°F) and check daily. You should see sprouts in 7-14 days—if most seeds sprout, your batch is good. If fewer than half sprout, try a fresh batch or buy new seeds.
This simple test saves time and frustration. I always do it in early spring, right before my usual planting window. If germination is slow, consider soaking seeds overnight in warm water to speed up the process. Plant outdoors after the last frost when soil reaches 60°F for best results.
Tips & tricks for perfect black Eyed Susan seed preservation
Saving seeds from Black Eyed Susans is simpler than you'd think—here's how to avoid common pitfalls and maximize your harvest.
Harvest Timing: The 2-3 inches of stem you cut below the seed head isn't just for looks—it helps stabilize the head during drying. If you're short on time, you can trim it shorter, but the extra length prevents heads from toppling over during the 1-2 week drying process. Harvest on a dry morning to ensure the heads aren't damp when you start.
Drying Environment: While indirect sunlight works well, I've found that a well-ventilated area with 65-75°F temperatures speeds up drying without risking scorching. If your home is humid, consider placing a small fan nearby (on low) to gently circulate air—just keep it far enough away to avoid blowing seeds around before they're ready to release.
Seed Extraction Strategy: When shaking dried heads over paper, I like to place the bag inside a second bag or wrap it in a towel first. This catches any seeds that might escape during vigorous shaking, especially if you're working near windy areas. You should get about 1 teaspoon of seeds per head, but don't be surprised if some heads yield slightly more.
Storage Wisdom: For long-term storage beyond the 2-3 years mentioned, transfer seeds to the freezer in small portions. The cold slows down any remaining moisture loss and preserves viability even longer. Just remember to label each container with the year and variety—Black Eyed Susans can look similar to other Rudbeckia species!
Pro Tips for Black Eyed Susan Seed Heads
- Saving seeds from Black Eyed Susans is simpler than you'd think—here's how to avoid common pitfalls and maximize your...
- Harvest Timing: The 2-3 inches of stem you cut below the seed head isn't just for looks—it helps stabilize the head d...
- Drying Environment: While indirect sunlight works well, I've found that a well-ventilated area with 65-75°F temperatu...
Frequently asked questions
Got questions about saving those gorgeous black-eyed Susan seed heads for next season? You’re in the right place! Here are answers to the most common queries—from timing to troubleshooting—so you can harvest with confidence.
When is the best time to collect black-eyed Susan seed heads?
Harvest seed heads in late fall or early winter (after the first frost) when they’ve turned brown and papery. This ensures seeds are fully mature but haven’t scattered yet. Avoid collecting too early—they won’t store well!
Can I save seeds from store-bought black-eyed Susans?
Yes, but with a caveat! Store-bought flowers may be hybrids, so seeds might not grow true to type (identical to the parent plant). For guaranteed results, save seeds from heirloom or open-pollinated varieties grown in your garden.
How should I store the seeds to keep them viable?
Once dried, place seeds in a paper envelope or breathable container (not plastic!) and store in a cool, dry place (like a fridge or seed vault). Label with the date—most black-eyed Susan seeds stay viable for 2–3 years.
Why aren’t my seed heads producing seeds?
If your flowers skip seed production, check for poor pollination (lack of bees or wind) or over-fertilizing (too much nitrogen = more leaves, fewer blooms). Try hand-pollinating with a soft brush or plant near pollinator-friendly flowers!
What if my seeds sprout mold or rot during storage?
Mold or rot usually means high humidity during storage. Next time, ensure seed heads are completely dry before storing, and avoid airtight containers. If mold appears, discard the batch—contamination can spread.
Wrapping up and next steps
Black Eyed Susan seed heads are your golden ticket to a vibrant, low-maintenance garden next season!
By mastering the dry-and-save technique, you’ll harness nature’s free blooms while supporting pollinators—win-win! 🌻✨ Whether you’re a gardening pro or just starting, every dried seed head is a step toward a greener, more beautiful outdoor space.
Ready to grow your garden’s future? Grab those seed heads, follow the steps, and watch your yard burst with color—without breaking the bank. Happy harvesting! 🌱💛