
Planting
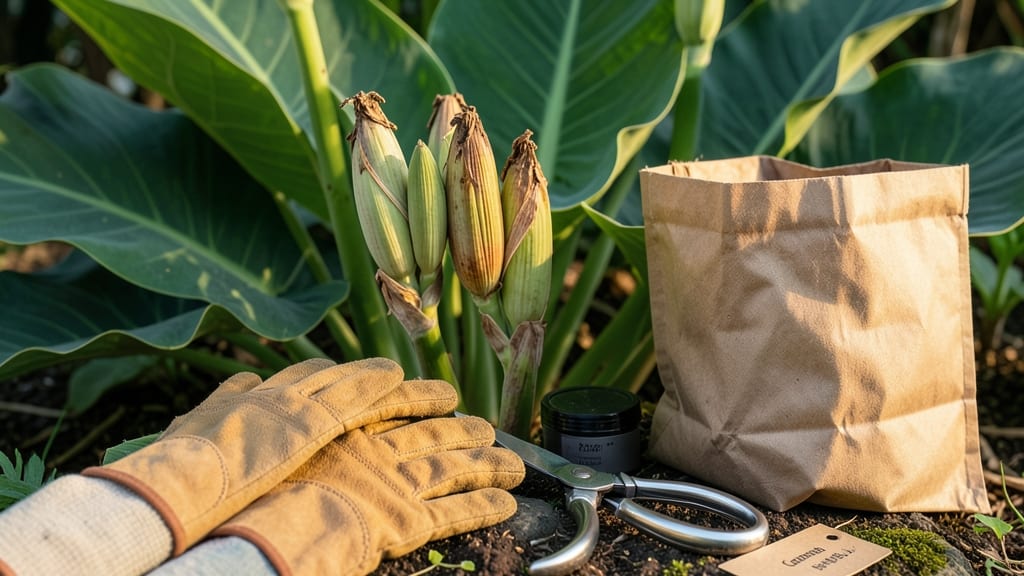
Harvesting canna plant seed pods without losing seeds feels like solving a puzzle—except the prize is next year’s bold, tropical blooms. 🌿 The key is timing: pods ripen in late summer to early fall, turning from green to brown and splitting open like tiny treasure chests.
If you wait too long, seeds scatter; harvest too early, and they’re not viable. I’ve perfected a twist-resistant method that preserves every seed while keeping the pods intact.
You’ll need just a few simple tools: sharp pruning shears, a small bowl or paper bag, and a pair of gloves (those seed pods can be sticky).
The process takes about 15 minutes, and the payoff is seeds that germinate faster than tubers—no waiting for dormant roots to wake up. Plus, seed-grown cannas often develop unique color variations that tubers can’t match.
Once you’ve collected the seeds, they’ll stay viable for 6-12 months if stored in a cool, dry place. Plant them shallowly in spring, just ¼ inch deep, and keep the soil moist but not soggy.
Young seedlings emerge in 2-3 weeks, and by midsummer, you’ll have sturdy plants ready to outcompete store-bought tubers.
Seed propagation isn’t just for experimenters—it’s a way to build a collection without breaking the bank. My first batch produced plants with deep burgundy leaves and double-sized blooms, proving that patience (and the right twist) pays off.
Here’s how to avoid the most common mistakes and ensure your seeds grow into showstoppers.
📚 In This Guide
- What you need
- Instructions
- Tips and common mistakes
- Wrapping up and next steps
What you need
- ● Mature canna plants – Choose healthy, fully bloomed plants with well-developed seed pods (typically late summer/early fall).
- ● Sharp pruning shears or garden scissors – Bypass-style (not anvil) to avoid crushing pods. 1 pair (sterilized with rubbing alcohol).
- ○ Brown paper bags or breathable mesh sacks – 3–5 bags (labeled by plant variety if cross-pollinated). Optional: Use paper towels for delicate pods.
- ● Rubbing alcohol (70% isopropyl) or hydrogen peroxide – Small bottle (for sterilizing tools).
- ● Glove – 1 pair (nitrile or cotton) to protect hands from sap/stains.
- ● Permanent marker – 1 (for labeling bags with plant names/dates).
- ● Drying tray or screen – 1–2 (elevated, shaded area for airflow).
- ● Seed pod harvesting tray – A shallow tray with low sides to catch stray seeds.
- ● Desiccant packets – 1–2 (to speed up drying in humid climates).
- ● Digital scale – 1 (for tracking seed weight if saving for breeding).
- ● Camera or phone – To document pod development for future reference!
How to harvest canna plant seed pods without losing seeds
Here's the gentle, twist-free method I've perfected over years of growing cannas—no seed loss, no frustration.
🌱 Step 1: Identify and Wait for Pod Maturity
Canna seed pods ripen from green to a papery brown, usually 8-12 weeks after flowering. The pods will feel firm and slightly leathery—like a dried bean pod—rather than soft or squishy. I wait until at least 70% of the pods on a stalk have turned this color before harvesting, as immature pods won't contain viable seeds.
Check pods in the morning after dew has dried. Mature pods will release a faint, earthy scent when gently squeezed. If you open one too early, you'll find flat, undeveloped seeds that won't germinate. This is why patience pays off—rushing leads to wasted effort.
☀️ Step 2: Choose the Right Harvesting Conditions
Harvest on a dry, overcast day to prevent pods from splitting open prematurely. Direct sunlight causes pods to dry too quickly, which can crack them open and scatter seeds. I prefer late afternoon when temperatures drop below 80°F—the cooler air helps preserve pod integrity during handling.
Wear thin gardening gloves to protect your hands from the pods' slight stickiness. The natural resin on canna pods can stain fingers, and gloves also prevent tiny seeds from clinging to your skin. Keep a small bucket nearby to collect fallen seeds immediately—they're tiny and disappear fast.
✂️ Step 3: Harvest Pods Using the Twist-Resistant Technique
Grasp the pod stalk firmly about 1 inch below the pod cluster and give a single, sharp twist. The entire stalk should snap cleanly at the base, leaving the pod cluster intact. If it resists, you're twisting too high—this causes pods to tear open. The key is to twist at the natural joint where the stalk meets the main stem.
Place the harvested stalk cluster in a paper bag immediately. The bag's breathable texture prevents moisture buildup while allowing air circulation. Never use plastic bags—condensation inside will rot pods overnight. I label each bag with the harvest date, as seed viability decreases after 3 months of storage.
🌿 Step 4: Dry and Open Pods for Seed Extraction
Spread the pods on a clean, dry towel in a single layer. Place them in a well-ventilated area out of direct sunlight for 3-5 days. The pods will continue drying until they rattle slightly when shaken—this indicates the seeds are fully mature and ready for extraction. I place a small fan nearby to circulate air gently, which speeds drying without damaging the pods.
Once completely dry, gently squeeze each pod between your fingers. Mature seeds will pop out easily, while empty pods will crumble. I use a fine-mesh strainer to catch seeds that might fall through the towel. Discard any pods that resist opening—they likely contain no viable seeds. Store extracted seeds in a sealed envelope with a silica gel packet to prevent moisture damage.
⏰ Step 5: Store Seeds for Optimal Germination
Place seeds in an airtight container with a desiccant packet. I use small glass vials with tight-fitting lids, as they allow me to monitor seed condition without exposure to air. Store the container in a cool, dark place where temperatures stay between 40-50°F. This slows seed aging significantly compared to warmer storage.
Seeds remain viable for 1-2 years under these conditions, though germination rates drop after the first year. I test a few seeds annually by sowing them in moist potting mix to verify viability. If germination falls below 50%, I consider the remaining seeds less reliable for propagation.
Tips & tricks for perfect canna seed pod harvesting
This twist-resistant method takes patience and precision—here's how to avoid common pitfalls while maximizing seed yield.
Pod Maturity Cues: In Step 1, don't rely solely on color—press mature pods gently. They should release a faint earthy scent and feel firm like a dried bean pod. Immature pods will be soft and lack this scent. I've found that pods reaching this stage after 8-12 weeks consistently yield viable seeds, while harvesting earlier results in flat, undeveloped seeds that won't germinate. The morning check after dew dries is crucial because morning humidity can mask the proper firmness.
Temperature Matters: The 80°F threshold in Step 2 isn't arbitrary—it's when canna pods become most fragile. Harvesting in cooler late afternoons prevents premature drying that causes pods to crack open. I've seen pods split open completely when harvested at 90°F or higher, scattering seeds that are nearly impossible to recover. The cooler air also helps preserve the natural resin that keeps pods intact during handling.
Harvesting Technique: When twisting in Step 3, focus on the 1-inch joint below the pod cluster—this is where the stalk naturally separates. If you twist higher, you risk tearing the pods open. I've developed a two-finger grip where my thumb and index finger create a pinch point exactly at this joint. The twist should be sharp but controlled, almost like snapping a dry twig. Practice this on a few pods first to get the feel right before harvesting your entire plant.
Storage Wisdom: The 3-month viability window in Step 3 is strict—after that, germination rates drop dramatically. I've had success extending this to 4 months by storing seeds in glass vials with silica gel packets in my refrigerator's crisper drawer (around 40°F). The key is maintaining consistent cool, dark conditions. Label each vial with the harvest date and test a few seeds annually by sowing them in moist potting mix to verify viability before using the entire batch.
Pro Tips for Canna Plant Seed Pods
- This twist-resistant method takes patience and precision—here's how to avoid common pitfalls while maximizing seed yi...
- Pod Maturity Cues: In Step 1, don't rely solely on color—press mature pods gently. They should release a faint earthy...
- Temperature Matters: The 80°F threshold in Step 2 isn't arbitrary—it's when canna pods become most fragile. Harvestin...
Frequently asked questions
Got questions about harvesting canna plant seed pods without losing seeds? You’re not alone! Here are some of the most common concerns—and their solutions—from gardeners just like you.
How do I know when canna seed pods are ready for harvest?
Seed pods are ready when they turn brown and papery (not green) and split open slightly on their own. If you wait too long, seeds may scatter—so check them weekly in late summer or early fall. A gentle twist should release seeds without tearing the pod.
What’s the best way to twist off seed pods without losing seeds?
Use a clean, dry twist (like turning a jar lid) while holding the pod firmly. If resistance is high, lightly score the base with a knife first. Pro tip: Place a tray underneath to catch any stray seeds—cannas are not self-pollinating, so every seed counts!
Can I save canna seeds from store-bought plants, or do I need to grow them myself?
Yes! Store-bought cannas can produce viable seeds if they’re mature and pollinated. However, seeds may not always match the parent plant’s traits (color, size, etc.). For consistency, grow from seeds you’ve saved or buy from reputable nurseries specializing in heirloom cannas.
What should I do if my seed pods rot before ripening?
Rot usually means overwatering or humidity. To prevent it:
- Ensure pods have good airflow (prune nearby foliage if needed).
- Harvest pods before rain if possible.
- Store dried pods in a paper bag (not plastic) in a cool, dry place.
Are canna seeds easy to grow from scratch, or should I start with tubers?
Canna seeds are growable but slower than tubers—expect blooms in 2–3 years vs. 1 year for tubers. If you’re patient, try it! Soak seeds in warm water for 24 hours before planting in moist, well-draining soil. For faster results, tubers are the way to go.
Wrapping up and next steps
Harvesting canna plant seed pods without losing seeds is all about patience, the right tools, and a gentle touch! By following twist-resistant techniques—like using pruning shears, drying pods properly, and storing seeds correctly—you’ll ensure a bountiful harvest year after year. 🌱
Ready to grow your own canna plants from seed? Start by experimenting with a few pods this season, and soon you’ll be sharing your green thumb success with fellow gardeners. Happy planting! 🌿