
Lawn
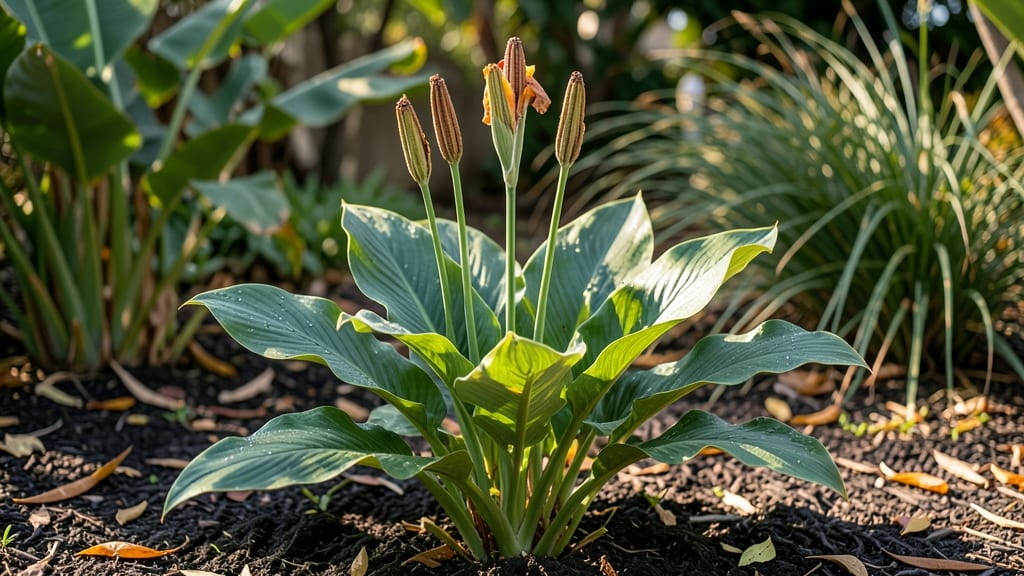
Harvesting canna seed pods is the secret to growing rare varieties without the winter tuber storage fuss. 🌿 I’ve saved seeds from my canna lilies for years, and the first time I saw those plump, papery pods turn brown, I knew I’d cracked the code for year-round propagation.
The process is simpler than you’d think—no fancy equipment, just patience and the right timing.
Once the pods turn deep brown and start splitting open, that’s your cue to collect them. Store them in a cool, dry place until they’re fully dry, then crack them open to reveal the tiny, glossy seeds inside.
These seeds stay viable for years if kept dry, so you’re not just growing plants—you’re building a living library of your favorite cannas. The best part? You skip the risk of rot or damage that comes with storing tubers over winter.
Germination is where the magic happens. Plant the seeds in a light, airy mix of peat and perlite, keep them warm (around 75°F), and they’ll sprout in 2-4 weeks. The seedlings grow fast once they start, and you’ll have sturdy young plants ready for transplanting by spring.
No more waiting for next year’s tubers—just a steady supply of new growth whenever you’re ready to plant.
If you’re used to dividing tubers, you’ll notice a few trade-offs: seeds take longer to mature into flowering-size plants, but they’re great for experimenting with new colors and patterns. For a foolproof method that combines both approaches, save some tubers for reliable blooms and use seeds to expand your collection.
Either way, you’ll end up with cannas that thrive all season long.
📚 In This Guide
- What you need
- Instructions
- Tips and common mistakes
- Wrapping up and next steps
What you need
- ● Pruning shears or sharp scissors – For cleanly snipping seed pods without damaging the plant.
- ● Brown paper bags or breathable mesh bags – 1–2 bags per harvest (8"–10" in size) to allow airflow and prevent mold.
- ● Drying rack or screen – A flat, elevated surface (like a wire mesh or wooden rack) to spread pods for even drying.
- ● Plastic zip-top bags or airtight containers – For long-term seed storage (quart-sized or larger).
- ● Permanent marker or labels – To tag pods with harvest dates and varieties (e.g., "Canna ‘Striped’ – Oct 2023").
- ○ Spray bottle with water – Optional but helpful for lightly misting pods if your climate is very dry.
- ● Mature canna plants – Harvest pods only after they’ve fully ripened (turned brown and papery) and split open slightly.
- ● Dry, shaded workspace – A spot with indirect sunlight and good ventilation (e.g., a garage, porch, or indoor drying area).
- ● Patience (2–4 weeks for drying) – Rushing the process risks mold or poor germination.
- ○ Optional: Humidity monitor – Keep humidity below 50% to prevent spoilage.
Step-by-Step guide to harvesting canna seed pods
Here's how to collect and store canna seeds for reliable germination—no fancy tools or guesswork required.
🌿 Step 1: Identify and Select Mature Seed Pods
Look for pods that have turned brown and papery—these are ready to harvest. The pods should feel dry to the touch and easily separate from the stem when gently twisted. I always check in late fall when the foliage starts yellowing and dying back naturally.
Skip any pods that look green or plump—these aren't mature yet. Overripe pods (blackened or moldy) should be discarded. A good pod will split open on its own when fully dry, revealing small, dark seeds inside. If you find pods that won't open naturally, place them in a paper bag for a few days—they'll finish drying and release seeds on their own.
✂️ Step 2: Harvest and Dry the Seeds
Use clean, sharp scissors or your fingers to carefully remove the dried pods from the stems. Place them in a shallow container (like a pie tin) and let them sit in a warm, dry spot for 3-5 days. This extra drying step prevents mold during storage.
Once dry, gently crush the pods between your fingers or with a rolling pin to release the seeds. I like to spread them on a clean paper towel and let them air-dry for another 24 hours—this ensures they're bone-dry before storage. Store the seeds in a paper envelope (not plastic) in a cool, dark place like a seed drawer or pantry.
🪴 Step 3: Store Seeds for Long-Term Viability
Label your envelope with the variety name and harvest date—canna seeds stay viable for 2-3 years when stored properly. I keep mine in a small glass jar with a silica gel packet to absorb any moisture. Avoid refrigeration unless your climate is very humid.
For extra insurance, I test a few seeds each year by planting them in small pots with warm soil (around 75-80°F). If they sprout within 2-3 weeks, the rest of the batch is good to go. If germination is slow or patchy, the seeds may need a warm soak in water for 12 hours before planting.
☀️ Step 4: Plant Stored Seeds for Next Season
Start seeds indoors 8-10 weeks before your last frost date. Fill 2-3 inch deep pots with light, well-draining mix and plant seeds ½ inch deep. Keep the soil consistently moist (not soggy) and place pots in a warm spot—a seedling heat mat helps speed up germination.
Once seedlings emerge, move them to a bright window or under grow lights for 14-16 hours daily. Canna seedlings are sensitive to cold—don't transplant outdoors until soil temperatures reach at least 65°F. Harden them off gradually over 1-2 weeks before moving to the garden.
Tips & tricks for perfect canna seed pod harvesting
Here's what I've learned after years of collecting canna seeds—these little tricks make all the difference between viable seeds and wasted effort.
Timing Secret: In Step 1, don't rush to harvest just because the leaves are yellowing. Wait until the pods are completely brown and papery—they should split open on their own when fully dry. I've learned this the hard way after harvesting too early and ending up with seeds that wouldn't germinate. The late fall timing in the instructions is perfect because cooler temperatures naturally dry the pods.
Drying Strategy: For Step 2, I always double-check the drying process by placing a small sample of seeds on a paper towel overnight. If they feel damp in the morning, extend the 3-5 day drying period by another day. The extra 24 hours on paper towels is crucial—it prevents mold during storage. I keep a small fan blowing gently over them to speed up evaporation without damaging the seeds.
Storage Wisdom: When storing your seeds in Step 3, I recommend adding a second silica gel packet if you live in a humid climate. The instructions mention one packet, but I've found that canna seeds absorb moisture more easily than many other seeds. Also, write the harvest date in pencil—not pen—since ink can smudge when you check the envelope later. The 2-3 year viability window starts from your harvest date, not when you store them.
Germination Test: The 12-hour warm soak test in Step 3 is a game-changer if you're having germination issues. Use lukewarm water (around 80°F) and place the seeds in a small jar with a lid. The warm water mimics the tropical conditions canna plants love, helping to break dormancy. I test a few seeds from each batch this way before committing to planting the whole envelope.
Pro Tips for Canna Seed Pods
- Here's what I've learned after years of collecting canna seeds—these little tricks make all the difference between vi...
- Timing Secret: In Step 1, don't rush to harvest just because the leaves are yellowing. Wait until the pods are comple...
- Drying Strategy: For Step 2, I always double-check the drying process by placing a small sample of seeds on a paper t...
Frequently asked questions
Got questions about canna seed pods?
You’re not alone! Whether you're a first-time grower or a seasoned gardener, these answers will help you navigate harvesting, storage, and germination like a pro.
When are canna seed pods ready to harvest?
Canna seed pods are typically ready for harvest when they turn brown and feel papery to the touch—usually 8–12 weeks after flowering. Avoid harvesting too early (green pods) or too late (they may split open and scatter seeds). Pro tip: Shake the pod gently—if seeds rattle inside, it’s time to pick!
How long do harvested canna seed pods last before germination?
Properly dried and stored seed pods can remain viable for 1–2 years if kept in a cool, dry place (like a sealed container with silica gel). For best results, plant them within 6–12 months to maximize germination rates. Label your pods with the harvest date to track freshness!
Can I reuse canna seed pods for multiple growing seasons?
Yes! Once the outer pod dries, you can reopen it to extract seeds for replanting. Store the remaining pod in a paper bag with a few holes for airflow to prevent mold. Just avoid wetting them—humidity is the enemy of long-term storage. This makes cannas a budget-friendly perennial!
What if my canna seed pods won’t open naturally?
If pods stay stubbornly closed, try these tricks:
- Gently crush the pod with a hammer (wear gloves!) to release seeds.
- Place sealed pods in a paper bag and refrigerate for 1–2 weeks—cold can trigger natural splitting.
- For stubborn cases, soak pods in warm water for 24 hours to soften the husk.
Warning: Avoid cutting pods—it can damage the seeds inside.
Are there alternatives to harvesting seed pods?
If you’re not into pod harvesting, cannas can also be propagated via:
- Rhizome division (dig up and split mature tubers in early spring).
- Stem cuttings (place healthy stems in water until roots form, then plant).
- Buying fresh plants from nurseries (best for rare varieties).
Seed pods are ideal for preserving heirloom varieties or experimenting with new colors!
Wrapping up and next steps
Harvesting canna seed pods doesn’t have to be a daunting task—with the right tools and timing, you can easily collect viable seeds for year-round germination! 🌱 Whether you’re a seasoned gardener or just starting out, these pods offer a rewarding way to propagate your plants while minimizing stress.
Ready to take the next step? Start small—try harvesting a few pods this season, experiment with drying methods, and track your success. Soon, you’ll be sharing your green thumb expertise (and maybe even seeds!) with fellow plant enthusiasts. Happy harvesting! 🌿✨