
Lawn
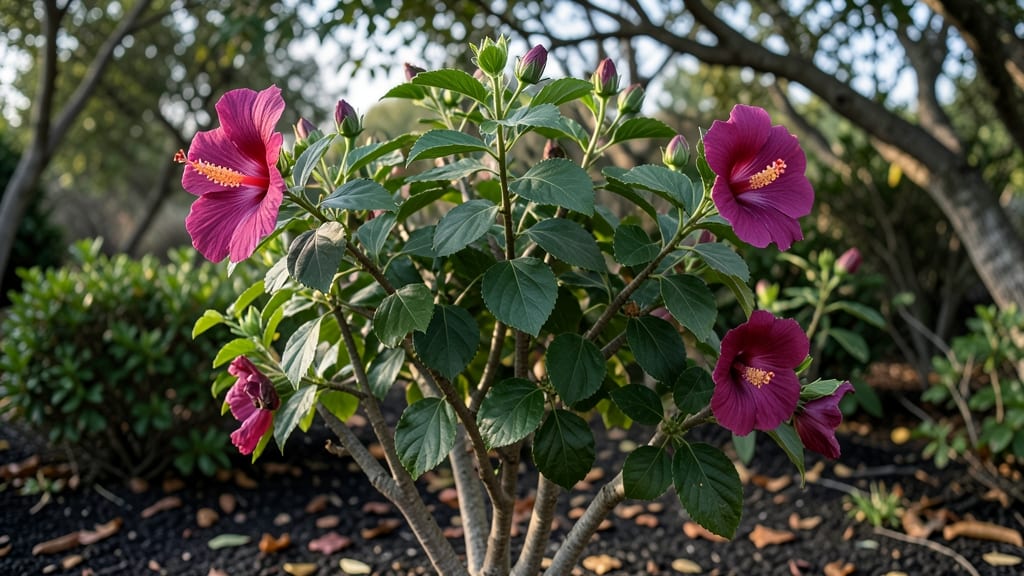
Harvesting Rose of Sharon seed pods saves you money and lets you grow your own vibrant shrubs. ✨ The twisty pods can be stubborn, but with the right timing and technique, you'll collect seeds effortlessly—no pruning shears required.
These seeds produce plants that thrive in tough conditions, just like the original shrub.
Wait until the pods turn brown and split open naturally, usually in late fall or early winter. Gently twist them off by hand when they're dry but before they release seeds to the ground.
A small mesh bag helps collect seeds without losing them to the wind—trust me, it's a game-changer for beginners.
Once collected, spread the seeds on a tray to dry completely for about a week. Store them in a paper envelope in a cool, dry place until spring planting.
No fancy stratification needed—just sow them ¼ inch deep in well-draining soil, and keep them moist until sprouts appear in 2-3 weeks.
This method works for both gardeners with sprawling yards and those with small urban spaces. The key is patience—young plants grow slowly at first, but they'll reward you with stunning blooms in just a few seasons. Ready to start your own Rose of Sharon collection?
📚 In This Guide
- What you need
- Instructions
- Tips and common mistakes
- Wrapping up and next steps
What you need
- ● Pruning shears or sharp scissors – Look for bypass pruners (clean cuts, no crushing!)
- ● Garden gloves – A pair with grip padding (thorns are sneaky!)
- ● Large bucket or basket – A 10–15 gallon capacity to collect pods
- ○ Newspaper or cardboard – For drying pods indoors (optional but helpful!)
- ● Small paintbrush or soft cloth – For gently dislodging stubborn seeds
- ● Seed packet or envelope – For storing dried seeds (label with the harvest date!)
- ● Disinfectant spray – To clean tools between cuts (prevents disease spread)
- ● Knee pad or stool – If your Rose of Sharon is taller than 6 feet!
Instructions for harvesting Rose of Sharon seed pods
Here's how to collect seeds without wrestling with stubborn stems or breaking branches.
🌿 Step 1: Identify and Wait for Ripe Seed Pods
Look for seed pods that have turned brown and papery—this signals they're fully mature and ready for harvesting. I check my bushes in late fall when most pods have dried out but before winter storms can scatter them. Avoid harvesting green pods; they won't contain viable seeds.
Gently squeeze a pod between your fingers. If it crumbles easily and releases seeds, it's ready. If it feels hard or springs back, wait another week. The key is timing—harvest too early, and the seeds won't germinate; too late, and they'll scatter on their own.
✂️ Step 2: Harvest Pods Without Damaging the Plant
Use clean pruning shears to snip the entire seed pod from the stem. I cut about ½ inch below the pod to avoid tearing the branch. If you're working with multiple bushes, collect pods in a paper bag—this prevents seeds from scattering and makes cleanup easier.
Don't pull pods off by hand; the stems are woody and can snap, leaving unsightly stubs. If you're harvesting a large number, wear gloves to protect your hands from the plant's slight prickliness. I like to work on a dry, sunny day when the pods are at their crispest.
🪴 Step 3: Dry and Store the Seed Pods
Spread the harvested pods in a single layer on a paper towel or screen tray in a warm, dry place for 1-2 weeks. This ensures any remaining moisture evaporates, preventing mold. I place mine near a sunny window but out of direct sunlight to avoid overheating.
Stir the pods occasionally to speed up drying. Once completely dry, they'll rattle when shaken. Store them in a paper envelope or small cloth bag in a cool, dark place. Label the bag with the harvest date—seeds stay viable for 1-2 years if stored properly.
🌱 Step 4: Extract Seeds for Planting
When ready to plant, gently crush each dried pod between your fingers over a clean sheet of paper. The seeds will fall out easily—discard the empty pod husks. I use a fine-mesh sieve to separate seeds from any remaining debris for extra cleanliness.
Sow the seeds immediately in well-draining soil or store them in a sealed container in the refrigerator for up to 6 months. Rose of Sharon seeds germinate best when stratified—mix them with moist sand and refrigerate for 4-6 weeks before planting to mimic winter conditions.
💧 Step 5: Plant Stratified Seeds Properly
Fill small pots with seed-starting mix and plant seeds ¼ inch deep. Keep the soil moist but not soggy—a spray bottle works best to avoid disturbing the seeds. Place the pots in a bright, indirect light area, like a north-facing window or under grow lights.
Germination can take 4-8 weeks, so be patient. Once seedlings emerge, move them to a sunnier spot and keep the soil consistently moist. Transplant outdoors after the last frost when seedlings are 3-4 inches tall and have 2-3 sets of true leaves. Mulch around the base to retain moisture and protect young roots.
Tips & tricks for perfect Rose of Sharon seed collection
These little tricks will turn your seed pod harvesting from frustrating to foolproof—no more wrestling with stubborn branches!
Timing is Everything: In Step 1, don't rush the maturity test. I've learned the hard way that pods need to be completely brown and papery—any hint of green means they're not ready. Pro tip: Check pods in the morning when they're dryest, as moisture can make them feel deceptively firm. The crumble test is foolproof: if it doesn't fall apart easily, wait another week.
Harvesting Hack: For Step 2, I've found that using small kitchen scissors instead of pruning shears makes the job easier—especially if you're harvesting a lot of pods. Just be sure to sterilize them first with rubbing alcohol to prevent spreading disease between plants. And if you're harvesting from multiple bushes, use separate paper bags for each to avoid cross-contamination of seeds.
Drying Strategy: When drying pods in Step 3, I like to place them on a cooling rack inside a dehydrator set to 115°F for 6-8 hours. This speeds up the process while maintaining even drying. If you don't have a dehydrator, just remember to stir them every few hours to prevent uneven drying. The pods are ready when they rattle loudly when shaken—this is your clear signal they're completely dry.
Storage Wisdom: For long-term storage, I recommend vacuum-sealing your dried pods in addition to the paper envelope method. This extends their viability beyond the 1-2 year mark while protecting them from pests. Just be sure to label each package with the harvest date—this helps you track seed freshness, especially if you're saving different varieties.
Pro Tips for Rose Of Sharon Seed Pods
- These little tricks will turn your seed pod harvesting from frustrating to foolproof—no more wrestling with stubborn ...
- Timing is Everything: In Step 1, don't rush the maturity test. I've learned the hard way that pods need to be complet...
- Harvesting Hack: For Step 2, I've found that using small kitchen scissors instead of pruning shears makes the job eas...
Frequently asked questions
Got questions about harvesting Rose of Sharon seed pods? You’re not alone! Here are some of the most common concerns—and their easy solutions.
When is the best time to harvest Rose of Sharon seed pods?
Harvest seed pods when they turn brown and papery (usually late fall or early winter). Avoid harvesting too early—they won’t be fully mature, or too late, when they may split open and scatter seeds. Aim for a dry, sunny day to make the process smoother.
What do I do if the seed pods won’t open naturally?
If pods stay stubbornly closed, try gently squeezing them between your fingers or tapping them lightly on a hard surface. For tough cases, place them in a paper bag and store them in a warm, dry spot for a few days—they’ll often pop open on their own!
Can I grow new Rose of Sharon plants from these seeds?
Yes! Once harvested, let the seeds dry completely, then plant them in well-draining soil. Keep the soil moist but not soggy. Germination can take 4-6 weeks, so patience is key. Young plants may take 2-3 years to bloom, but the wait is worth it!
Are there any risks or downsides to harvesting seed pods?
Mostly just patience and timing—if you miss the window, you’ll have to wait another year. Also, some gardeners report birds or squirrels may snack on the pods before you do! Covering them with netting can help if wildlife is a problem.
What if my Rose of Sharon plant doesn’t produce seed pods?
This could mean it’s too young, not getting enough sunlight, or lacks proper nutrients. Try fertilizing in early spring with a balanced formula and ensure it gets 6+ hours of sun daily. If it’s a newly planted shrub, give it another season to mature.
Wrapping up and next steps
Harvesting Rose of Sharon seed pods doesn’t have to be a tangled mess—with the right tools and techniques, you can collect them effortlessly! Whether you’re saving seeds for next season or simply tidying up your garden, these tips ensure a smooth process.
Now that you’re equipped with the know-how, go ahead and reclaim your weekends from seed pod struggles!
🌱 Your Next Step:
- Grab your gloves and scissors—it’s time to put theory into practice!
- Share your success (or clever hacks) with fellow gardeners—everyone loves a good seed story!