
Picking
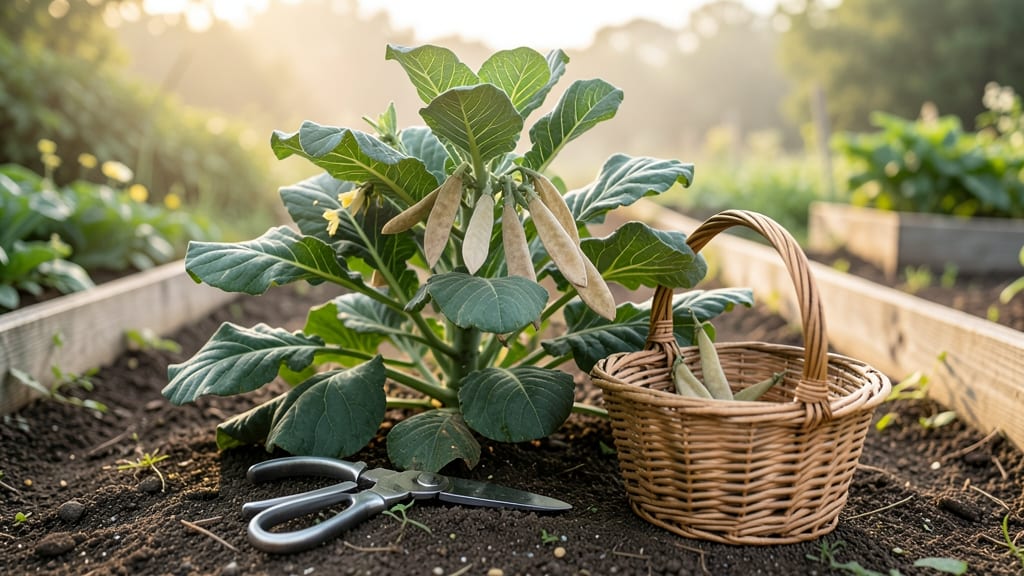
Harvesting collard greens seed pods is the easiest way to save seeds for next year’s garden—no fancy equipment needed. 🌱 I’ve been saving collard seeds for years, and once you try it, you’ll never buy seeds again.
These hardy greens are self-pollinating, so the seeds you save will grow true to type, especially if you’re growing heirloom varieties.
The key is timing: wait until the pods turn brown and papery before harvesting, usually in late fall or early winter, depending on your climate. A gentle twist or snip separates the pods from the plant—no need to rush.
Once collected, lay them out in a single layer on a tray to dry completely in a warm, dry spot for about two weeks.
After drying, simply rub the pods between your palms to release the seeds, then store them in a cool, dark place like a sealed envelope or jar.
With proper storage, these seeds stay viable for up to 5 years, giving you a free, reliable source of plants for future gardens.
Collard greens thrive in cool weather, so saved seeds are perfect for early spring or fall plantings. Whether you’re a seasoned seed saver or just starting, this method is foolproof and rewarding—your future self will thank you for the fresh, homegrown harvest ahead.
📚 In This Guide
- What you need
- Instructions
- Tips and common mistakes
- Wrapping up and next steps
What you need
- ● Collard greens plants – Mature, healthy plants with seed pods (typically in their second year). Aim for at least 3-5 plants for a reliable seed supply.
- ● Pruning shears or sharp scissors – For cleanly snipping seed pods without damaging the plant.
- ● Paper bags or breathable seed envelopes – 10-20 bags (depending on yield), labeled with the plant variety and harvest date.
- ● Drying rack or mesh screen – A flat, elevated surface (like a wooden frame or window screen) to allow airflow.
- ○ Fan or dehumidifier (optional but helpful) – Speeds up drying in humid climates.
- ● Fine-mesh sieve or sifter – For separating seeds from chaff after drying.
- ● Air-tight seed storage containers – Small jars, mylar bags with oxygen absorbers, or resealable plastic bags with silica packets.
- ● Permanent marker or labels – To tag varieties, harvest year, and germination notes.
- ● Glove – Protects hands from prickly pods or debris.
- ● Humidity monitor – Ensures seeds dry to 5-8% moisture for long-term storage.
- ● Germination test supplies – Paper towels, spray bottle, and a clear container to check seed viability before planting.
- ● Seed catalog or notebook – For tracking heirloom varieties or notes on growing conditions.
How to harvest collard greens seed pods for next year’s garden
Here’s my foolproof method for saving collard greens seeds—no fancy equipment, just patience and timing.
🌱 Step 1: Identify Mature Seed Pods
Wait until your collard greens bolt (send up flower stalks) in late summer or early fall. The seed pods will form along these stalks and start as small, green buds. When they turn tan or light brown and feel dry to the touch, they’re ready for harvest. Gently twist a pod open—if it releases small, black seeds easily, it’s time.
Don’t rush this step. Harvesting too early means immature seeds that won’t germinate next year. I like to check pods every 3-4 days once they start drying out. A good rule of thumb: if the pod splits open on its own, you’ve waited too long—collect seeds from those that are still intact.
✂️ Step 2: Harvest and Dry the Pods
Use clean, sharp scissors to snip the entire seed stalk (about 6-12 inches long) and bring it indoors. Lay the stalks on a paper towel in a single layer, ensuring pods aren’t touching. Place them in a warm, dry spot (around 70°F) with good airflow—like a sunny windowsill or a dehumidifier-free room.
Drying takes 7-10 days. You’ll know they’re ready when the pods are completely brittle and the seeds rattle inside. If humidity’s high, spread them out more or use a fan on low to speed up drying. Pro tip: Label each stalk with the variety name and harvest date—collard greens can cross-pollinate, and seed characteristics vary by type.
🪴 Step 3: Extract and Store the Seeds
Once pods are dry, rub them between your palms or gently crush them with a rolling pin to release the seeds. Sift the mixture through a fine-mesh strainer to separate seeds from chaff. Store the seeds in a paper envelope or small glass jar—moisture is the enemy, so avoid plastic containers. Keep them in a cool, dark place (like a pantry) where they’ll stay viable for 3-5 years.
Test a few seeds before storing by planting them in a small pot. If they sprout within 7-14 days, your batch is good to go. If germination’s slow or patchy, try drying the seeds again or store them in a sealed jar with a silica gel packet to absorb any lingering moisture.
⏰ Step 4: Plant Your Saved Seeds Next Season
Start seeds indoors 6-8 weeks before your last frost date for strong transplants. Sow them ¼ inch deep in a seed-starting mix, keeping the soil consistently moist but not soggy. Place them in a warm spot (70-75°F) until germination, which usually happens in 5-10 days. Once seedlings have 2-3 true leaves, transplant them outdoors after hardening off for 7-10 days.
Here’s the thing—collard greens saved from your own garden will adapt perfectly to your climate. You’ll notice they mature faster and handle your local weather better than store-bought seeds. Just remember: save seeds from open-pollinated or heirloom varieties only—hybrids won’t produce true-to-type plants.
Tips & tricks for perfect collard greens seed pod harvesting
These simple tricks will help you avoid common pitfalls and maximize your seed-saving success.
Timing is Everything: In Step 1, when checking pods every 3-4 days, do it in the late afternoon when the pods are fully dry from morning dew. This gives you the most accurate assessment of their readiness. If you check too early, you might miss the perfect moment when seeds are fully mature but pods haven't split open yet. I've learned this the hard way after harvesting too early and ending up with seeds that wouldn't germinate!
Drying Strategy: For Step 2, if your kitchen is particularly humid, consider using a small fan on low speed to circulate air around your drying stalks. This can cut your drying time from 7-10 days down to just 5-7 days while preventing mold. Place the fan at least 12 inches away from the pods to avoid blowing seeds around. The key is maintaining that warm (around 70°F) environment while keeping humidity low.
Seed Viability Test: When testing your seeds in Step 3, plant 3-5 seeds in a small pot rather than just one. This gives you a better sample size to determine germination success. If only 2 out of 5 sprout, you might want to extend your drying time or try storing them with a silica gel packet. The test is your quality control measure before committing to full storage.
Storage Wisdom: While paper envelopes work well for short-term storage, consider using small glass jars with tight-sealing lids for long-term viability. The glass protects against moisture better than paper, and the sealed lid prevents any accidental moisture exposure. Just remember to label your jars clearly with the variety name and harvest date—this becomes especially important if you're saving multiple varieties.
Pro Tips for Collard Greens Seed Pods
- These simple tricks will help you avoid common pitfalls and maximize your seed-saving success.
- Timing is Everything: In Step 1, when checking pods every 3-4 days, do it in the late afternoon when the pods are ful...
- Drying Strategy: For Step 2, if your kitchen is particularly humid, consider using a small fan on low speed to circul...
Frequently asked questions
Got questions about harvesting collard greens seed pods? You’re not alone! Here are answers to the most common queries to help you save seeds like a pro.
When is the best time to harvest collard greens seed pods?
Harvest seed pods when they turn tan or brown and feel dry to the touch—usually late summer to early fall (after the first frost). Avoid harvesting too early (green pods) or too late (bursting pods), as this affects seed viability.
Can I save seeds from store-bought collard greens?
Probably not! Store-bought collards are often hybrids (crossbred for flavor/texture) and won’t produce true-to-type seeds. For reliable seeds, grow heirloom varieties from a trusted seed supplier.
What do I do if my seed pods are moldy or rotting?
Mold or rot means the pods were harvested too late or stored damp. Discard affected pods immediately—they won’t yield viable seeds. To prevent this, dry pods indoors (on paper towels) for 1–2 weeks before storage.
How long can I store collard greens seeds before planting?
Store seeds in a cool, dry place (like a sealed jar in the fridge) for 2–3 years. Test viability by planting a few—if they sprout, the rest are good! For best results, plant within 1 year.
What if my collards don’t produce seed pods?
Seed pods form only if plants bolt (send up flower stalks). To encourage bolting, let collards mature undisturbed in cool weather (they’re biennials). Avoid over-fertilizing with nitrogen, which promotes leaf growth over flowering.
Wrapping up and next steps
Harvesting collard greens seed pods is a rewarding way to ensure a fresh supply of homegrown greens for years to come!
With the right timing, tools, and patience, you can easily collect viable seeds from your mature plants. Don’t let this simple task intimidate you—every gardener starts somewhere, and your future harvests will thank you!
Ready to take the next step? Mark your calendar for next season’s planting and start a small batch of seeds today. Share your success (or questions!) with fellow gardeners—you’ll be growing and learning together. 🌱✨