
Lawn
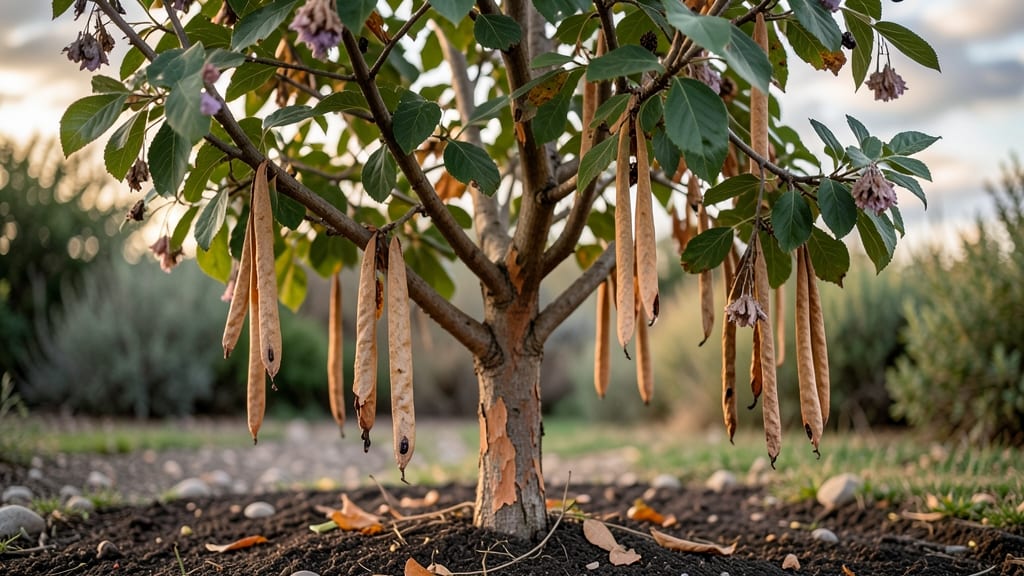
Harvesting crepe myrtle seed pods turns your yard into a free nursery—if you time it right. 🌿 These papery pods split open in late fall, revealing seeds that can grow into stunning new trees, but only if collected at the perfect moment.
The challenge? Knowing exactly when to pick and how to handle them without losing viability.
You’ll need just a few simple tools: gloves to protect your hands from the fuzzy pods, a bucket for collection, and a warm, dry spot to process them. The key is patience—crepe myrtle seeds need a cold stratification period (mimicking winter) to germinate, which means you can’t rush the process.
Most home gardeners skip this step and buy seedlings, but the satisfaction of growing your own is worth the extra time.
Once you’ve collected the pods, crack them open to reveal the seeds inside, then store them in a sealed bag in the fridge for 3-6 months before planting. Germination rates aren’t guaranteed—some seeds may not sprout—but when they do, you’ll get hardy trees that thrive in heat and drought.
The payoff? A future shade tree with minimal upfront cost.
This method works best in zones 6-9, where crepe myrtles grow naturally. If you’re in a colder climate, consider overwintering the seeds outdoors instead. The biggest mistake?
Harvesting too early or skipping stratification—both kill germination chances. But with the right timing, you’ll have seedlings ready for spring planting in no time.
📚 In This Guide
- What you need
- Instructions
- Tips and common mistakes
- Wrapping up and next steps
What you need
- ● Mature crepe myrtle trees: Choose healthy trees (at least 3–5 years old) with abundant seed pods—look for brown, dried pods in late fall or winter.
- ● Pruning shears or loppers: 1 pair (sharp, bypass-pruners for clean cuts).
- ● Large garbage bags or buckets: 2–3 (10–20 gallon capacity) for collecting pods and debris.
- ○ Gloves (optional but recommended): Heavy-duty work gloves to protect hands from thorns and rough pods.
- ● Newspaper or cardboard: 1–2 sheets for spreading pods to dry indoors.
- ● Fine-mesh screen or sieve: 1 (¼-inch mesh) for separating seeds from chaff.
- ● Paper towels or coffee filters: 5–10 sheets for drying seeds.
- ● Small paper bags or envelopes: 5–10 (for storing clean, dry seeds).
- ● Labeling markers: 1–2 to tag seeds with harvest dates.
- ● Disinfectant spray (70% isopropyl alcohol): To sterilize tools and surfaces if reusing containers.
- ● Hair dryer or fan: For speeding up seed drying (use low heat!).
- ● Seedling trays or pots: If you plan to germinate seeds immediately.
- ● Hose with nozzle: For rinsing pods if they’re dusty or dirty.
Step-by-step guide to harvesting crepe myrtle seed pods
Here's how to collect and prepare crepe myrtle seed pods for successful germination—no stress, just reliable results.
🌿 Step 1: Identify and Harvest Mature Seed Pods
Wait until late fall or early winter when the pods turn brown and papery—this signals they're fully mature and ready for collection. I like to harvest on a dry, sunny day when the pods are open just enough to release seeds easily. Gently twist or pull the pods from the branches, being careful not to damage the tree.
If pods are still green or hard, they need more time. Overripe pods (shriveled or cracked open) will release seeds prematurely, so harvest them as soon as they turn brown. Place the pods in a paper bag—this prevents moisture buildup that can cause mold. Store them in a cool, dry place for a few weeks to dry completely.
🪴 Step 2: Extract Seeds and Remove Debris
Once the pods are fully dry, open them by gently squeezing or rubbing between your fingers. You'll hear a faint crackling sound as the seeds release. I spread the pods on a clean sheet of newspaper or a tray to make cleanup easier. Use a small hand brush or your fingers to separate seeds from chaff and empty pods.
Discard any seeds that look shriveled, discolored, or damaged—they won’t germinate. Healthy seeds are small, flat, and light brown to tan in color. Store the viable seeds in a paper envelope or small container labeled with the harvest date. Keep them in a dry, dark place until ready to plant.
⏰ Step 3: Stratify Seeds for Better Germination
Crepe myrtle seeds need stratification to break dormancy. Place the seeds in a ziplock bag with a damp paper towel—just enough moisture to feel slightly damp, not soggy. Seal the bag and refrigerate for 6-8 weeks. Check the towel weekly; if it dries out, add a few drops of water and reseal.
This cold treatment mimics winter conditions, tricking the seeds into thinking they’ve survived the cold season. After stratification, the seeds will be ready to germinate much faster. I like to use a small plastic container with a lid for stratification—it’s easy to monitor and keeps everything contained.
🌱 Step 4: Plant Stratified Seeds for Germination
Fill a small seed tray or biodegradable pots with well-draining potting mix. Plant the stratified seeds ¼ inch deep, spacing them 1 inch apart to allow room for growth. Gently press the soil around each seed to ensure good contact. Water lightly with a spray bottle to avoid displacing the seeds.
Place the tray in a warm, bright location—around 70-75°F is ideal. Cover the tray with a clear plastic dome or wrap it in plastic wrap to retain moisture and warmth. Keep the soil evenly moist but not waterlogged. Germination can take 2-4 weeks, so patience is key.
☀️ Step 5: Care for Seedlings Until Transplanting
Once seedlings emerge, remove the plastic cover immediately to prevent damping-off disease. Place the tray under bright, indirect light for the first week to avoid shocking the tender sprouts. After that, gradually introduce direct sunlight to harden them off.
Water the seedlings when the top inch of soil feels dry to the touch. Avoid overwatering—crepe myrtle seedlings are sensitive to root rot. When the seedlings reach 3-4 inches tall and have 2-3 sets of true leaves, they’re ready to transplant into individual pots or the garden.
Tips & tricks for perfect crepe myrtle seed pod harvesting
Confession: I skipped the stratification step for years and wondered why my seeds never sprouted. Here's what actually makes the difference.
Pod Maturity Matters: The brown, papery texture in Step 1 is your golden cue—green pods won't germinate, and shriveled ones have already released seeds. I harvest when pods are just starting to open naturally. If you miss the window, store them in a cool, dry place for up to 2 weeks while waiting for full maturity. This patience prevents wasted effort on immature seeds.
Stratification Secret: That 6-8 week refrigeration in Step 3 isn't optional—it mimics winter's natural dormancy break. I place my ziplock bags in the crisper drawer of my fridge where temps stay consistently cool. Pro tip: Label your bags with the start date so you don't forget about them (trust me, I have). The damp towel should feel like a wrung-out sponge—too wet and you risk mold, too dry and stratification fails.
Seedling Light Strategy: In Step 5, that first week under bright indirect light is critical. I use a south-facing windowsill with sheer curtains to diffuse harsh rays. Too much direct sun too soon causes seedlings to stretch awkwardly toward the light. After the first week, I gradually move them to direct sun by placing the tray closer to the window each day—this hardens them off naturally without shocking the plants.
Pro Tips for Crepe Myrtle Seed Pods
- Confession: I skipped the stratification step for years and wondered why my seeds never sprouted. Here's what actuall...
- Pod Maturity Matters: The brown, papery texture in Step 1 is your golden cue—green pods won't germinate, and shrivele...
- Stratification Secret: That 6-8 week refrigeration in Step 3 isn't optional—it mimics winter's natural dormancy break...
Frequently asked questions
Got questions about crepe myrtle seed pods? You’re not alone! Here are some of the most common queries—and their simple solutions—to help you navigate harvesting, storing, and germinating with confidence.
When should I harvest crepe myrtle seed pods?
Harvest pods when they turn brown and papery (usually late fall to early winter). Avoid green pods—they’re not yet mature. Wait until they crack open slightly to reveal seeds inside. Overripe pods may scatter seeds, so act promptly! Pro tip: A gentle squeeze should make seeds rattle inside.
How do I know if the seeds inside are viable?
Viable seeds are plump, firm, and dark brown. Shriveled or hollow seeds won’t germinate. For extra assurance, soak a few in water for 24 hours—good seeds sink! Discard any that float or look moldy. Bonus: Cut open a pod and check for intact, glossy seeds.
What’s the best way to store crepe myrtle seeds?
Store seeds in a cool, dry place (like a sealed container in the fridge) for up to 6 months. Add a damp paper towel to retain moisture if storing long-term. Avoid plastic bags—condensation can cause mold. Label your container with the harvest date for tracking!
Why aren’t my crepe myrtle seeds germinating?
Common culprits:
- Improper stratification: These seeds need cold treatment (6–8 weeks in the fridge). Skip this, and germination stalls.
- Too much moisture: Keep soil lightly damp, not soggy. Overwatering drowns seeds.
- Old seeds: Viability drops after 1 year. Harvest fresh pods for best results.
Can I use crepe myrtle seed pods for anything other than planting?
Dry pods add rustic texture to winter arrangements or craft projects. Crush them for natural mulch (rich in nutrients). Just avoid composting them—they’re slow to break down. Fun idea: Hang pods in bundles for a whimsical garden decor piece!
Wrapping up and next steps
Harvesting crepe myrtle seed pods doesn’t have to be a daunting task—with the right timing, tools, and techniques, you can easily collect viable seeds for future planting. 🌱 Whether you’re pruning for aesthetics or preparing for propagation, understanding the life cycle of these pods ensures success.
Now that you’re equipped with answers to common questions and a clear step-by-step guide, why not give it a try this season?
Ready to grow your own crepe myrtle trees? Start by gathering your supplies, monitoring those pods, and taking action when they’re at peak ripeness. Happy gardening—your future shade trees will thank you! 🌿