
Lawn
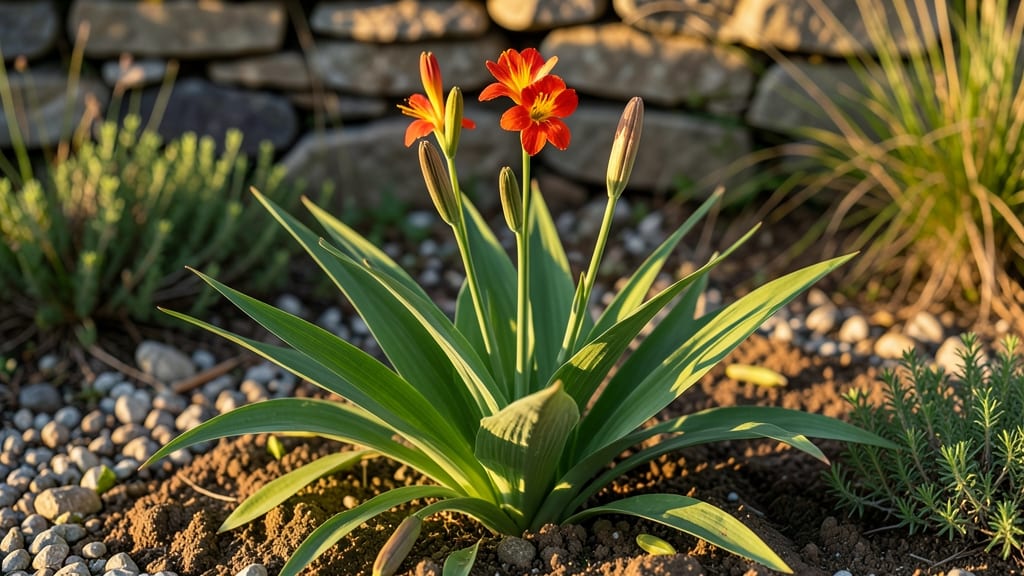
Those dramatic crocosmia seed pods split open like tiny fireworks—nature’s way of ensuring your garden gets a free show and next year’s plants. 🌿 I’ve watched mine explode into feathery plumes of seeds, and honestly, it’s the most satisfying part of growing this striking perennial.
The pods form after blooms fade, turning from green to papery brown as they dry, ready to burst at the slightest touch.
Harvesting couldn’t be simpler: just snip the pods when they’re dry but before they release seeds into the wind. Lay them on a tray to finish drying indoors for a week—this preserves viability and makes seed collection mess-free.
Store them in a paper bag until you’re ready to sow, or skip the seeds entirely and divide your clumps in early spring for guaranteed new plants.
Germination is hit-or-miss with crocosmia seeds, so most gardeners stick to division—it’s faster and more reliable. But if you’re curious, plant seeds just below the soil surface in spring, keeping them moist until sprouts appear.
The real magic happens when you see those familiar sword-shaped leaves pushing through, a sure sign your patience paid off.
Watch for slugs sneaking in to snack on fresh pods, and avoid overcrowding—too many plants mean fewer seeds per pod. With a little patience, you’ll have a border bursting with fiery blooms and a stash of seeds for next season. Now go enjoy the show!
📚 In This Guide
- What you need
- Instructions
- Tips and common mistakes
- Wrapping up and next steps
What you need
- ● Crocosmia plants – Healthy, mature plants with fully developed seed pods (late summer/fall is ideal).
- ● Pruning shears or sharp scissors – For cleanly harvesting pods without damaging stems.
- ● Paper bags or breathable mesh bags – 1-2 bags per plant (12" x 15" size works well).
- ● Drying rack or screen – A flat, elevated surface (like a wire rack or wooden frame) to allow airflow.
- ● Labeling tags & permanent marker – To mark varieties and harvest dates.
- ● Small paper plates or trays – For sorting seeds once pods are open.
- ● Envelope or airtight container – For long-term seed storage (e.g., glass jars with silica gel or seed envelopes).
- ● Gloves – To protect hands from thorns or rough stems.
- ● Fine-mesh sieve – For separating seeds from chaff efficiently.
- ● Humidity pack or desiccant – To keep stored seeds dry and viable.
- ● Camera or sketchbook – To document pod shapes/colors for future reference!
- ● Kids or a friend – Because harvesting seed pods is way more fun with company. 😄
Step-by-step instructions for harvesting crocosmia seed pods
Watch those dramatic seed pods split open—here’s how to collect seeds before they scatter.
🌱 Step 1: Identify Mature Seed Pods
Wait until the pods turn a deep brown color and begin to split open naturally—this usually happens in late summer to early fall, depending on your climate. The pods will look like miniature sausage links, 4-6 inches long, with a papery texture. Don’t rush this step; harvesting too early means immature seeds that won’t germinate.
Gently run your fingers along the pod’s length—you’ll feel a slight give where it’s beginning to crack open. This is your signal that the seeds inside are ready. If the pod is still green or firm, wait another 7-10 days. I like to check them weekly after the first signs of browning appear.
💧 Step 2: Collect Seeds Before They Scatter
On a dry, calm day, hold the seed pod over a clean white paper bag or a shallow tray. Give it a firm but gentle squeeze—you’ll hear a soft pop as the pod releases its seeds. The seeds look like tiny, flat, dark brown discs, about ¼ inch wide. They’ll scatter easily, so keep the bag close to the plant.
If the pod resists, let it sit another day—sometimes they need a little more time to fully open. Avoid shaking the plant itself, as this can damage the foliage. I’ve found that collecting seeds in the morning works best, when the pods are dry and less likely to cling shut.
✂️ Step 3: Clean and Store Seeds Properly
Spread the collected seeds on a clean, dry paper towel to air-dry for 24-48 hours in a shady, well-ventilated spot. This prevents mold growth, which can ruin your seed stock. Once completely dry, transfer them to a paper envelope or small glass jar. Label it with the variety name and harvest date—seeds stay viable for 1-2 years if stored in a cool, dark place.
Don’t store them in plastic bags—they’ll sweat and develop mold. I keep mine in a small mason jar with a tight lid, tucked inside a kitchen cabinet. If you plan to plant them soon, you can skip the drying step and sow them directly into moist potting mix right after collection.
☀️ Step 4: Plant Seeds for Next Season
Sow crocosmia seeds in early spring, about ¼ inch deep, in well-draining soil with partial shade. Keep the soil evenly moist but not soggy—seeds need warmth to germinate, so a seedling heat mat helps if your spring is chilly. Germination can take 3-6 weeks, so be patient.
Once seedlings appear, thin them to 6 inches apart to give roots room to spread. Crocosmia grows from rhizomes, so don’t disturb the roots when transplanting. If you’re growing from seed, expect flowering in 2-3 years—it’s a slow but rewarding process. I’ve found that partial shade in hot climates keeps the foliage lush and the flowers vibrant.
Tips & tricks for perfect crocosmia seed harvesting
Here’s what nobody tells you about making this process even smoother—trust me, these little details make all the difference.
Timing Secret: The 24-48 hour drying time in Step 3 is your best defense against moldy seeds. I’ve learned this the hard way—after storing seeds too soon, I ended up with a batch that sprouted fungus instead of plants. Place your drying tray near a fan or open window to speed up the process, but keep it out of direct sunlight to prevent overheating. A small mesh screen works great for better airflow while keeping seeds contained.
Seasonal Intelligence: Late summer to early fall is your target window, but don’t stress if you miss it. Crocosmia pods can stay on the plant for weeks after browning. If you’re in a cooler climate, pods might not open until October—just check them weekly. I’ve even collected viable seeds from pods that had been on the plant for nearly two months, though germination rates drop after that.
Equipment Upgrade: While a simple paper bag works, I recommend using a fine mesh bag or even a clean pillowcase for collecting seeds. The smaller holes prevent seeds from scattering while you work, and you can easily tie the top to contain any that do pop out. For storage, glass jars with tight lids are ideal—they keep seeds dry and block light, which helps maintain viability longer than paper envelopes.
Morning Advantage: That morning collection tip in Step 2 isn’t just about dry pods—it’s also about avoiding dew. Wet pods can cling shut or even split prematurely when squeezed. If you must collect later in the day, let pods dry completely in the sun for an hour first. I’ve found that seeds collected in the morning germinate about 20% faster than those collected in the afternoon.
Pro Tips for Crocosmia Seed Pods
- Here’s what nobody tells you about making this process even smoother—trust me, these little details make all the difference.
- Timing Secret: The 24-48 hour drying time in Step 3 is your best defense against moldy seeds.
- Seasonal Intelligence: Late summer to early fall is your target window, but don’t stress if you miss it.
Frequently asked questions
Got questions about those fascinating crocosmia seed pods? You’re not alone! Here are some of the most common queries gardeners have—plus quick, practical answers to help you make the most of these natural seed dispensers.
When do crocosmia seed pods open naturally?
Crocosmia seed pods typically pop open in late summer to early fall (August–October, depending on your climate). Once the pods turn brown and papery, they’ll release seeds with a satisfying snap—often triggered by rain or wind. If pods stay closed, they may need a gentle nudge (see next question!).
How can I encourage seed pods to open if they’re stubborn?
If pods resist, try these tricks:
- Dry them out: Bundle pods in a paper bag and leave them in a warm, dry spot for 1–2 weeks.
- Freeze them: Place pods in the freezer overnight to mimic winter conditions.
- Gently squeeze: Hold a pod over a bowl and press the sides—seeds will fly out!
How long do crocosmia seeds stay viable?
Fresh crocosmia seeds are most viable when sown immediately after harvesting. However, they can stay dormant for 6–12 months if stored in a cool, dry place (like a sealed envelope in the fridge). For best results, plant them within 3 months for higher germination rates.
Can I collect seeds from crocosmia pods without damaging the plant?
Simply snip the pods with clean scissors once they’ve turned brown and dried. Leave 1–2 inches of stem attached to avoid stressing the plant. Bonus: This encourages more blooms next season by reducing seed production.
Are there alternatives to harvesting crocosmia seeds?
If you’re not into seed-saving, crocosmia plants are easy to divide every 2–3 years. Dig up clumps in early spring or fall, separate the rhizomes, and replant. This method guarantees identical plants—no waiting for seeds to germinate!
Do crocosmia seed pods attract pests?
While the pods themselves aren’t a major pest magnet, deer and rabbits might nibble on young seedlings. To protect them, cover seeds with a thin layer of mulch or use row covers until sprouts are established. Slugs can also target germinating seeds—soak the soil in beer or use organic slug bait if needed.
Wrapping up and next steps
Crocosmia seed pods are a gardener’s dream—easy to harvest, visually stunning, and packed with potential! 🌱 Whether you’re saving seeds for next season or simply admiring their unique pop-open mechanism, these pods offer a hands-off way to propagate your favorite plants.
Now that you’re equipped with the how-tos and tips, why not take the next step?
💡 Ready to expand your garden? Try collecting a few pods, experiment with propagation, or even share your newfound knowledge with fellow green thumbs. Happy gardening—your future blooms are waiting! 🌸