
Propagation
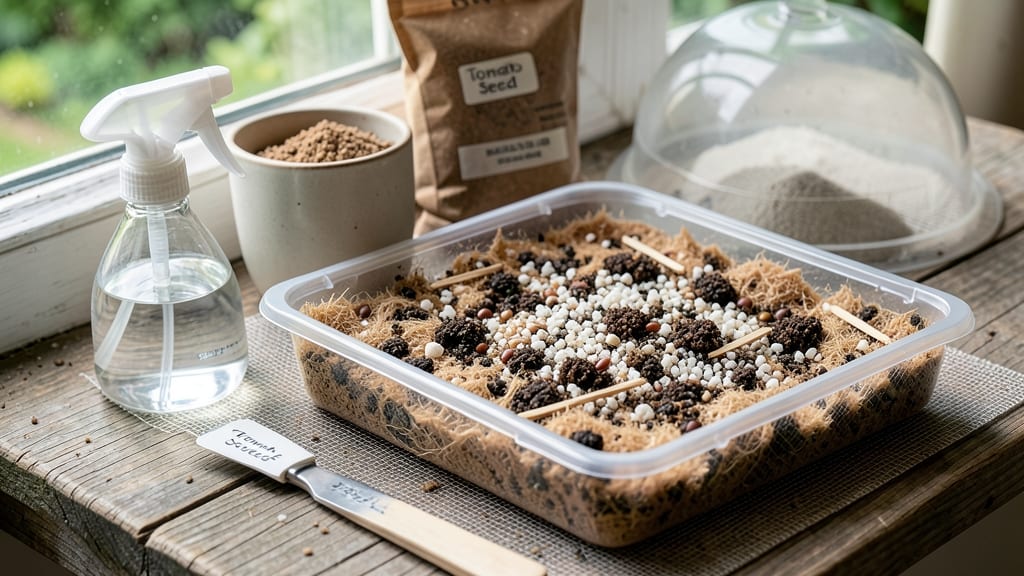
My DIY seed starting mix with coco coir changed how I grow seedlings—lighter, faster germination, and stronger starts than store-bought blends. 🌱 The secret lies in coco coir’s perfect balance of moisture retention and aeration, plus a few key ingredients that make seeds pop in just days instead of weeks.
You’ll need coco coir bricks (the base), perlite or vermiculite (for drainage), and worm castings or compost (for nutrients). Mix them in a 1:1:1 ratio—simple, cost-effective, and reusable.
No more struggling with compacted soil or moldy trays; this blend stays fluffy and works for everything from tiny lettuce seeds to finicky peppers. By week two, you’ll see bold green seedlings reaching for the light, not leggy or weak.
The mix stays moist without drowning roots, and you can reuse it for cuttings later. It’s the foolproof way to skip the nursery and grow your own. Works for indoor setups, greenhouse trays, or even paper pots.
Here’s exactly how to mix it—and troubleshoot the few hiccups that can happen.
📚 In This Guide
- What you need
- Instructions
- Tips and common mistakes
- Wrapping up and next steps
What you need
- ● Coco coir (block or brick): 1 part (expandable, peat-free, and lightweight—choose a 100% coco coir for best results). Pro tip: A 10L (2.64 gal) block expands to ~10L of fluffy mix!
- ● Perlite or vermiculite: 1 part (for aeration and moisture retention—perlite is best for lightweight mixes, while vermiculite holds more water).
- ● Worm castings or compost: 1 part (adds nutrients—worm castings are gentler on seedlings).
- ○ Optional: Horticultural charcoal: ½ part (prevents mold and improves drainage).
- ● Seed-starting containers: Trays with drainage holes, peat pots, or recycled containers (clean and sanitized!).
- ● Large mixing bowl or clean bucket (sterilized with a 10% bleach solution if reused).
- ● Measuring cups or a scale (for precision—1:1:1 ratio is key!).
- ● Spray bottle (for gentle watering).
- ○ Gloves (optional but recommended—coco coir dust can be irritating!).
- ○ pH test kit (optional but helpful—aim for 5.8–6.2 for optimal germination).
How to create a custom seed starting mix using coco coir
This lightweight, sterile blend promotes rapid germination and strong root development—ideal for finicky seedlings.
🌱 Step 1: Hydrate and Fluff the Coco Coir
Begin by soaking the coco coir bricks in warm water for 15-20 minutes until they expand to 3-4 times their original size. I use a large bucket and stir occasionally to ensure even saturation—uneven hydration leads to clumpy mix later. Once fully expanded, drain excess water through a mesh screen or colander, squeezing gently to remove moisture without compacting the fibers.
Spread the hydrated coir on a clean surface and fluff with your hands or a fork. This aerates the mix and breaks up any stubborn clumps. Aim for a texture similar to crumbled cotton balls—light enough to hold shape when pressed but still airy. If it feels too dense, add a handful of perlite (about 10% of the total volume) to improve drainage and prevent compaction.
🌿 Step 2: Add Nutrients and Structural Support
In a separate container, combine 1 part worm castings (about 1 cup per quart of coir) with ½ part compost (sifted to remove large chunks). This blend provides essential microbes and slow-release nutrients without overwhelming tender seedlings. I like to mix these dry first, then fold them into the fluffed coir—this ensures even distribution and prevents nutrient pockets.
For structural integrity, incorporate ½ part peat moss (if using) or additional perlite to maintain porosity. The goal is a 60-70% coco coir base with 30-40% amendments—this balance retains moisture while allowing roots to breathe. Give it one last thorough mix by hand, checking for consistency. The final texture should resemble humus-rich garden soil but with a lighter, almost spongy feel.
💧 Step 3: Sterilize and Condition the Mix
Transfer the blended mix to a clean container and microwave it in 2-minute intervals for a total of 4-6 minutes. This heat treatment kills pathogens and weed seeds without damaging the coir’s structure. Let it cool completely before handling—hot mix can kill beneficial microbes and burn your hands. I place the container in the fridge overnight to further stabilize the mix and reduce the risk of fungal issues.
Once cooled, give the mix a final moisture check. It should hold together when squeezed but not drip water. If too dry, mist with lukewarm water until evenly damp; if too wet, spread it out to air-dry slightly. Store any unused mix in an airtight container for up to 2 weeks—this blend stays fresher than garden soil but still benefits from being used promptly.
☀️ Step 4: Test and Adjust for Seedling Success
Fill a small container with your mix and press gently to simulate planting conditions. Observe how it holds shape—if it crumbles excessively, add a splash of cornstarch slurry (1 tbsp cornstarch + ½ cup water) to bind it slightly. For seeds requiring high moisture (like lettuce), increase the coir proportion to 70%. For drought-tolerant starts (like succulents), reduce coir to 50% and boost perlite to 30%.
Plant a test seed (like fast-germinating radish or basil) to verify performance. If seedlings emerge within 3-5 days and develop strong, white roots when gently pulled, your mix is ready. Slow germination or mushy stems signal overwatering or poor drainage—adjust the perlite ratio or let the mix dry slightly before replanting.
Tips & tricks for perfect DIY seed starting mix
Took me a while to figure these out, so here goes—your secret weapon for foolproof seedling success.
Hydration Precision: In Step 1, the 15-20 minute soak is non-negotiable for even expansion. I've learned the hard way that cutting this short leaves stubborn clumps, while over-soaking creates a sludge that drains poorly. Use a kitchen scale to verify expansion—your coco coir should weigh about 10 times its original brick weight when properly hydrated. The texture should resemble a damp sponge that holds its shape when pressed gently but doesn't drip water.
Nutrient Layering: When combining worm castings and compost in Step 2, I recommend sifting both through a fine mesh screen to eliminate any large particles that could create air pockets. For an extra boost, add a pinch of kelp meal (about 1 teaspoon per quart) to the worm castings before mixing—this provides trace minerals without altering the delicate pH balance. The key is gradual incorporation: sprinkle the amendments over the fluffed coir and gently fold with a garden trowel rather than dumping all at once.
Microwave Technique: For Step 3's sterilization, I've found that using a microwave-safe glass container with a loose lid (like a Pyrex dish with a paper towel over it) prevents steam buildup that could overcook the outer layers. The 2-minute intervals are crucial—pause between each to stir and check temperature. The mix should feel warm to the touch but not hot enough to scald your fingers. This method kills pathogens while preserving the beneficial microbial balance that garden soil contains.
Test Plant Validation: In Step 4, don't skip the test seed phase—it's your quality control measure. I use radish seeds for this because they germinate in just 3-5 days, giving you immediate feedback. If your test seedlings develop strong white roots but weak stems, increase the perlite ratio by 5% to improve aeration. The roots should feel firm when gently pulled, not mushy or brittle—this indicates proper moisture balance and nutrient availability.
Pro Tips for Diy Seed Starting Mix With Coco Coir
- Took me a while to figure these out, so here goes—your secret weapon for foolproof seedling success.
- Hydration Precision: In Step 1, the 15-20 minute soak is non-negotiable for even expansion.
- Nutrient Layering: When combining worm castings and compost in Step 2, I recommend sifting both through a fine mesh screen to eliminate any large particles that could create air pockets.
Frequently asked questions
Got questions about crafting your DIY seed-starting mix with coco coir?
You’re not alone! Here are answers to the most common ones to help you grow like a pro.
1. How long does a DIY coco coir seed mix last before it breaks down?
A properly stored DIY coco coir mix stays fresh for 3–6 months in a sealed container. To extend its life, keep it dry and cool (like in a garage or basement). Once it starts to smell musty or mold appears, toss it—freshness is key for germination!
2. Can I use regular potting soil instead of coco coir?
While you can substitute potting soil, it’s heavier and may compact, slowing drainage and root growth. Coco coir’s lightweight, airy texture mimics ideal seed-starting conditions. For a hybrid mix, blend 50% coco coir + 50% sterile potting soil to balance moisture and nutrients.
3. Why are my seeds not germinating in my DIY mix?
Check these common culprits:
- Temperature: Most seeds need warmth (70–85°F). Use a heat mat if your space is chilly.
- Moisture: Keep the mix damp (not soggy)—use a spray bottle for gentle watering.
- Light: Seeds need darkness to germinate; cover trays with a lid or cloth until sprouts appear.
- Freshness: Old or moldy mix can inhibit growth—start fresh!
4. Do I need to add fertilizer to my coco coir mix?
Not right away! Coco coir is nutrient-light, so wait until seedlings have 2–3 true leaves before adding a diluted liquid fertilizer (half-strength). Over-fertilizing can burn tender roots. For a gentle boost, mix in 1 tbsp compost per gallon of mix at planting.
5. How do I store leftover coco coir mix for future use?
Store your mix in an airtight container (like a plastic bin with a lid) in a cool, dry place. Avoid humidity—moisture speeds up mold growth. Label the container with the date to track freshness. Pro tip: Add a silica gel packet to absorb excess moisture.
Wrapping up and next steps
Creating your own seed-starting mix with coco coir is a game-changer for gardeners—it’s lightweight, nutrient-rich, and perfect for fast germination. 🌱 With just a few simple ingredients, you’ve got a cost-effective, eco-friendly alternative to store-bought mixes that’ll give your seedlings the strongest start.
Whether you’re a beginner or a seasoned pro, this DIY approach saves money and lets you customize the mix for your plants.
Now that you’re ready to mix, why not take the next step? Try experimenting with additives like worm castings or perlite to fine-tune your blend. Happy planting—and watch those tiny seeds transform into thriving plants! 🌿