
Lawn
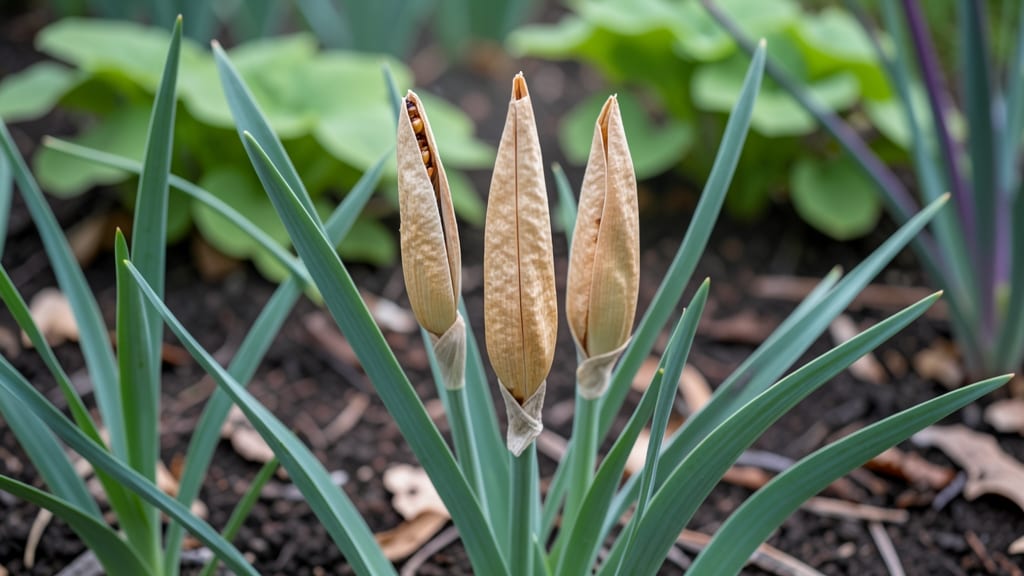
Those papery dried iris seed pods hold the secret to next spring's blooms—if you cold-stratify them right. 🌱 I've grown irises from seed for years, and the difference between a 60-day sprout and a failed attempt comes down to timing, moisture, and patience.
The pods look like delicate dried flowers, but inside are tiny seeds that need winter's chill to wake up.
Start by harvesting mature pods in late summer when they turn brown and papery. Let them dry completely before storing in a paper bag in the fridge for 60-90 days.
This mimics nature's cold stratification—no fancy equipment needed, just your kitchen fridge. The seeds stay viable for years if kept dry, so you can collect a stash for multiple planting seasons.
When spring arrives, sow seeds just below the soil surface in well-draining beds with full sun. Keep the soil consistently moist but never soggy—young seedlings need gentle care to avoid damping off.
Within 4-6 weeks, you'll see the first true leaves, and by next spring, those tiny seeds could be sturdy plants ready to bloom.
Here's the trick: be patient with germination—it can take up to a year for some varieties. The payoff is irises that thrive exactly where you planted them, with colors and forms you won't find in nursery pots. Perfect for expanding your garden's palette without breaking the bank.
📚 In This Guide
- What you need
- Instructions
- Tips and common mistakes
- Wrapping up and next steps
What you need
- ● Dried iris seed pods: 3–5 mature, fully dried pods (harvested in late summer/fall, when they turn brown and papery).
- ● Cold-stratification container: A sealed plastic bag (quart-sized) or a small airtight container with a breathable lid (e.g., a mesh bag).
- ● Moisture source: Damp paper towels, sphagnum moss, or a small handful of perlite (to retain humidity without sogginess).
- ● Refrigerator space: A standard fridge (34–40°F / 1–4°C) for 6–8 weeks.
- ○ Potting mix: Well-draining, sterile seed-starting mix (avoid garden soil—it’s too dense!). Optional: Add 10% perlite or sand for extra aeration.
- ● Small pots or seed trays: 2–3 inch pots or a shallow tray with drainage holes (1 pod per pot or 2–3 pods per tray cell).
- ● Spray bottle: For gentle watering (avoid over-saturating!).
- ● Grow lights or sunny windowsill: A south-facing window (6+ hours of light/day) or a LED grow light (12–16 hours/day) for seedlings.
- ● Humidity dome: A clear plastic lid or mini greenhouse to retain moisture during germination.
- ● Heating mat: A seedling heat mat (55–65°F / 13–18°C) to speed up germination slightly.
- ● Fertilizer: A balanced liquid fertilizer (5-5-5 or 10-10-10) diluted to half-strength for early growth.
- ● Seedling labels: Toed labels or popsicle sticks to track varieties (if mixing types!).
- ● Pruning shears: For snipping pods open (if they’re stubbornly sealed).
How to grow irises from dried seed pods
Cold-stratifying iris seed pods is the secret to faster, more reliable blooms—here's how to do it right.
🌱 Step 1: Harvest and Prepare the Seed Pods
Collect dried iris seed pods when they turn brown and papery after flowering. Let them dry completely indoors for 2-3 weeks in a paper bag—this prevents mold and ensures proper stratification. Once fully dry, open the pods to release the flat, black seeds inside.
I like to store the seeds in an envelope labeled with the iris variety and harvest date. The seeds are tiny but hardy—don’t worry if they look wrinkled. Just keep them in a cool, dry place until you’re ready to stratify.
❄️ Step 2: Cold-Stratify for 60 Days
Place the seeds in a sealed plastic bag with a small amount of damp sphagnum moss or paper towels—just enough to keep them slightly moist, not soggy. Seal the bag and refrigerate for 60 days at 35-45°F. This mimics winter conditions and breaks seed dormancy.
Check the bag every 2 weeks to ensure the moss isn’t drying out. If it feels dry, add a tiny spray of water. The goal is to keep the seeds consistently moist but not waterlogged. Cold stratification is where the magic happens—skipping this step delays germination by months.
🌿 Step 3: Sow Stratified Seeds in Containers
Fill small pots or seed trays with light, well-draining potting mix. Scatter the seeds on the surface—no need to bury them. Press them lightly into the soil so they make contact but don’t cover them. Moisten the soil gently with a spray bottle until it’s damp but not wet.
Place the containers in a warm spot with bright, indirect light (like a sunny windowsill). Keep the soil consistently moist—not soggy—by watering from the bottom if needed. Germination can take 4-8 weeks, so patience is key.
☀️ Step 4: Transplant Seedlings to Outdoor Beds
Once seedlings develop 2-3 true leaves (not just the initial seed leaves), they’re ready for their first outdoor move. Choose a sunny spot with 6+ hours of direct sun and well-draining soil. Dig small holes 1 inch deep and space seedlings 6 inches apart.
Water deeply after planting to settle the soil around the roots. Mulch lightly with 1 inch of compost to retain moisture and suppress weeds. Irises are tough once established, but young plants need consistent moisture for their first year.
⏰ Step 5: Care for Young Irises Through First Year
Keep the soil evenly moist but not waterlogged—water when the top inch feels dry. Fertilize lightly with a balanced, low-nitrogen fertilizer (like 5-5-5) every 6 weeks in spring and summer. Avoid high-nitrogen feeds, which encourage leaf growth at the expense of blooms.
By their second year, your irises should produce their first flowers. The blooms might not be as showy as mature plants, but each year they’ll get better. Here’s the thing—cold-stratified seeds often bloom faster than store-bought starts, so you’ll see results sooner than you’d expect.
Tips & tricks for perfect cold-stratified iris blooms
These simple strategies will help you skip the common pitfalls and get those irises blooming faster.
Harvest Timing: Wait until the seed pods are completely brown and papery before harvesting—this ensures maximum seed viability. I’ve learned the hard way that harvesting too early (when pods are still green) results in lower germination rates. Store them in a cool, dry place until you’re ready to stratify, which prevents mold and maintains seed quality.
Stratification Secrets: The 60-day cold stratification at 35-45°F is non-negotiable for breaking dormancy, but here’s the thing: your fridge temperature might not be exact. Use a thermometer to confirm the temperature—some fridges run warmer than others. If you’re short on time, you can extend the stratification up to 90 days for even better results, though 60 days is perfect for most varieties.
Seedling Care: Once you’ve transplanted those seedlings with 2-3 true leaves, resist the urge to overwater. Irises hate soggy roots, so let the top inch of soil dry out between waterings. I’ve found that mulching with 1 inch of compost helps retain moisture while preventing weeds—just make sure it doesn’t smother the young plants.
Pro Tips for Dried Iris Seed Pods
- These simple strategies will help you skip the common pitfalls and get those irises blooming faster.
- Harvest Timing: Wait until the seed pods are completely brown and papery before harvesting—this ensures maximum seed ...
- Stratification Secrets: The 60-day cold stratification at 35-45°F is non-negotiable for breaking dormancy, but here’s...
Frequently asked questions
Got questions about working with dried iris seed pods? You’re not alone! Here are some of the most common queries—plus quick, practical answers to help you grow stunning irises in just 60 days.
How do I know when iris seed pods are fully dried and ready to harvest?
Harvest pods when they turn brown and papery, usually 4–6 weeks after blooming. Gently squeeze—if they crumble easily, they’re ready! Avoid harvesting if pods are still green or moist, as seeds may not germinate properly. Store them in a cool, dry place until stratification.
What does "cold-stratification" mean, and why is it necessary for iris seeds?
Cold-stratification mimics winter conditions to break seed dormancy. Place dried pods in a sealed bag with damp sand or peat moss, then refrigerate for 60 days. This trick fools seeds into thinking spring has arrived, boosting germination rates from near-zero to 90%!
Can I use dried iris seeds from store-bought flowers?
Yes, but with a catch: seeds from hybrid or named varieties (like ‘Blue Flag’) may not grow true to type. For consistent results, source seeds from open-pollinated irises or reputable seed suppliers. If you’re experimenting, store-bought pods are a fun (and free!) way to try!
My iris seeds aren’t germinating—what went wrong?
Check these common pitfalls:
- Skipped stratification: Iris seeds need the cold treatment to sprout.
- Too much moisture: Overly wet pods can rot; keep them damp, not soggy.
- Old seeds: Viability drops after 1–2 years; store pods in a cool, dark place.
- Impatience: Germination can take 3–6 months—don’t give up!
Are there alternatives to growing iris seeds if I want blooms faster?
For quicker color, buy bare-root iris rhizomes from nurseries—they bloom in 1–2 years vs. 3+ years from seed. Divide mature iris clumps in early fall for instant transplants. Seed-growing is rewarding but slower; rhizomes are the speedy shortcut!
Wrapping up and next steps
Dried iris seed pods offer a fast, budget-friendly way to grow vibrant blooms in just 60 days with cold stratification—no greenhouse needed! 🌱 Whether you're a gardening novice or a seasoned pro, these pods simplify propagation while adding a touch of whimsy to your lawn or garden.
Ready to transform your outdoor space?
🌿 Your Next Step: Plant & Watch Them Grow!
Grab your dried iris pods, follow the steps, and enjoy the satisfaction of watching tiny seeds turn into stunning flowers. Share your progress with fellow gardeners or experiment with different varieties—happy planting! 🌸