
Lawn
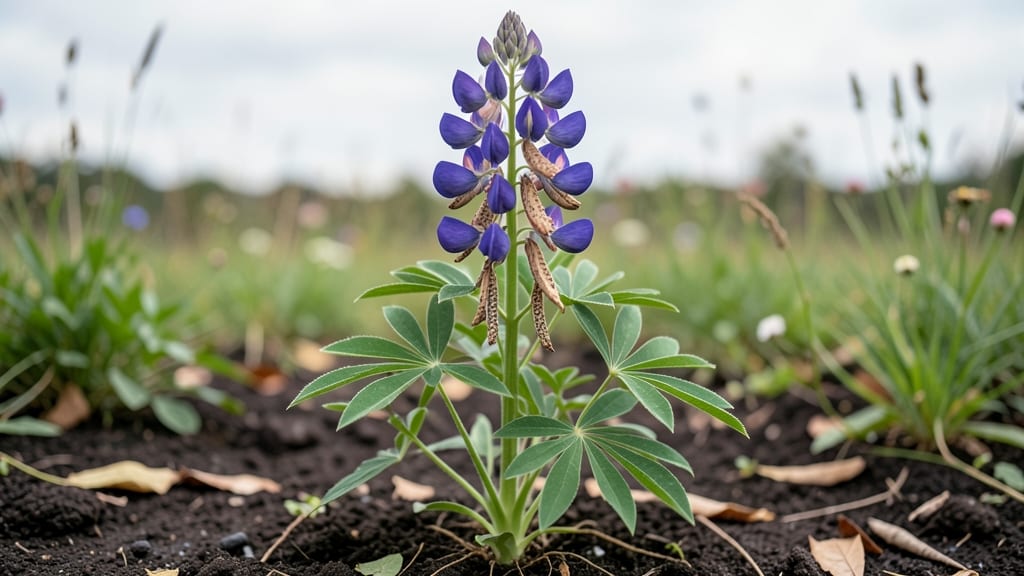
Saving flower seeds from pods cuts waste and keeps your garden growing for years. 🌻 I’ve harvested seeds from poppies, marigolds, and cosmos—each pod holds the promise of next season’s blooms without buying new packets. The key? Timing and gentle handling to avoid crushing seeds before they’re ready.
Start by identifying dry but unbroken pods—like the papery husks of cosmos or the bulbous cases of poppies. Harvest them on a dry day, then lay them on paper towels to finish drying indoors.
Label each type immediately (a simple twist-tie with masking tape works perfectly) before storing in an airtight container. This method preserves viability for 3–5 years with no special equipment.
When planting, mimic nature’s rhythm: scatter seeds directly in fall for self-sowing or start them indoors 6–8 weeks before your last frost. Annuals like marigolds thrive with full sun and loose soil, while perennials like poppies appreciate a light scratch into the surface.
Watch for sprouts in 7–21 days, depending on the flower.
Troubleshooting is simple: if pods burst too soon, harvest earlier or cover plants with lightweight mesh. For mold risks, ensure pods dry completely before storage. With these steps, you’ll turn this season’s blooms into next year’s garden staples—zero waste, zero fuss.
📚 In This Guide
- What you need
- Instructions
- Tips and common mistakes
- Wrapping up and next steps
What you need
- ● Mature flower seed pods – Choose healthy, fully dried pods (e.g., from cleome, cosmos, or snapdragons). Aim for 5–10 pods depending on your project scale.
- ● Pruning shears or small scissors – Sharp, clean tools to snip pods without damaging stems. Sterilize with rubbing alcohol if reusing.
- ● Paper bags or breathable mesh bags – 2–3 bags (kraft paper or unbleached cotton) to allow airflow while drying. Avoid plastic!
- ● Labeling tags & permanent marker – Write pod names, harvest dates, and varieties. Waterproof tags work best for outdoor drying.
- ● Drying tray or screen – A wire mesh tray (12"x12" or larger) or a wooden screen to elevate pods for even airflow.
- ● Glove – Lightweight gardening gloves to protect hands from prickly pods (e.g., okra or mallow).
- ● Small fan or dehumidifier – Speeds up drying in humid climates. Place pods 6–12 inches away from airflow.
- ● Seed envelope kit – 5–10 envelopes (or repurpose tea bags) for long-term storage. Use unbleached paper to prevent mold.
- ● Desiccant packets – 1–2 packets (like silica gel) to absorb moisture in airtight containers.
- ● Magnifying glass – Helps spot tiny seeds in intricate pods (e.g., lupine or delphinium).
Step-by-Step guide to harvesting flower seed pods
Zero-waste seed saving starts with proper technique—here’s how to collect viable seeds without damaging pods.
🌱 Step 1: Identify and Wait for Optimal Maturity
Harvest seed pods when they’ve fully matured but before they split open naturally. Most annuals develop dry, papery pods that turn tan, brown, or beige—this signals seeds are ready. For perennials like coneflowers, wait until the pod feels lightweight and hollow when tapped.
I check maturity daily during peak season. If pods open too soon, seeds scatter and lose viability. A quick twist test helps: gently squeeze the pod—if it resists but gives slightly, it’s prime. Avoid harvesting in damp conditions; moisture accelerates spoilage.
✂️ Step 2: Harvest Pods Without Damaging Seeds
Use clean, sharp pruning shears or scissors to snip pods at their stems. Cut ½ inch above the base to include the stem attachment point—this helps seeds stay intact during drying. Place harvested pods in a paper bag (not plastic) to allow airflow while preventing seed loss.
Never pull pods off plants—this risks tearing stems and exposing plants to disease. For delicate flowers like poppies, I use sterilized tweezers to pluck pods directly. Label each bag with the plant name and harvest date to track varieties.
🪴 Step 3: Dry Pods Properly for Seed Viability
Spread pods in a single layer on a screens or mesh tray in a dry, shaded area with good airflow (60–70°F). Avoid direct sunlight—it can overheat pods and reduce germination rates. Turn pods every 2–3 days to ensure even drying.
Drying takes 1–3 weeks, depending on humidity. Pods are ready when they rattle when shaken and seeds separate easily when pressed. I test a few pods early: if seeds pop out cleanly, the batch is ready. Store dried pods in paper envelopes in a cool, dark place.
💧 Step 4: Clean and Store Seeds for Long-Term Use
Once pods are fully dry, gently crush them over a clean sheet of paper to separate seeds from chaff. Use a fine-mesh sieve to sift out debris—this ensures only pure seeds remain. For sticky seeds (like milkweed), add a damp paper towel to the sieve to help release them.
Store seeds in labeled paper envelopes or glass jars with a silica gel packet to absorb moisture. Viable seeds last 1–5 years, depending on the species. I date each batch and note germination rates—this helps track which varieties perform best over time.
⏰ Step 5: Test Germination Before Storing Long-Term
Before final storage, conduct a germination test: place 10 seeds between damp paper towels in a ziplock bag and keep them in a warm (70–75°F) location. Check daily for sprouts—if 80% or more germinate within 10–14 days, the batch is viable.
If germination drops below 50%, store seeds in the freezer for 1–2 weeks to reset dormancy cycles. This trick often revives older seeds. Discard batches with <30% germination—they won’t yield reliable plants. Properly saved seeds give you a zero-waste, self-sustaining garden year after year.
Tips & tricks for perfect flower seed pod harvesting
These insider techniques will help you maximize seed viability and streamline the entire zero-waste process.
Maturity Test Precision: In Step 1, when checking for optimal maturity, focus on the pod's sound rather than just appearance. A fully mature pod should make a distinct rattling noise when gently shaken—this indicates seeds are loose inside and ready for harvest. For particularly stubborn pods, try the "float test": drop a few in water; mature pods will sink while unripe ones float.
Harvesting Technique for Delicate Pods: For flowers with fragile stems like poppies or delphiniums, I recommend using sterilized forceps instead of tweezers in Step 2. The wider grip gives you better control without crushing the delicate seed heads. Always harvest in the morning when dew has evaporated but humidity is still low—this reduces the risk of mold during drying.
Drying Environment Control: The 60–70°F drying range in Step 3 is ideal, but humidity matters more than temperature. If your climate is naturally humid, consider using a small fan on low setting to maintain airflow. I've found that placing pods on a mesh tray over a baking sheet (with a towel underneath to catch stray seeds) prevents moisture buildup while allowing circulation.
Seed Storage Organization: When labeling your paper envelopes in Step 4, include not just the plant name but also the harvest year and germination percentage from your test. I use colored stickers to categorize by seed type (annuals vs perennials) and store them in alphabetical order by botanical name. This system makes it effortless to find specific seeds when planning future gardens.
Pro Tips for Flower Seed Pods
- These insider techniques will help you maximize seed viability and streamline the entire zero-waste process.
- Maturity Test Precision: In Step 1, when checking for optimal maturity, focus on the pod's sound rather than just appearance.
- Harvesting Technique for Delicate Pods: For flowers with fragile stems like poppies or delphiniums, I recommend using sterilized forceps instead of tweezers in Step 2.
Frequently asked questions
Got questions about harvesting flower seed pods like a pro? Here are some of the most common ones—plus the answers you need for a smooth, zero-waste seed-saving experience!
When is the best time to harvest flower seed pods?
Harvest seed pods when they’re fully mature but before they split open or scatter seeds naturally. For most annuals, this means waiting until pods turn brown, dry, and crispy to the touch. Perennials often need a little longer—watch for seeds inside to look fully formed and dry.
How do I know if my seed pods are ready to collect?
Gently squeeze a pod—if it releases seeds easily, you’ve missed the window! Look for these clues: dry texture, brown or tan color, and no green stems. Some pods (like okra or milkweed) may even start cracking—harvest them before seeds fly away.
Can I save seeds from store-bought flowers?
Yes, but with a caveat: hybrid flowers (like many petunia or impatiens varieties) may not grow true from seed. Stick to heirloom or open-pollinated varieties for reliable results. If unsure, ask the nursery or check seed packets for “OP” labels.
What should I do if my seed pods are infested with bugs?
Don’t panic! Most pests (like aphids or beetles) won’t ruin your seeds. Simply rinse pods in cool water, let them dry in a well-ventilated area, and store seeds in a sealed container. For heavy infestations, freeze pods for 48 hours to kill pests before processing.
How do I store harvested seed pods for long-term use?
Keep pods in a cool, dry place (like a paper bag or envelope) until you’re ready to extract seeds. Once seeds are out, store them in an airtight container with a desiccant packet to prevent moisture. Label with the plant name and harvest date—seeds last 1–5 years depending on the type!
Wrapping up and next steps
From okoume trees to okoume seed pods, mastering the art of twist-free harvesting ensures a zero-waste garden while unlocking nature’s bounty. Whether you’re a seasoned gardener or just starting, these techniques make seed saving simple, rewarding, and eco-friendly. 🌱
Ready to try it? Grab your tools, step outside, and let the magic of flower seed pods transform your garden—one twist-free harvest at a time! Start saving seeds today!