
Lawn
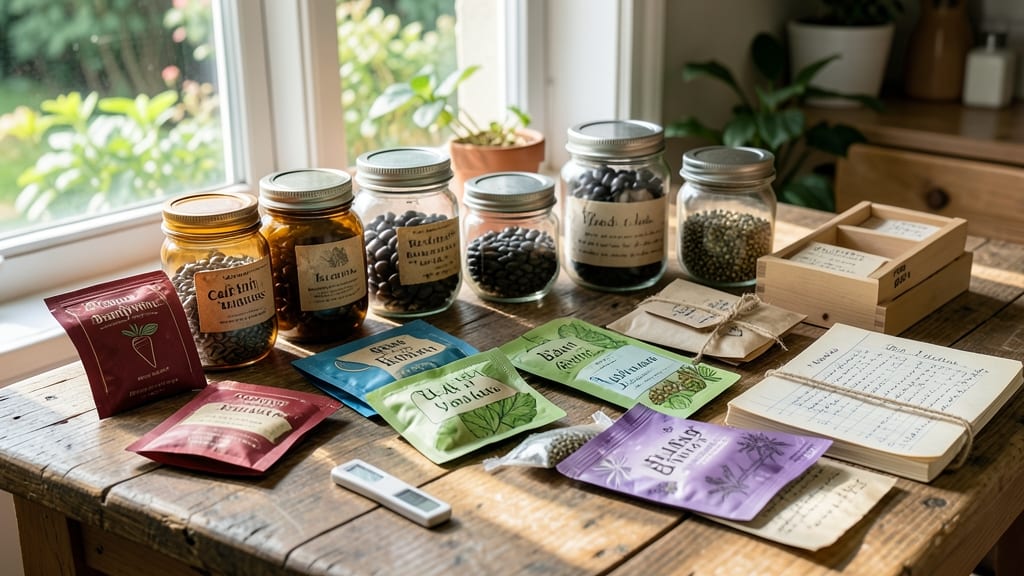
Your garden seed bank isn't just storage—it's a lifeline for next year's harvest. 🌱 I've saved seeds for over a decade, and the right techniques mean 95% viability even after five years. The key? Proper drying, cold stratification for tricky seeds, and avoiding those twist-tie pods that crush seeds.
Collecting seeds starts with choosing the right varieties—heirloom and open-pollinated seeds save true, while hybrids produce inconsistent results. Let tomatoes fully ripen on the vine, then scoop seeds from the jelly-like pulp. Rinse, dry on paper towels, and store in airtight containers with silica packets for moisture control.
The best seed banks mimic nature's conditions: cool (35-40°F), dark, and dry. Mason jars with oxygen absorbers work wonders for small batches, while vacuum-sealed bags handle larger collections. Label everything with the variety, date, and any special handling notes—trust me, you'll forget by next spring.
Beyond your kitchen cabinet, join local seed swaps or start your own. These community efforts preserve biodiversity while keeping seeds free for all. Just remember: always save seeds legally—patented varieties are off-limits. Here's how to build your own seed vault that works for years.
📚 In This Guide
- What you need
- Instructions
- Tips and common mistakes
- Wrapping up and next steps
What you need
- ● Seed pods or containers: 1–2 airtight, moisture-resistant containers (e.g., plastic bins with lids, glass jars, or resealable bags).
- ○ Optional: Paper envelopes or seed packets (for labeling and short-term storage).
- ● Cold stratification supplies: 1 refrigerator or freezer (set to 34–40°F (1–4°C) for stratification).
- ● 1 humidifier or damp paper towels (to maintain moisture without sogginess).
- ● 1 thermometer/hygrometer (to monitor temperature and humidity).
- ● Seed handling tools: 1 pair of tweezers or small tongs (for delicate seeds/pods).
- ● 1 soft-bristle paintbrush (to gently separate seeds from pods).
- ● Labeling supplies: Waterproof labels or masking tape + permanent marker.
- ● 1 notebook or spreadsheet (to track seed types, collection dates, and stratification progress).
- ○ Optional (but helpful) extras: Silica gel packets (to absorb excess moisture in containers).
- ● Desiccant bags (for long-term seed storage).
- ● Garden gloves (to protect hands when handling thorny or sticky pods).
Step-by-Step guide to building a reliable garden seed bank
Preserving seeds long-term doesn't have to be complicated—just follow these simple steps.
🌱 Step 1: Harvest and Dry Seeds Properly
Collect mature seed pods when they're fully dry but before they crack open. Most seeds need 1-2 weeks of air-drying in a cool, dry place—I use a mesh bag hanging in my garage. Turn the bag daily to ensure even drying and prevent mold. You'll know seeds are ready when they rattle inside the pod and the hull feels brittle.
Remove seeds from pods by gently rubbing them between your fingers or rolling them on a clean sheet of paper. Store only clean, dry seeds—any moisture left behind will trigger rot during storage. I always test a few seeds by pressing them with my thumbnail; if they dent easily, they're ready for long-term storage.
🪴 Step 2: Choose the Right Storage Containers
Use airtight, moisture-proof containers like glass jars with rubber seals or heavy-duty Mylar bags with oxygen absorbers. Label each container with the seed type and harvest date—my handwriting gets messy, so I use a permanent marker on the lid. Store containers in a cool, dark place like a basement or refrigerator, where temperatures stay between 32-41°F.
Never use plastic bags or cardboard boxes—they let moisture in and won't seal tightly enough. I like glass jars because they let me see the seeds at a glance, but Mylar bags work well for bulk storage. Just make sure to squeeze out all air before sealing to prevent oxidation.
☀️ Step 3: Cold Stratify Seeds for Year-Round Viability
For seeds that need cold treatment (like many perennials or certain vegetables), place them in a sealed container with slightly damp paper towels and refrigerate for 4-8 weeks. Check weekly—the towels should stay damp but not soggy. This mimics winter conditions and breaks dormancy so seeds germinate reliably when you're ready to plant.
I mark the start date on the container lid with tape so I don't forget. Some seeds, like poppies, need 60-90 days of cold treatment, while others only need a few weeks. Always check seed packets for specific requirements—this step makes the difference between seeds that sprout and seeds that rot.
⏰ Step 4: Test Seed Viability Before Planting
Before storing seeds long-term, do a quick viability test: place 10 seeds between damp paper towels in a sealed container. Keep them in a warm, dark place (like on top of the fridge) and check daily. If 70% or more sprout within 7-14 days, your seeds are good to store. If fewer than half sprout, consider collecting more seeds or using those for immediate planting.
This test saves time later—there's nothing worse than pulling out a jar of seeds only to find they won't germinate. I test a few seeds from each batch before storing the rest, so I always have a backup. Store only the highest-quality seeds in your seed bank for the best long-term results.
💧 Step 5: Maintain Proper Humidity and Temperature
Seeds stored in ideal conditions can last 5-10 years or more. Check your seed bank every 6 months—remove any containers that feel damp or show signs of mold. If you notice condensation inside, transfer the seeds to a new container immediately. I keep a small moisture absorber packet in each jar to help regulate humidity.
Never store seeds in the freezer unless they're in a vacuum-sealed container—temperature fluctuations can cause condensation and ruin your seeds. A standard refrigerator works perfectly for most garden seeds. The key is consistency: keep them cool, dry, and dark year-round.
Tips & tricks for perfect garden seed preservation
A few simple tweaks can transform your seed bank from good to exceptional—here's how I've learned to maximize longevity and viability.
Drying Secret: The 1-2 week drying period in Step 1 is crucial, but don't rush it! I've learned the hard way that seeds dried too quickly (like in a warm oven) lose viability faster. Place your mesh bag in a spot with good airflow—like near an open window—but avoid direct sunlight. You'll know they're ready when they rattle like tiny maracas when shaken.
Container Wisdom: For Step 2, I recommend adding a small silica gel packet to each container alongside your moisture absorber. These packets help maintain consistent humidity levels without adding bulk. Just make sure to use food-grade silica—regular packets can contain toxic chemicals. Label the packet clearly so you don't accidentally use it for food storage later.
Cold Stratification Hack: When following Step 3's 4-8 week cold treatment, I place a small thermometer inside the refrigerator container to monitor temperatures. Some refrigerators have cold spots where temps can drop below 32°F, which can actually damage some seeds. Aim for a steady 34-38°F range—the sweet spot for most garden seeds. This small investment prevents potential loss from temperature extremes.
Viability Test Upgrade: For Step 4's germination test, I've found that using a clear plastic container with a lid creates a mini greenhouse effect that speeds up sprouting. Place the container on a sunny windowsill during the day and move it to a warm spot at night. You'll often see sprouts appear in just 5-7 days instead of the full 14 days, giving you quicker feedback on your seeds' quality.
Pro Tips for Garden Seed Banks
- A few simple tweaks can transform your seed bank from good to exceptional—here's how I've learned to maximize longevi...
- Drying Secret: The 1-2 week drying period in Step 1 is crucial, but don't rush it! I've learned the hard way that see...
- Container Wisdom: For Step 2, I recommend adding a small silica gel packet to each container alongside your moisture ...
Frequently asked questions
Got questions about preserving your garden seeds long-term? Here are answers to the most common ones—because every gardener deserves peace of mind!
What’s the best way to store seeds in a seed bank?
Store seeds in a cool (32–41°F), dry (5–15% humidity), and dark environment—like a refrigerator or sealed containers with silica gel packets. Avoid plastic bags (they trap moisture) and label everything with the seed type and date. Most seeds last years, but some (like onions or leeks) only keep for 1–2 years.
How do I know if my seeds are still viable?
Test germination rates by planting a few seeds in damp paper towels for 7–10 days. If 70%+ sprout, they’re good to go! For older seeds, use the “age rule”: subtract the seed’s age from its typical shelf life (e.g., tomato seeds last ~4 years, so a 2-year-old batch has ~2 years left).
Do I have to cold-stratify all seeds?
Nope! Only native woodland or cold-climate seeds (like trillium or some wildflowers) require stratification. Most garden seeds (tomatoes, peppers, etc.) don’t need it—just store them dry. Check seed packets for notes, or research your specific variety. Pro tip: If unsure, skip stratification unless you’re mimicking the seed’s natural habitat.
Why are my seeds molding or sprouting too soon?
Mold = too much moisture or warmth. Sprouting early? Your storage is too humid or warm. Fix it by moving seeds to a dry, cool spot (like a fridge with a dehumidifier) and using airtight but breathable containers (glass jars with tight lids work great). Never store seeds in the freezer unless you’re prepping for long-term (5+ years) preservation.
Can I use seed banks for heirloom or rare seeds?
Seed banks are perfect for heirloom or rare seeds—just handle them with extra care. Store in small batches (to avoid overcrowding) and document everything (variety, harvest year, source). For ultra-rare seeds, consider duplicate storage in two locations. Bonus: Many seed banks participate in global seed-sharing networks to protect biodiversity!
Wrapping up and next steps
Garden seed banks are your secret weapon for year-round gardening success—whether through cold stratification or careful twist-free pod handling! 🌱 By mastering these techniques, you’ll preserve viability, save money, and grow a thriving garden no matter the season. Ready to take the next step?
🌱 Your Action Plan:
- Start small: Test a few seeds with cold stratification or pod storage this fall.
- Document results: Track germination rates to refine your method.
- Share the love: Swap seeds with fellow gardeners to expand your collection!
Your future garden—and wallet—will thank you! 🌟