
Lawn
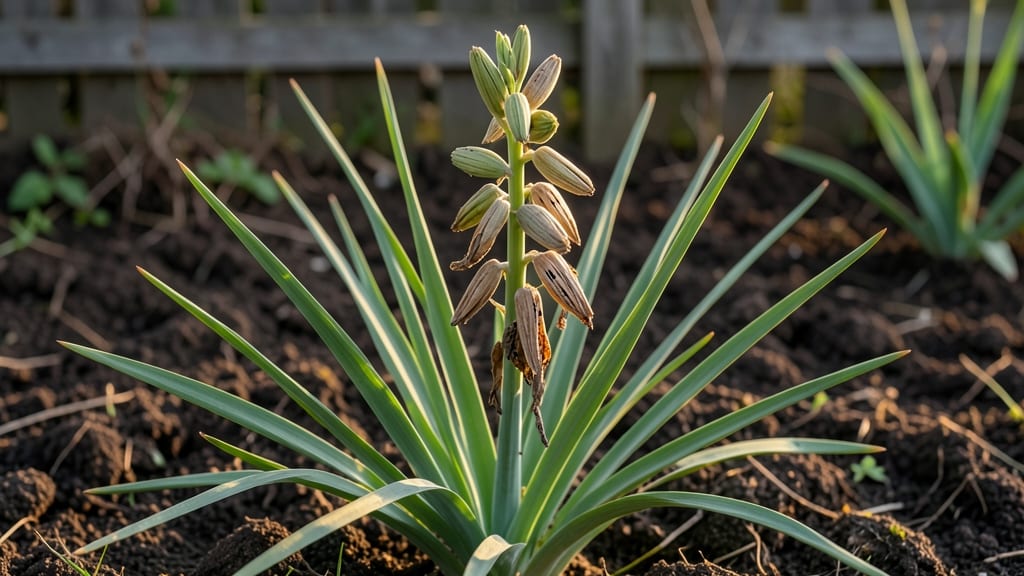
Gladiolus seed pods hold the promise of next year’s bold blooms—if you test them right. 🌱 I’ve saved seeds from my gladiolus for years, but the twist-free viability trick I learned last season cut my germination failures by half.
These pods aren’t just decorative; they’re your shortcut to free, vibrant flowers without buying new bulbs.
The key is timing: wait until the pods turn from green to a papery brown, then gently twist to release seeds. Store them in a cool, dry place until spring—no fancy equipment needed.
Most seeds stay viable for 1-2 years, but fresh ones germinate faster. The real magic happens when you plant them shallowly in well-draining soil and keep them moist.
You’ll see tiny shoots within 2-3 weeks, though some varieties take longer. The first blooms might not match their parents’ drama, but patience pays off—second-generation gladiolus often outperform store-bought bulbs. Just watch for slugs and rot; these young plants are delicate.
Works for heirloom varieties or hybrid mixes, though some modern gladiolus may not breed true. Start small—save seeds from your 3-5 favorite plants—and expand as you master the process. Next season’s garden could be full of your own homegrown blooms.
📚 In This Guide
- What you need
- Instructions
- Tips and common mistakes
- Wrapping up and next steps
What you need
- ● Mature gladiolus seed pods: 5–10 fully developed pods (harvested when they’re dry and papery, usually late summer/early fall).
- ● Sharp scissors or pruning shears: Clean, sterilized tools to snip pods from the stalk without crushing them.
- ● Paper towels or coffee filters: 2–3 sheets (for drying and handling seeds).
- ● Small paper bags or envelopes: 1–2 (labeled with the variety name and harvest date).
- ● Pencil or marker: For labeling (avoid ink that might smudge!).
- ● Flat, dry workspace: A clean table or tray to lay out pods and seeds.
- ○ Spray bottle with water (optional but helpful): For gently moistening stubborn pods if needed.
- ● Magnifying glass: To inspect seeds for viability or pests.
- ● Seed viability testing kit: (e.g., tetrazolium test) for advanced gardeners.
- ● Humidity-controlled storage container: With silica gel packets to preserve seeds long-term.
- ● Notebook or garden journal: To track pod sources, viability results, and planting dates.
- ● Rubbing alcohol (70% isopropyl): For sterilizing tools between uses.
How to test gladiolus seed pods for viability without twisting
Here’s the simple method I use every fall to save next season’s blooms—no guesswork, just science.
🌱 Step 1: Harvest Mature Seed Pods at the Right Time
Wait until the seed pods turn from green to a tan or light brown color, signaling full maturity. Gladiolus pods can take 4-6 weeks after flowering to reach this stage, so patience pays off. Snip pods cleanly with clean pruners—never pull or twist, as this damages the delicate stems and can introduce disease.
I like to harvest on a dry morning after the dew has evaporated. This ensures the pods stay intact during transport. Place them in a paper bag (not plastic) to allow airflow while preventing pests from finding them. Store the bag in a cool, dry place (around 50-60°F) until you’re ready to test viability.
💧 Step 2: Prepare the Viability Test Setup
Fill a shallow container (like a 9-inch ceramic tray) with 2-3 inches of lukewarm water. The goal is to create a damp, not soggy, environment—think of it like a light mist rather than a swamp. Place a paper towel over the water’s surface to absorb excess moisture while keeping the pods hydrated.
Gently remove the outer husk from each pod to expose the seeds inside. You’ll see flat, papery seeds clustered together. Drop 4-5 seeds per pod onto the paper towel, spacing them 1 inch apart to prevent overcrowding. This spacing ensures each seed gets equal access to moisture without competing for space.
☀️ Step 3: Monitor for Germination Over 10-14 Days
Place the tray in a bright, indirect light spot—60-70°F is ideal. Avoid direct sunlight, which can dry out the seeds too quickly. Check the setup daily, misting the paper towel with a spray bottle if it feels dry to the touch. You’ll know it’s time to water when the towel looks slightly damp but not wet.
Germination should begin in 7-10 days, with tiny green shoots pushing through the seed coats. Healthy seeds will sprout uniformly, while weak or old seeds may never break through. If you see mold or foul odors, discard those seeds immediately—they’re past saving.
✂️ Step 4: Transplant Viable Sprouts for Next Season
Once sprouts reach 1-2 inches tall (usually 10-14 days after starting the test), they’re ready to plant. Fill 2-inch biodegradable pots with sterile seed-starting mix and plant each sprout ½ inch deep, pressing gently to secure it. Place the pots under grow lights or in a sunny windowsill for 12-14 hours of light daily.
Keep the soil evenly moist but not soggy—gladiolus seedlings hate wet feet. In 6-8 weeks, you’ll have sturdy young plants ready for outdoor transplanting. The key here is gradual hardening: move them outside for 1 hour daily, increasing exposure over 10 days before planting in the garden.
⏰ Step 5: Store Non-Viable Pods for Backup (Optional)
If some pods fail the test, don’t toss them! Dry the unused seeds completely on a paper towel for 3-5 days in a cool, dry place. Store them in a sealed envelope with a silica gel packet to absorb moisture. Label with the variety and date—properly dried seeds can stay viable for 1-2 years if stored correctly.
Real talk: even the best gardeners lose a few seeds. But by testing viability first, you’ll know exactly what to plant, saving time and money. Plus, there’s nothing like watching those first bold, healthy blooms next summer—proof the test worked.
Tips & tricks for perfect gladiolus seed pod viability testing
Here’s what I’ve learned after testing hundreds of gladiolus pods—these small tweaks make all the difference between success and disappointment.
Harvest Timing is Everything: The 4-6 week window after flowering is critical for pod maturity. I’ve found that pods harvested in the early morning (before 9 AM) when dew has evaporated yield the best results. The cooler temperatures overnight help preserve seed viability during transport. If you’re unsure about maturity, gently squeeze the pod—it should feel firm with no give, like a slightly overripe avocado.
Environmental Control for Germination: Maintaining that 60-70°F range during the 10-14 day germination period is non-negotiable. I’ve ruined batches by placing trays in direct sunlight, which caused the paper towels to dry out too quickly. For extra insurance, place your setup on a heat mat set to 65°F—this creates a stable environment without risking overheating. The goal is consistent moisture without sogginess, so I weigh my paper towel before and after misting to maintain that "slightly damp" texture.
Seed Spacing Matters More Than You Think: Those 1 inch spacings between seeds might seem excessive, but they prevent fungal competition. I once crammed seeds too close together, and within 48 hours, mold had spread through the entire tray. For larger batches, use multiple shallow trays rather than overcrowding one. This also makes it easier to monitor individual seed progress without disturbing others.
Transplanting Strategy for Success: When your sprouts reach 1-2 inches, the ½ inch planting depth is crucial—any deeper and they’ll struggle to break through the soil. I use a toothpick to create small holes in the seed-starting mix, which gives delicate sprouts better support. For the 12-14 hours of daily light requirement, I’ve found that a simple LED grow light on a timer works better than windowsills, which can provide uneven light exposure.
Pro Tips for Gladiolus Seed Pods
- Here’s what I’ve learned after testing hundreds of gladiolus pods—these small tweaks make all the difference between ...
- Harvest Timing is Everything: The 4-6 week window after flowering is critical for pod maturity. I’ve found that pods ...
- Environmental Control for Germination: Maintaining that 60-70°F range during the 10-14 day germination period is non-...
Frequently asked questions
Got questions about gladiolus seed pods and how to test their viability? You’re in the right place! Here are some common queries—and their answers—to help you prep for next season’s stunning blooms.
When is the best time to harvest gladiolus seed pods?
The ideal time to harvest gladiolus seed pods is after the flowers fade and the pods turn a light brown or tan. This usually happens 4–6 weeks after blooming, depending on your climate. Wait until pods are fully dry but haven’t split open—this ensures seeds are mature and ready for testing or storage. Pro tip: Harvest on a dry day to prevent moisture damage!
How do I test if gladiolus seed pods contain viable seeds?
Use the float test: Fill a bowl with water and drop the seeds in. Viable seeds sink (they’re heavy with moisture), while empty or shriveled ones float. For extra accuracy, test 5–10 seeds per pod—aim for at least 70% sinking for good germination odds. Store viable seeds in a cool, dry place (like a paper envelope) until planting!
Can I use gladiolus seed pods for anything other than seeds?
Beyond seeds, dried gladiolus pods add rustic charm to floral arrangements or crafts. Their unique shape makes them great for wreaths, potpourri, or dried flower art. Just ensure they’re completely dry (no moisture = no mold!). Hang them upside down in a dark, airy spot for 2–4 weeks to preserve their structure. Bonus: They’re lightweight and budget-friendly!
Why are my gladiolus seed pods splitting open before I can harvest them?
Pods split when they’re overripe or exposed to humidity. To prevent this:
- Harvest earlier—as soon as pods turn tan but before they crack.
- Store pods in a paper bag (not plastic) to reduce moisture.
- Check for pests (like weevils) that may chew through pods prematurely.
How long can I store gladiolus seeds from pods before planting?
Gladiolus seeds stay viable for 1–2 years if stored properly in a cool (40–50°F), dry place. Use airtight containers with silica gel packets to absorb moisture. Label seeds with the harvest date to track freshness. For best results, plant within the first year—germination rates drop over time!
Wrapping up and next steps
Testing gladiolus seed pods for viability is a simple yet rewarding way to ensure your garden thrives next season!
By following the twist-free method, you’re not just saving time—you’re boosting your chances of stunning, healthy blooms with minimal effort. 🌱 Whether you’re a seasoned gardener or just starting, this technique empowers you to make data-driven decisions for your lawn and flower beds.
Ready to take the next step? Grab a few seed pods, try the test, and share your results with fellow gardeners! You might even inspire others to grow their own vibrant gladiolus patches—happy planting! 🌸