
Lawn
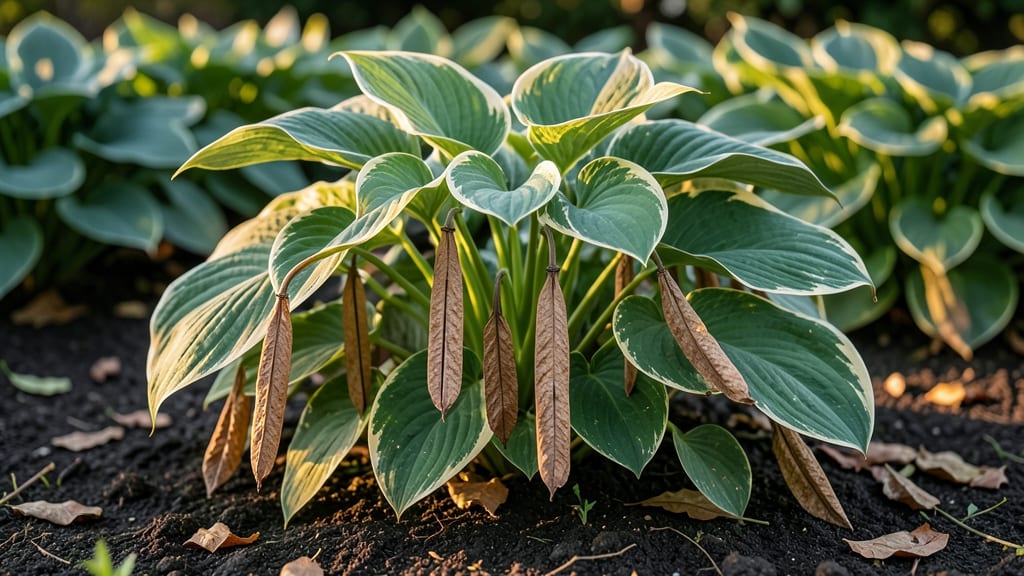
Harvesting hosta seed pods before they twist saves seeds that grow into thriving plants next spring. 🌱 I’ve collected hundreds of these pods over the years, and the key is timing—wait until they’re brown but still intact, then gently twist them open to reveal the plump, black seeds inside.
You’ll need just a few simple tools: clean scissors or pruners, a paper bag for collecting pods, and a dry, dark spot for storage. Unlike division, which gives you instant plants, seeds take patience—germination can take weeks or even months—but the payoff is worth it for rare varieties.
Once stored properly, these seeds stay viable for years, giving you a free source of new hostas. The first sprouts appear delicate but toughen up quickly, and with the right care, you’ll have lush foliage by next summer.
Best for patient gardeners who love experimenting with new varieties—though it’s not the fastest method, the satisfaction of growing from seed is unmatched. Here’s how to do it right the first time.
📚 In This Guide
- What you need
- Instructions
- Tips and common mistakes
- Wrapping up and next steps
What you need
- ● Gearing up to harvest hosta seed pods? Here’s everything you’ll need to ensure a smooth, twist-free collection for next year’s garden gems! 🌱✨
- ● Pro tip: 💡 Harvest pods on a dry, overcast day to minimize seed loss from wind or animals!
Step-by-Step instructions for harvesting hosta seed pods
Here’s how to collect viable hosta seeds without damaging the plant or losing germination potential.
🌿 Step 1: Identify and Locate Mature Seed Pods
Hostas produce seed pods in late summer or early fall after flowering. Look for pods that have turned tan or brown and feel dry to the touch—these are ready for harvest. Avoid green pods, as they’re still developing. I check my hostas every 3-5 days starting in August, running my fingers gently over the foliage to spot the small, pea-sized pods.
Use a small hand lens if needed—mature pods will have a papery texture and may even split open slightly at the seams. The best time to harvest is on a dry morning after dew has evaporated, which prevents moisture from sticking to the seeds and promoting mold.
✂️ Step 2: Carefully Remove Seed Pods Without Twisting
Grasp the pod firmly but gently between your thumb and forefinger, avoiding the stem. Twisting or pulling too hard can snap the stem and damage the plant. Instead, use a small pair of scissors or clean pruners to snip the pod cleanly from the stem. I like to leave about ½ inch of stem attached—this helps preserve the seed’s viability during drying.
Place the harvested pods in a paper bag (not plastic) to allow airflow. Label each bag with the hosta variety and harvest date. If you’re harvesting multiple varieties, keep them separate—cross-pollination can occur, and you’ll want to track parent plants for future reference.
🪴 Step 3: Dry and Store Seeds Properly
Spread the seed pods on a clean, dry paper towel in a single layer and place them in a warm, dry location out of direct sunlight. I use a mesh screen or a cardboard box with holes punched in the sides to ensure good airflow. The pods need 2-4 weeks to fully dry—you’ll know they’re ready when they crumble easily between your fingers.
Once dry, open the pods carefully and extract the seeds. Store them in a small envelope or airtight container with a silica gel packet to absorb moisture. Keep the container in a cool, dark place (like a refrigerator) for up to 12 months. Label the container with the hosta variety and harvest year—seeds lose viability over time, so freshness matters.
🌱 Step 4: Test Seed Viability Before Planting
Before sowing, test a few seeds to ensure they’re still viable. Place 5-10 seeds between two damp paper towels in a sealed plastic bag. Keep them in a warm spot (around 65°F) and check daily. Healthy seeds should sprout within 7-14 days. If fewer than half sprout, the remaining seeds may have lower viability, but you can still plant them—just expect a lower germination rate.
Sow viable seeds in late winter or early spring in a light, well-draining potting mix. Press them ¼ inch deep and keep the soil consistently moist until germination. Hosta seeds can take 3-6 weeks to sprout, so patience is key. Once seedlings emerge, provide bright, indirect light and keep them warm until they’re strong enough to transplant outdoors in late spring.
Tips & tricks for harvesting hosta seed pods
These simple strategies will help you collect the best hosta seeds without stressing your plants.
Timing is Everything: The 3-5 day check schedule starting in August is perfect because it catches pods at their peak maturity. I’ve learned that harvesting too early (when pods are still green) or too late (when they’ve already split open) drastically reduces seed viability. Look for that papery texture—it’s your green light to harvest!
Gentle Handling Matters: In Step 2, when removing pods, remember that hosta stems are delicate. I’ve snapped stems trying to pull pods off—always use clean pruners and leave that ½ inch of stem attached. This small detail makes a huge difference in seed survival rates during drying.
Drying Conditions: The 2-4 week drying period in Step 3 is non-negotiable for seed quality. I’ve tried rushing this process with a hairdryer, but it actually reduces germination. Instead, create airflow with a mesh screen or cardboard box with holes, and keep it consistently warm but out of direct sunlight. This mimics natural drying conditions perfectly.
Viability Test Hack: When testing seeds in Step 4, use 5-10 seeds from each variety to get accurate results. I’ve found that testing just 3 seeds can give misleading results—sometimes they all sprout by chance even if the batch has low viability. The warm 65°F spot is crucial too; cooler temperatures slow germination and can make you think seeds aren’t viable when they actually are.
Pro Tips for Hosta Seed Pods
- These simple strategies will help you collect the best hosta seeds without stressing your plants.
- Timing is Everything: The 3-5 day check schedule starting in August is perfect because it catches pods at their peak ...
- Gentle Handling Matters: In Step 2, when removing pods, remember that hosta stems are delicate. I’ve snapped stems tr...
Frequently asked questions
Got questions about hosta seed pods?
You’re not alone! Here are some of the most common queries—and their answers—to help you master the twist-free harvest for next year’s hostas.
When do hosta seed pods ripen, and how will I know they’re ready?
Hosta seed pods typically ripen in late summer to early fall (August–October, depending on your climate). They’re ready when they turn tan or light brown and feel dry to the touch. A gentle squeeze should release seeds easily—if they’re still green or moist, wait a few more days. Pro tip: Avoid harvesting if rain is forecasted, as damp pods may mold.
How long do hosta seeds stay viable inside the pods?
Freshly harvested hosta seeds retain viability for 1–2 months if stored properly in a cool, dry place (like a paper envelope). After that, germination rates drop significantly. For best results, sow seeds within 4–6 weeks of harvest. If you can’t plant them immediately, store pods in a paper bag (not plastic) in the fridge for up to a year.
What if my hosta seed pods twist or shatter before I can collect them?
Twisting or shattering is common in humid conditions! To prevent this, harvest pods early when they’re still firm but turning color. If pods already split, scoop out seeds with a spoon or tweezers and store them in a dry container. Bonus tip: Place a breathable mesh bag over the plant to catch stray seeds without smothering it.
Can I grow hostas from seed pods, or should I buy seeds?
While store-bought seeds offer guaranteed varieties, growing from your own pods is free and fun—plus, you’ll get unique hybrids. Just know that seedlings may not match the parent plant’s traits. For reliable results, start with a few store-bought seeds alongside your homegrown batch. Pro move: Label pods by hosta variety if possible!
What should I do if my hosta seed pods develop mold or pests?
Mold or pests (like slugs or mites) can ruin seed pods. If you spot fuzzy growth or tiny bugs, remove affected pods immediately. To prevent issues:
- Harvest pods during dry weather.
- Store them in a well-ventilated container.
- Check for pests regularly and treat with neem oil if needed.
Wrapping up and next steps
Growing hosta seed pods into thriving plants is a rewarding journey that combines patience and a little know-how! By following the right steps—from harvesting to drying and storing—you’re setting yourself up for a bountiful batch of seeds next season.
Whether you’re a seasoned gardener or just starting out, these tips ensure you maximize your chances of success.
Now that you’re armed with the knowledge, why not give it a try? Grab those seed pods, follow the steps, and enjoy the satisfaction of nurturing new life from your garden. Happy gardening! 🌱