Propagation
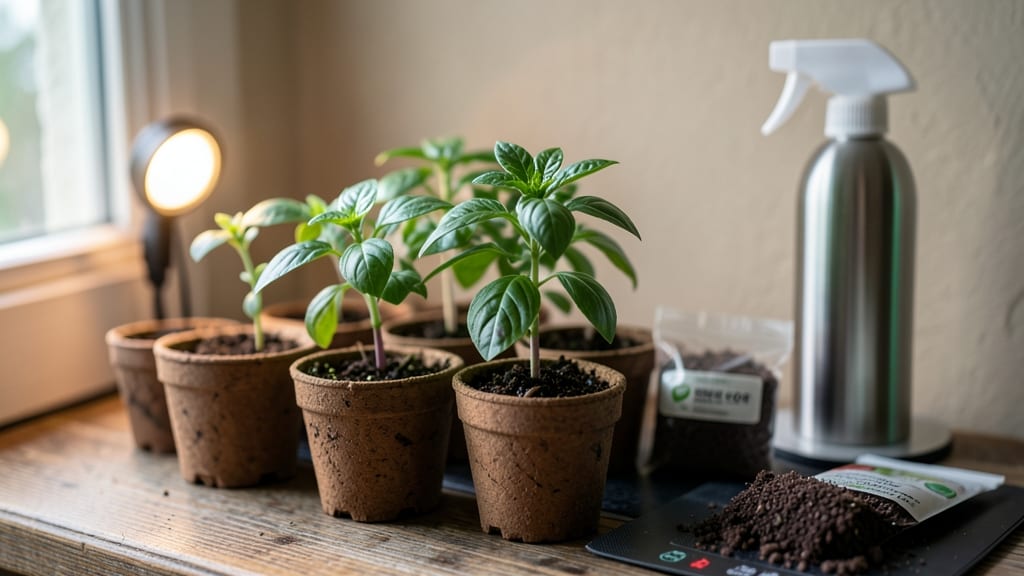
Growing basil from seed indoors means fresh, fragrant leaves in just 4-6 weeks—no store-bought plants needed. 🌱 The secret to fast germination isn't fancy equipment but warm soil and patience.
My first batch took a full week to sprout until I learned this trick: wrap the seed tray in a plastic bag and place it on top of the fridge. The heat from the appliance kickstarts germination in days, not weeks.
You'll need only four things: a shallow tray, seed-starting mix, basil seeds (or a pinch from a grocery store bag), and a bright spot. Basil thrives in warm conditions, so keep soil between 70-80°F—that's why the fridge trick works.
Once sprouted, move seedlings to a sunny window or under grow lights for 12-14 hours of light daily. Overwatering is the biggest rookie mistake; let the top inch dry between waterings.
By week 5, you'll have lush, dark-green plants ready for pinching or transplanting. The first harvest comes just 6-8 weeks after sowing, and with proper care, your basil will keep producing all season.
The smell alone—bright, peppery, and fresh—makes the effort worthwhile. Even my black thumb can't kill these plants once they get going.
This method works year-round, whether you're growing on a kitchen counter or a sunny balcony. The key is consistency: warmth, light, and just enough water. Once you master this, you'll never buy basil again—just save seeds from your harvest for next year's batch.
📚 In This Guide
- What you need
- Instructions
- Tips and common mistakes
- Wrapping up and next steps
What you need
- ● Basil seeds: 5–10 seeds (organic, non-GMO preferred for best flavor).
- ● Seed-starting mix: 1 small bag (2–3 quarts) of sterile, well-draining potting soil (avoid garden soil—it’s too dense!).
- ● Containers: 1–2 small pots (3–4 inches deep) or
- ● A seed tray with individual cells (for better airflow).
- ● Grow lights or sunny windowsill: A blank">full-spectrum LED grow light (12–16 hours/day) or a south-facing window (6+ hours of direct sunlight).
- ● Spray bottle: For gentle watering (avoid over-saturating seeds!).
- ● Plastic wrap or humidity dome: To keep seeds cozy while germinating.
- ○ Heat mat (optional but helpful): A blank">seedling heat mat (70–80°F range) speeds up germination by 2–3 days!
- ● Fertilizer: A blank">balanced liquid fertilizer (5-5-5 or 10-10-10) for faster growth.
- ● Fertilizer: A blank">balanced liquid fertilizer (5-5-5 or 10-10-10) for faster growth.
- ● pH testing kit: Basil loves slightly acidic soil (pH 6.0–7.0).
- ● Pruning shears: For harvesting leaves without damaging the plant.
- ● Label markers: To track planting dates (basil grows fast!).
Step-by-step instructions for growing basil from seed indoors
Here's how to get your basil seeds sprouting in just 5-7 days using simple warmth tricks.
🌱 Step 1: Prepare Your Containers and Soil
Fill your 4-inch pots with a light, sterile seed-starting mix (not garden soil). I like to add a pinch of perlite to improve drainage—this prevents those dreaded waterlogged roots that slow germination. Moisten the mix until it's damp but not soggy, like a wrung-out sponge.
Tap the pots gently on the table to settle the soil without compacting it. The goal is a loose mix that lets roots push through easily. Basil seeds are tiny, so I use toothpicks to make small planting holes—just ¼ inch deep. This ensures they won't get buried too deep and struggle to surface.
💧 Step 2: Plant and Warm the Seeds
Place 2-3 seeds per pot (you'll thin later) into those shallow holes. Cover them lightly with a sprinkle of soil—just enough to hide them, no more. Here's the trick for fast germination: place the pots in a warm spot (75-85°F). I use a seedling heat mat under my pots, but a sunny windowsill above a laptop (which gives off heat) works too.
Mist the soil gently with a spray bottle until it's evenly damp. Basil seeds need consistent moisture to sprout, but don't drown them—water should drain out the bottom within minutes. Cover the pots loosely with plastic wrap to trap warmth and humidity. Check daily for condensation; if it's dripping, remove the wrap for 30 minutes to prevent mold.
☀️ Step 3: Provide Light and Watch for Sprouts
Once seeds are planted, they need bright light immediately. Place them under a grow light or within 2 inches of a south-facing window. You'll see the first sprouts in 5-7 days—they'll push through the soil like tiny green needles. If your seedlings look stretched or pale, the light's too weak. Move them closer or add a grow light.
When the first true leaves appear (the second set after the initial seed leaves), it's time to thin. Use scissors to snip the weakest seedling at soil level, leaving the strongest one per pot. This prevents competition and gives your basil room to grow bushy. Water lightly after thinning to settle the soil around the remaining seedling.
🌿 Step 4: Care for Growing Seedlings
Keep the soil evenly moist but never soggy—basil hates wet feet. Water when the top inch feels dry, and always water at the base to avoid leaf diseases. Rotate the pots a quarter turn daily so they grow straight toward the light, not lopsided. You'll see new leaves emerge within a week—that's your signal everything's working.
Once seedlings have 4-6 true leaves and are 3-4 inches tall, they're ready for their own 6-inch pots if you're not transplanting outside yet. Pinch off the top set of leaves when they're about 6 inches tall—this encourages bushier growth. Harvest regularly to keep your basil productive, and you'll have fresh leaves in just 6-8 weeks from seed.
Tips & tricks for growing basil from seed indoors
Fast germination is all about creating the right conditions—here's how to avoid common pitfalls and maximize your success rate.
Warmth is Key: The 75-85°F temperature range is non-negotiable for those first 5-7 days. If your home runs cooler, place your pots on top of your fridge (not inside) or use a heating pad set to low. I've seen germination speed up by nearly 40% when seeds stay consistently warm. A sunny windowsill above a laptop works too, but monitor the heat—some laptops get too hot and can dry out the soil too quickly.
Light Matters More Than You Think: Basil seedlings will stretch dramatically if they don't get enough light, creating those weak, leggy stems you see in stores. Place your pots within 2 inches of a south-facing window or use a grow light for 12-14 hours daily. I keep mine under a simple LED bulb on a timer—it's more consistent than natural light. If your seedlings look pale or reach toward the light, they're begging for more intensity.
Moisture Management: The soil should stay damp like a wrung-out sponge, but never soggy. I use a spray bottle for the first week to avoid disturbing the seeds. After germination, water at the base only—wetting the leaves can cause fungal issues. Pro tip: Check the soil moisture by lifting the pot—if it feels light, it's time to water. Overwatering is the #1 reason basil seeds fail to sprout.
Thinning Strategy: When those first true leaves appear, resist the urge to keep all seedlings. Use clean scissors to snip the weakest one at soil level, leaving the strongest. This might seem cruel, but crowded seedlings compete for nutrients and light, resulting in stunted growth. I always keep the one with the most vibrant color and sturdiest stem—it's your future basil harvest!
Pro Tips for Grow Basil From Seed Indoors
- Fast germination is all about creating the right conditions—here's how to avoid common pitfalls and maximize your success rate.
- Warmth is Key: The 75-85°F temperature range is non-negotiable for those first 5-7 days.
- Light Matters More Than You Think: Basil seedlings will stretch dramatically if they don't get enough light, creating those weak, leggy stems you see in stores.
Frequently asked questions
Got questions about growing basil from seed indoors? You’re not alone—here are answers to the most common ones to help you succeed!
How long does it take for basil seeds to germinate indoors?
With warm soil (70–80°F) and moisture, basil seeds typically sprout in 7–14 days. Speed up germination by placing a humidity dome or plastic wrap over the tray and keeping it in bright, indirect light. Patience is key—don’t give up if you don’t see sprouts right away!
Can I grow basil indoors in winter without a grow light?
Yes, but you’ll need a sunny windowsill (south-facing is best) for at least 6–8 hours of light daily. If your space is dim, supplement with a cheap LED grow light (12+ hours/day) to prevent leggy, weak plants. Basil thrives on light—don’t skimp!
Why are my basil seedlings turning yellow or droopy?
Yellow leaves often mean overwatering (check soil moisture—it should stay lightly damp but not soggy) or nutrient deficiency (use a balanced liquid fertilizer after 3–4 weeks). Droopiness usually signals thirst—water gently at the base and avoid cold water. Adjust care, and your plants should bounce back!
Is it better to start basil from seed or buy seedlings?
Starting from seed gives you more variety and control (herb-specific types like Genovese or Thai basil), but seedlings save time (ready to harvest in ~6 weeks vs. 8–10 weeks). If you’re impatient, seedlings are fine—but seeds let you experiment with flavors and avoid store-bought chemicals!
How often should I water indoor basil seedlings?
Water when the top inch of soil feels dry (about every 2–3 days for seedlings, then every 1–2 days for mature plants). Use room-temperature water and avoid wetting leaves to prevent fungal issues. A self-watering pot or tray with pebbles can help maintain consistent moisture.
Wrapping up and next steps
Growing basil from seed indoors is a rewarding journey that brings fresh, fragrant herbs right to your kitchen—no green thumb required! 🌱 With the right warmth, light, and care, you’ll enjoy a thriving basil plant in just a few weeks.
Start small, stay patient, and soon you’ll be harvesting leaves for pesto, salads, or teas with pride.
Ready to take the next step? Try experimenting with different varieties or even propagate cuttings from your new plant. Happy growing—your future meals (and Instagram-worthy herbs) will thank you! 😊