
Lawn
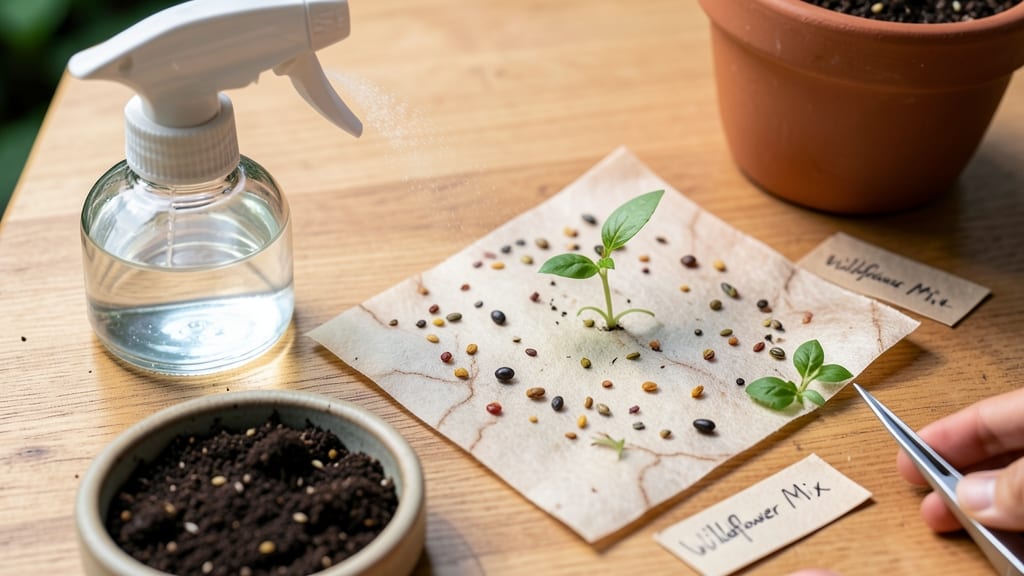
Transforming old paper into blooming wildflowers is easier than you think. 🌱 Making plantable seed paper turns scrap paper into a living gift that grows into vibrant wildflowers—no soil required until planting. The process is simple, eco-friendly, and perfect for kids or creative gardeners.
You’ll need basic supplies: paper pulp (from recycled paper), wildflower seeds, water, and a binding agent like cornstarch or flour. Mix the pulp with seeds, shape into sheets, and let dry completely. The result? Edible, biodegradable paper that bursts into color when planted.
Once dry, cut into shapes—think greeting cards, bookmarks, or confetti—and plant them directly in soil. Within weeks, you’ll see delicate blooms emerge, turning every cut-out into a living decoration. Perfect for weddings, classrooms, or just adding whimsy to your garden.
The best part? No special tools or skills needed. Even if your first batch looks lumpy, it’ll still grow—just adjust moisture and seed distribution next time. Let’s get started!
📚 In This Guide
- What you need
- Instructions
- Tips and common mistakes
- Wrapping up and next steps
What you need
- ● Seed blend: 1 cup of wildflower or herb seeds (organic, untreated—think marigolds, sunflowers, or basil). Pro tip: Mix 3-4 types for a vibrant garden! 🌻
- ● Paper pulp: 1 cup of blank">recycled paper (printer paper, junk mail, or egg cartons) torn into tiny pieces.
- ● Water: 2 cups (distilled or boiled for best results).
- ● Blender: A high-speed blender (like a Vitamix or Ninja) to pulverize the paper.
- ● Mold & deckle: A DIY frame (wooden or plastic) or a store-bought blank">paper-making kit.
- ● Sieve or fine mesh screen: For draining excess water.
- ● Absorbent surface: A towel, felt sheet, or newspaper to press the paper.
- ● Rolling pin or heavy book: To flatten the paper evenly.
- ● Natural dyes (turmeric, beet juice) for colored paper.
- ● Essential oils (lavender, citrus) for scent.
- ● Glitter or biodegradable confetti for a festive touch.
- ● Non-toxic glue (if reinforcing edges).
- ● A clean, flat workspace (outdoors or in the sink!).
- ● Patience—let the paper dry for 24-48 hours before planting.
- ● Sunlight or a warm, dry spot for curing.
Step-by-step instructions for making plantable seed paper
Here's how to turn recycled paper and wildflower seeds into biodegradable paper that grows into vibrant blooms.
🌱 Step 1: Mix the Paper Pulp and Seeds
Tear the scrap paper into small pieces—about the size of your thumbnail—and soak them in warm water for 10-15 minutes until they soften. Drain the water, then blend the soaked paper with 1 cup of water until it forms a smooth, thick pulp. This is your base, and it should feel like wet mashed potatoes.
While the pulp is still warm, stir in 1 tablespoon of wildflower seeds (about 1 teaspoon per sheet). Make sure the seeds are evenly distributed—this ensures every cut-out has a chance to grow. I like to fold the pulp gently with a spoon to break up any clumps. Here's the thing—if the mixture feels too dry, add a splash of water to keep it workable.
💧 Step 2: Spread the Mixture Evenly
Lay a screen or mesh (like an old window screen) over a flat surface. Pour the pulp-seed mixture onto the screen, then use a spatula or your hands to spread it into an even layer—about 1/8 inch thick. The goal is consistency, so don’t press too hard, but make sure there are no thick or thin spots. You’ll see the seeds peeking through in some areas—that’s perfect.
Let the mixture sit uncovered for 15-20 minutes until it feels slightly dry to the touch but still damp. You’ll know it’s ready when you can gently lift a corner without the pulp sticking to your fingers. If it’s still too wet, wait a few more minutes. Patience here prevents tearing when you transfer it later.
☀️ Step 3: Press and Dry the Paper
Place a clean cloth or paper towel over the pulp layer, then press down firmly with another flat surface—like a heavy book or rolling pin—to squeeze out excess moisture. Flip the screen and repeat on the other side. This step is crucial because it ensures your seed paper stays flat and sturdy once dry.
Remove the screen and let the paper dry completely in a shady, well-ventilated spot for 24-48 hours. Avoid direct sunlight at first—it can cause uneven drying and warping. Once fully dry, you’ll have a crisp, plantable sheet that’s ready to be cut into shapes. Pro tip: Store extras in a dry place until you’re ready to plant.
✂️ Step 4: Cut and Plant Your Designs
Use scissors or a craft knife to cut your seed paper into shapes—think flowers, confetti, or even messages. The beauty of this project is that every scrap can grow! Place the cut-outs on top of 1-2 inches of moist soil in a tray or garden bed. Press them gently so they make contact with the earth, then mist lightly with water to help them settle.
Keep the soil consistently moist (not soggy) for the first 7-10 days—this is when the seeds germinate. You’ll see tiny sprouts pushing through the paper in about a week. Once the seedlings are 2-3 inches tall, you can transplant them to a garden or pot. The paper will decompose naturally, leaving your wildflowers to thrive.
Tips & tricks for perfect plantable seed paper
These simple tricks will help you create sturdy, beautiful seed paper that grows wildflowers every time!
Pulp Consistency Matters: The 10-15 minute soak time is crucial—don't rush it! If your pulp feels too dry after blending, add just enough water to make it workable, but avoid making it too runny. The perfect consistency should hold together when pressed but still be pliable. Think of it like wet mashed potatoes that stick together when you press them.
Seed Distribution Secret: When mixing in your 1 tablespoon of wildflower seeds, use a spoon to gently fold them through the pulp rather than just stirring. This ensures even distribution so every cut-out has a chance to grow. You'll know it's perfect when you can see seeds peeking through the pulp in every section.
Drying Wisdom: The 24-48 hour drying time is your friend—don't rush it! Place your seed paper in a shady spot with good airflow to prevent warping. If you're short on time, you can speed up drying by placing it near a fan on low setting, but avoid direct heat sources. The paper should be completely dry and crisp before cutting—test by gently bending a corner.
Planting Hack: For best germination, press your cut-outs firmly into the soil so they make good contact with the earth. I like to mist them lightly with water after planting to help them settle. Remember, the first 7-10 days are critical for keeping the soil consistently moist—this is when those tiny seeds need all the help they can get to sprout!
Pro Tips for Make Plantable Seed Paper
- These simple tricks will help you create sturdy, beautiful seed paper that grows wildflowers every time!
- Pulp Consistency Matters: The 10-15 minute soak time is crucial—don't rush it! If your pulp feels too dry after blend...
- Seed Distribution Secret: When mixing in your 1 tablespoon of wildflower seeds, use a spoon to gently fold them throu...
Frequently asked questions
Got questions about crafting your own plantable seed paper? Here are some of the most common ones—plus answers to help you grow wildflowers with confidence!
How long does it take for seeds in paper to sprout?
Most wildflower seeds embedded in seed paper sprout within 7–21 days, depending on the species and conditions. Keep the paper moist (but not soggy) and in a warm, sunny spot for best results. Some seeds, like sunflowers, may sprout faster (5–10 days), while others, like cosmos, take longer.
Can I use regular paper instead of plantable seed paper?
Yes! You can make plantable seed paper from recycled paper, coffee filters, or even newspaper—just add wildflower seeds and natural glue (like flour paste). However, store-bought seed paper is pre-treated for faster germination and easier handling. For beginners, we recommend starting with pre-made paper to avoid guesswork.
How long will my seed paper last before planting?
Seed paper stays viable for 6–12 months if stored in a cool, dry place (like a sealed container). Avoid humidity or direct sunlight, which can degrade the paper and reduce germination rates. Label your creations with the seed type and date for easy tracking!
What if my seed paper doesn’t sprout? Troubleshooting tips.
If your seeds aren’t sprouting, check these common issues:
- Lack of moisture: Keep the paper damp (like a sponge) until sprouts appear.
- Poor sunlight: Most wildflowers need 6+ hours of sun daily—place near a sunny window or outdoors.
- Old seeds: Seeds lose viability over time; use fresh wildflower seeds for best results.
- Temperature shock: Avoid planting in frost or extreme heat (ideal range: 60–75°F).
Can I add other materials (like glitter or dyes) to seed paper?
While you can add decorative elements like biodegradable glitter or natural dyes (e.g., turmeric or beet juice), avoid synthetic additives—they may harm seeds or soil. Stick to non-toxic, organic materials to keep your eco-friendly project safe for wildlife and plants.
Wrapping up and next steps
Creating your own plantable seed paper is a rewarding way to reduce waste while bringing beauty and life to your garden! 🌱 With just a few simple materials and a little creativity, you can turn everyday scraps into eco-friendly art that grows into vibrant wildflowers.
Whether you're crafting gifts, decorating your yard, or teaching kids about sustainability, this project is both fun and impactful.
Ready to take the next step? Experiment with different seed blends, designs, or even scents—the possibilities are endless! Share your creations with friends or plant them in unexpected places to inspire others. Happy crafting, and may your wildflowers bloom with joy! 🌸