
Lawn
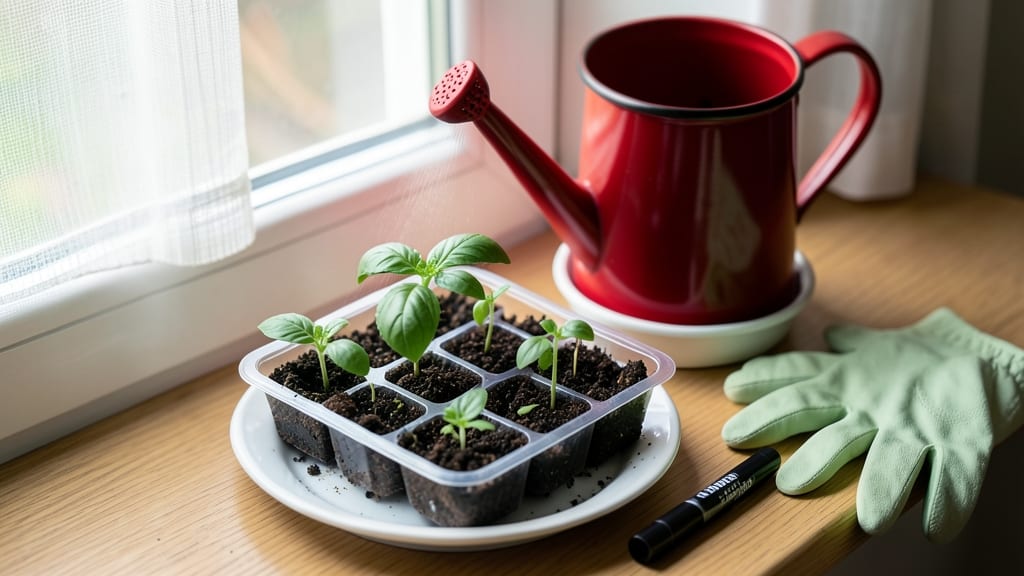
Watering seed trays feels like walking a tightrope—too much and roots drown, too little and seeds shrivel. 🌱 I’ve lost more seedlings to soggy soil than I’d like to admit, but the right method keeps them thriving from day one.
The secret isn’t just how much you water, but how you do it.
Bottom-watering is my go-to: fill a tray with an inch of water, let the soil soak up moisture from below, and drain excess after 10 minutes. A spray bottle works for delicate seeds, but avoid blasting them—gentle misting keeps soil damp without disturbing tiny sprouts.
Consistency is key: check soil daily with your finger; it should feel like a wrung-out sponge.
You’ll know you’re doing it right when seedlings stand tall with crisp leaves, not floppy or yellowing. Overwatering creates mold; underwatering leaves soil crusty. Both stunt growth. A humidity dome (plastic wrap over trays) helps retain moisture while you master the balance.
Start with a seedling heat mat if your space is chilly—cooler temps slow moisture evaporation. Once sprouts hit the light, reduce watering slightly. The goal? Seedlings strong enough to transplant without shock. Trust the process, and those fragile starts will reward you with lush, healthy plants.
📚 In This Guide
- What you need
- Instructions
- Tips and common mistakes
- Wrapping up and next steps
What you need
- ● Seed trays – Choose trays with drainage holes (6–12" wide, depth varies by seed type).
- ● High-quality seed-starting mix – Lightweight, sterile, and well-draining (e.g., Pro Mix or FoxFarm Seedling Mix).
- ● Watering can or spray bottle – Opt for a fine-rose nozzle (for gentle watering) or a spray bottle with a misting function (for delicate seeds).
- ● Flat tray or saucer – To catch excess water (place under trays to avoid soggy bottoms).
- ○ pH testing kit (optional but helpful) – Ensures your water is neutral (6.0–7.0 pH) for optimal seed germination.
- ● Humidity dome or plastic wrap – Keeps moisture trapped (especially for tiny seeds like lettuce or herbs).
- ● Bottom heat mat – Speeds up germination for slow starters (e.g., tomatoes, peppers).
- ● Self-watering tray – Maintains consistent moisture without overwatering.
- ● Grow lights or sunny windowsill – Ensures seedlings get enough light post-watering.
- ● Funnel or sieve – Helps distribute water evenly without disturbing seeds.
- ● Labeling tags – Track seed types and planting dates!
Step-by-Step instructions for watering seed trays
Here's how I keep my seed trays perfectly moist—no soggy mess, no dry patches.
💧 Step 1: Use the Bottom-Watering Method for Even Moisture
Fill a shallow tray with about ½ inch of warm water and place your seed trays inside. Let them soak up moisture from the bottom for 10-15 minutes. This prevents disturbing delicate seedlings or creating surface crusts that block air. You'll know it's working when the soil surface looks uniformly damp but not wet.
I always use room-temperature water—cold water can shock tender roots. Avoid letting trays sit in standing water longer than 20 minutes, or roots will suffocate from lack of oxygen. This method also washes away excess salts from tap water that can burn young plants.
🌱 Step 2: Check Moisture Daily with the Finger Test
Stick your index finger about ½ inch deep into the soil. If it feels dry, it's time to water again. If it's still cool and damp, wait another day. The top layer can dry out while roots stay hydrated—don't judge by surface appearance alone. I keep a small notebook by my seed trays to track moisture levels and adjust my schedule.
Seedlings need consistent moisture, not constant wetness. Overwatering smothers roots and invites damping-off disease, while underwatering causes seedlings to wilt and never recover. Aim for soil that stays evenly moist but never soggy—think of a wrung-out sponge, not a dripping wet rag.
☀️ Step 3: Adjust Watering Based on Light and Temperature
In bright, warm conditions, soil dries faster. I water my trays every 1-2 days when sitting under grow lights at 75°F. In cooler rooms or dimmer light, I stretch watering to every 2-3 days. Watch your seedlings—they'll tell you what they need through their growth rate and leaf color.
If you notice the soil surface drying quickly but the bottom stays damp, your trays may need better drainage. I add a thin layer of perlite to the bottom of trays before filling with soil to improve airflow and prevent compaction. This simple trick keeps moisture balanced at all soil levels.
⏰ Step 4: Transition to Top-Watering After Germination
Once seedlings have their first true leaves, switch to gentle top-watering with a watering can that has a fine rose attachment. Water slowly until you see moisture emerge from the drainage holes at the bottom. This ensures water penetrates evenly without creating surface runoff that can wash away seedlings.
Water in the morning so any excess moisture evaporates during the day. Avoid watering from above after germination—it spreads disease spores and can uproot fragile seedlings. I always water at the base, aiming for the soil surface between plants rather than over the tops.
🌿 Step 5: Maintain Humidity Without Overwatering
Place seed trays under a clear plastic dome or cover them with plastic wrap to create a humid microclimate. Check daily for condensation on the inside of the cover—this means humidity levels are perfect. Remove the cover immediately when you see the first true leaves emerge to prevent fungal growth.
For extra humidity without risking overwatering, I place trays on a bed of damp pebbles. The evaporating water creates moisture without direct contact with the soil. This works especially well in dry indoor environments where air circulation might otherwise dry out your seedlings too quickly.
Tips & tricks for perfect seedling moisture balance
These simple strategies will help you maintain ideal moisture for your seedlings without the guesswork.
Soil Texture Matters: The bottom-watering method in Step 1 works best with well-draining seed-starting mix. If your mix compacts easily, add a thin layer of perlite or vermiculite to the bottom of your trays before filling with soil. This improves airflow and prevents waterlogging at the roots while still allowing even moisture absorption during those critical 10-15 minutes of bottom-watering.
Timing Secret: Those 10-15 minutes of bottom-watering can feel like forever when you're waiting, but consistency is key. Set a timer so you don't accidentally leave trays sitting longer than 20 minutes—roots need oxygen too! I've learned the hard way that over-soaking leads to root rot, especially in dense mixes. Watch for the surface to look uniformly damp but not wet; that's your perfect moisture signal.
Environmental Cues: Pay attention to your seedlings' appearance—they'll tell you what they need. In Step 3, when your space is at 75°F under grow lights, you'll notice seedlings drink up water faster. But if leaves start curling or wilting between your 1-2 day watering schedule, that's your cue to check moisture deeper than just the surface. Remember, the finger test in Step 2 should be done at that ½-inch depth where roots are actively growing.
Transition Strategy: When you reach Step 4 and switch to top-watering, use a spray bottle for the first few days to avoid disturbing delicate seedlings. The fine mist mimics natural rainfall and helps prevent soil compaction. I like to water in the morning so any excess moisture evaporates during the day, keeping roots healthy and preventing fungal issues that can come from damp conditions overnight.
Pro Tips for Water Seed Trays
- These simple strategies will help you maintain ideal moisture for your seedlings without the guesswork.
- Soil Texture Matters: The bottom-watering method in Step 1 works best with well-draining seed-starting mix. If your m...
- Timing Secret: Those 10-15 minutes of bottom-watering can feel like forever when you're waiting, but consistency is k...
Frequently asked questions
Got questions about keeping those seed trays perfectly moist without drowning your sprouts? You’re not alone! Here are some of the most common concerns—and straightforward answers—to help you grow like a pro.
How often should I water seed trays?
Check the soil daily—it should feel consistently damp, like a wrung-out sponge, but never soggy. Most seeds need watering every 1-2 days, depending on humidity and temperature. Mist lightly in the morning to avoid fungal risks.
Can I use tap water for seed trays?
Yes, but let it sit for 24 hours first to remove chlorine, which can harm delicate seedlings. For sensitive plants (like herbs or veggies), use rainwater or filtered water to avoid chemical buildup.
What if my seed trays dry out too fast?
Speed up moisture retention by placing trays on a shallow water tray with pebbles (to elevate them) or covering them with a humidity dome. Avoid direct sunlight, which dries soil faster. Pro tip: Group trays together to create a microclimate!
How do I fix overwatered seed trays?
If the soil feels mushy or mold appears, stop watering immediately and improve drainage. Gently fluff the soil with a fork or spoon to aerate, then place trays in a bright, indirect spot to dry slowly. Discard severely moldy trays to prevent seed rot.
Can I reuse seed trays for new plantings?
Clean trays with soapy water and a 10% bleach solution (1 part bleach to 9 parts water) to kill pathogens. Rinse thoroughly and let dry before reuse. Sterilization is key—especially if you’re growing different plant families!
Wrapping up and next steps
Mastering the art of watering seed trays is all about finding that perfect balance—keeping your seeds just damp enough to sprout strong, without drowning them in excess moisture. 🌱 With the right tools, techniques, and a little patience, you’ll give your seedlings the best start in their growth journey.
Now that you’re armed with these tips, it’s time to roll up your sleeves and watch your green dreams take root!
Ready for the next step? Once your seedlings have sprouted and grown a few true leaves, it’s time to transplant them into larger containers or directly into the garden. Stay tuned for our guide on gradual hardening off to ensure your little plants thrive in their new home! 🌿