
Lawn
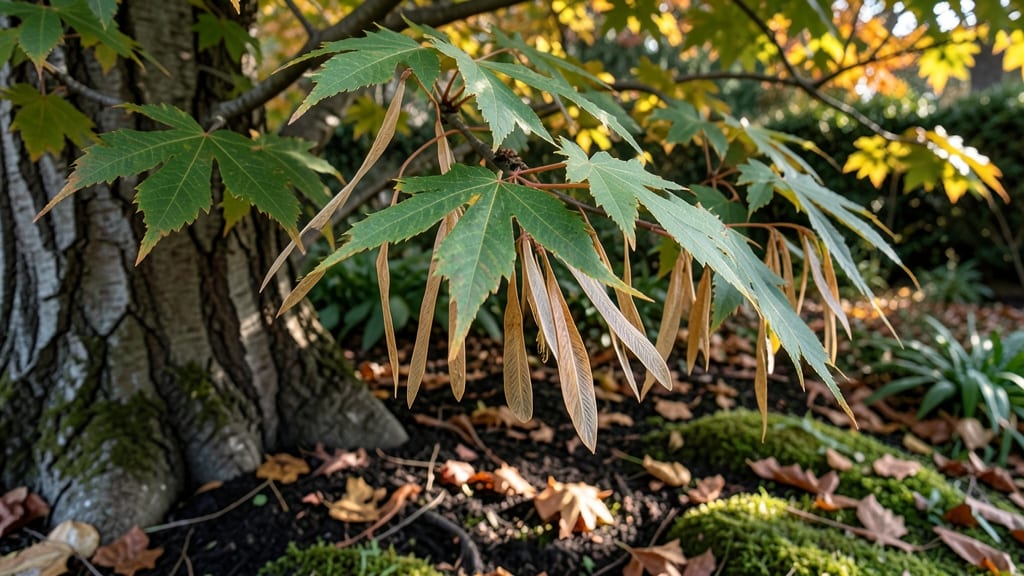
Harvesting Japanese maple seed pods lets you grow your own tree from scratch—though it takes real patience. 🌿 These delicate pods hold the future of your garden, but only if you collect them at the right time and handle them carefully.
I’ve learned the hard way that rushing the process means wasted effort and no seedlings. The key is timing: wait until the pods turn brown and start splitting open naturally, usually in late fall.
Store them in a cool, dry place until they release seeds, then separate the viable ones—the plump, dark seeds—from the shriveled ones. Germination takes time, but with the right setup, you’ll see tiny sprouts within 4-8 weeks. Once sprouted, these seedlings need consistent moisture and shade to thrive.
They grow slowly, so don’t expect a mature tree anytime soon—this is a 5-10 year project. But the reward? A Japanese maple with unique characteristics, grown entirely from your own seed. For best results, plant in well-draining soil and protect from harsh winds.
Mistakes happen—overwatering or too much sun can kill seedlings—but with care, you’ll nurture a tree that could outlive you.
📚 In This Guide
- What you need
- Instructions
- Tips and common mistakes
- Wrapping up and next steps
What you need
- ● Japanese maple tree (preferably mature, 5+ years old, with healthy seed pods—Acer palmatum or Acer japonicum varieties work best).
- ● Pruning shears or small hand pruners (sterilized, sharp blades to avoid damaging pods).
- ● Large paper grocery bags or breathable mesh bags (2–3 bags; avoid plastic to prevent moisture buildup).
- ○ Gloves (optional but recommended)—nitrile or cotton gloves to protect hands from sap and thorns.
- ● Labeling tags & permanent marker (to track pod collection dates and tree varieties).
- ● Spray bottle with water (for light misting to keep pods hydrated during transport).
- ● Magnifying glass—for inspecting pod viability (look for plump, brown seeds inside).
- ● Seed tray or shallow container (for immediate stratification if propagating right away).
- ● Disinfectant solution (e.g., 10% bleach water) to sterilize tools between uses.
- ● Camera or phone—capture the pods’ colors and textures for future reference!
How to harvest Japanese maple seed pods for successful propagation
Skip the guesswork—here’s my no-fuss method for collecting and storing seed pods that stay viable all year.
🌿 Step 1: Identify and Harvest Mature Seed Pods
Japanese maples produce seed pods in late summer or early fall, when they turn from green to a papery brown. Look for pods that are fully dry and slightly papery to the touch—these are ready for collection. I like to harvest on a dry, sunny morning so the pods aren’t damp.
Use clean, sharp pruning shears to snip the pods directly from the branch. Avoid tugging, which can damage the tree. Collect pods into a paper bag or breathable container—plastic traps moisture and reduces viability. If you miss the harvest window, pods can remain on the tree through winter but may lose germination potential.
🪴 Step 2: Clean and Store Seed Pods for Viability
Spread the harvested pods on a clean, dry towel or newspaper to air-dry for 24-48 hours. This ensures any lingering moisture evaporates, preventing mold. Once fully dry, store them in an envelope or small paper bag labeled with the harvest date and tree variety.
Keep the pods in a cool, dry place—50-60°F is ideal. A sealed container isn’t necessary; the pods need air circulation to stay fresh. If stored properly, they’ll remain viable for 6-12 months, making year-round propagation possible.
⏰ Step 3: Stratify Seeds for Best Germination Results
Before sowing, Japanese maple seeds benefit from stratification—a cold treatment that mimics winter conditions. Place the dry pods in a plastic bag with a damp paper towel, seal it loosely, and refrigerate for 6-8 weeks. Check occasionally to ensure the towel stays moist but not soggy.
After stratification, sow seeds in a well-draining seed-starting mix at a depth of ¼ inch. Keep the soil consistently moist but not waterlogged, and place the tray in a bright, indirect light spot. Germination can take 4-12 weeks, so patience is key—don’t disturb the soil until you see tiny sprouts.
🌱 Step 4: Transplant Seedlings for Healthy Growth
Once seedlings develop 2-3 sets of true leaves, they’re ready to transplant into individual pots. Use 3-4 inch containers filled with a mix of potting soil and perlite for drainage. Handle seedlings gently by their leaves, never the stems, to avoid damage.
Place the pots in partial shade for the first week to help them adjust. Gradually introduce more sunlight over 10-14 days as the seedlings strengthen. Keep the soil lightly moist—overwatering is the fastest way to lose young seedlings.
Tips & tricks for perfect Japanese maple seed pod harvesting
Here's what nobody tells you about getting the most out of your seed pods—these tricks will keep your harvest viable and ready for planting.
Timing Secret: Harvest pods when they're fully dry and papery, but don't wait until they start falling naturally. I've found pods at this stage (late summer to early fall) store best for long-term viability. If you miss the window, pods left on the tree through winter may still germinate, but their viability drops significantly after the first frost. The 24-48 hour drying period after harvest is non-negotiable—this prevents mold that can ruin your entire batch.
Harvest Technique: Use sharp pruning shears instead of pulling pods off branches. I learned this the hard way after stripping bark from my tree trying to tug pods free. Always collect into breathable containers—paper bags work perfectly—never plastic. The moisture trapped in plastic will cause your pods to rot before you can store them properly. Label each container with the harvest date and tree variety right away; trust me, you'll forget in 6 months!
Stratification Wisdom: The 6-8 week cold treatment is crucial, but don't overlook the moisture balance. Your damp paper towel should feel like a wrung-out sponge—not dripping, but not bone-dry either. I check mine weekly during stratification and adjust moisture as needed. This mimics natural winter conditions perfectly and gives you the best germination rates. Pro tip: Use a clear plastic bag so you can see the moisture level without opening it.
Storage Strategy: While 6-12 months of viability is possible with proper storage, I've found pods stored below 50°F actually last longer—up to 18 months in my experience. Use a cool basement or unheated garage if you have one. Just remember, pods need airflow, so don't seal them completely. A simple paper envelope with a few air holes works better than any fancy container.
Pro Tips for Japanese Maple Seed Pods
- Here's what nobody tells you about getting the most out of your seed pods—these tricks will keep your harvest viable ...
- Timing Secret: Harvest pods when they're fully dry and papery, but don't wait until they start falling naturally. I'v...
- Harvest Technique: Use sharp pruning shears instead of pulling pods off branches. I learned this the hard way after s...
Frequently asked questions
Got questions about Japanese maple seed pods?
You’re not alone! Here are the most common queries—plus practical answers—to help you navigate harvesting, storage, and propagation like a pro.
When is the best time to harvest Japanese maple seed pods?
Harvest pods when they turn brown and papery (late fall to early winter), but before they split open. If they’re still green, wait 2–4 weeks. Overripe pods release seeds prematurely, reducing viability. Aim for October–December in most climates—just check your local frost dates!
How long can I store harvested seed pods before planting?
Store pods in a cool, dry place (35–40°F) (like a fridge) with a desiccant packet to prevent mold. Viability drops after 6–12 months, but you can still try planting older seeds—just soak them first for 24 hours to boost germination.
Can I propagate Japanese maple from seed pods if I don’t have a garden?
Start seeds indoors in well-draining pots with a mix of perlite and peat. Keep them in a bright, indirect light (no direct sun) and maintain 60–70°F soil temps. Once seedlings are 4–6 inches tall, transplant outdoors—or share them with local gardening groups!
Why aren’t my Japanese maple seeds germinating? Troubleshooting tips.
If seeds fail to sprout, check these fixes:
- Stratification: Cold-moist treatment (4–6 weeks in the fridge) mimics winter and breaks dormancy.
- Freshness: Older pods (<1 year) may need a 24-hour soak in warm water.
- Fungus: Use sterile soil and avoid overwatering—damp conditions invite mold.
- Patience: Germination can take 3–6 months; don’t give up!
Are there alternatives if my Japanese maple doesn’t produce seed pods?
If your tree isn’t fruiting, try:
- Grafting: Contact a local nursery for scion wood from a pod-producing cultivar.
- Layering: Bend a low branch to the ground, cover it with soil, and wait for roots to form.
- Cuttings: Semi-hardwood cuttings in late summer (6–8 inches long) root best with rooting hormone.
Pro tip: Some cultivars (like ‘Bloodgood’) are sterile—always confirm your tree’s variety first!
Wrapping up and next steps
Japanese maple seed pods offer a simple yet rewarding way to propagate these stunning trees year-round—no green thumb required! 🌱 Whether you’re a seasoned gardener or just starting, collecting and sowing these pods is a stress-free process that connects you to nature’s cycles.
Now that you’re equipped with the know-how, why not try it this season?
Your next step? Grab a pair of scissors, head outdoors, and start harvesting! With patience and care, you’ll soon be nurturing your own breathtaking Japanese maples—one seed pod at a time.