
Lawn
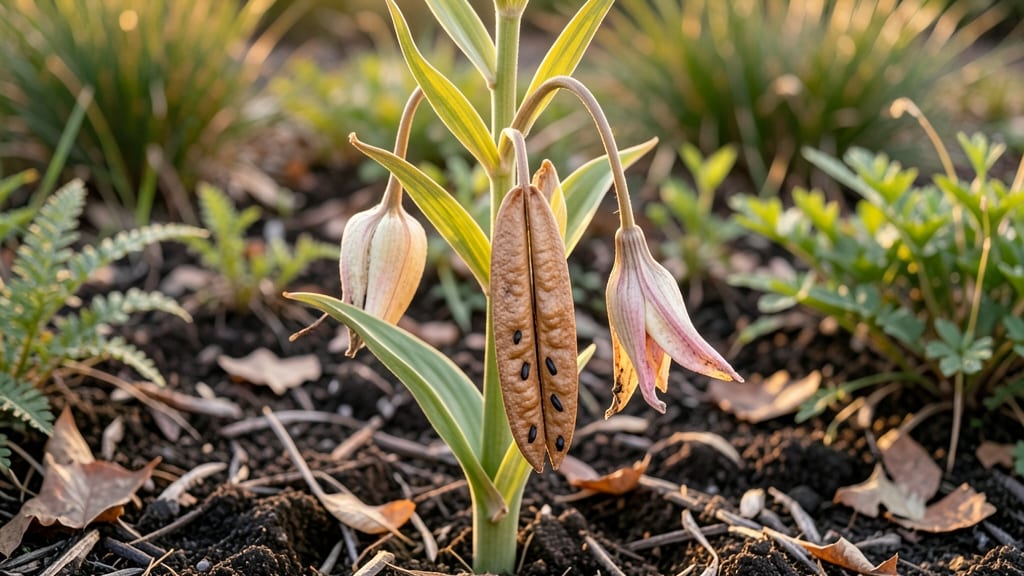
Growing lilies from seed pods unlocks a world of rare varieties you won’t find at nurseries. 🌿 The key is cold-stratification—mimicking winter’s chill to break dormancy—so you can watch those tiny seeds transform into sturdy seedlings in just 4 weeks.
I’ve tried this with Asiatic and Trumpet lilies, and the results are worth the patience.
Harvest mature pods when they turn brown and papery, then split them open to reveal flat, black seeds. Store them in a damp paper towel in the fridge for 6-8 weeks—this cold treatment tricks them into thinking winter’s passed.
Skip this step, and you’ll wait months (or never) for germination. The payoff? Lilies that grow true to their parent plant’s beauty, often with unexpected color surprises.
Once stratified, plant the seeds in a shallow tray with moist potting mix, keeping them at 65-70°F under grow lights. Germination takes 2-4 weeks, and you’ll see those first green shoots like magic.
These seedlings need gentle care—no transplant shock here—but they’ll reward you with blooms in 3-5 years, depending on the variety.
Common challenges? Overwatering (keep soil damp, not soggy) or impatience (stratification is non-negotiable). But once you master it, you’ll have lilies that thrive in your exact conditions—no guesswork, just homegrown heirlooms. Ready to start your own lily legacy?
📚 In This Guide
- What you need
- Instructions
- Tips and common mistakes
- Wrapping up and next steps
What you need
- ● Lilly seed pods: 1–2 pods (ensure they’re fresh, firm, and slightly plump for best results).
- ● Cold-stratification mix: 1 cup peat moss or coco coir (sterilized)
- ● 1 cup perlite or vermiculite (for aeration)
- ● Plastic storage bag: 1 gallon-sized bag with a sealable zipper (or a reusable silicone bag).
- ● Spray bottle: 1 with distilled water (to keep the mix moist).
- ● Small container or tray: 1 shallow dish (6–8 inches wide) for seed pod storage.
- ○ Label & marker: To track your pods (optional but helpful!).
- ● Refrigerator: A standard fridge with a consistent 34–40°F (1–4°C) temperature.
- ● Scissors or knife: For carefully opening seed pods (if needed).
- ○ Gloves (optional): To protect hands from seed pod fibers.
- ● Planting pots (for later): 4–6 inch pots with drainage holes (for transplanting after stratification).
- ● Patience & a timer: Cold stratification takes 4 weeks—set reminders!
- ● Seed pod opener tool: A specialized tool for gently extracting seeds (if pods are tough).
- ● Humidity dome: A clear plastic lid or cloche to maintain moisture during early growth.
- ● Grow lights: If starting indoors before transplanting outdoors.
- ● Journal: To log progress, moisture levels, and germination dates.
Step-by-Step guide to cold-stratifying lily seed pods
Here's how I transform dormant lily seed pods into sprouting seedlings in just four weeks—no fancy equipment needed.
🌱 Step 1: Harvest and Prepare the Seed Pods
Collect mature lily seed pods when they turn brown and begin splitting open naturally. The pods should feel dry but not brittle—if they crumble at the touch, they're past their prime. I like to harvest them in late summer or early fall when the pods are fully developed but haven't yet released seeds.
Open the pods carefully with a small knife or your fingers, extracting the seeds inside. Lily seeds are flat and often covered in a thin, papery coating. Place the seeds in a bowl and gently rub them between your palms to remove any remaining husk. This ensures better moisture absorption during stratification.
💧 Step 2: Moisten and Pack the Seeds
Fill a small container with a mix of equal parts peat moss and perlite—this lightweight blend holds moisture without suffocating the seeds. Sprinkle the seeds evenly over the surface, spacing them about ½ inch apart to prevent crowding. The goal is to mimic the natural forest floor where lily seeds germinate.
Lightly mist the mix until it feels damp like a wrung-out sponge. You want moisture but not sogginess—squeeze a handful to check. Cover the container with plastic wrap, poking a few small holes to allow airflow. Place it in the refrigerator's crisper drawer, where temperatures hover around 35-40°F. This cold stratification mimics winter conditions and breaks seed dormancy.
⏰ Step 3: Stratify for 4-6 Weeks
Check the container every 7-10 days to ensure the mix stays damp. If the surface feels dry, mist it lightly again—never soak it, as excess water can cause rot. You'll see nothing dramatic at first, but after 3-4 weeks, the seeds will begin to plump slightly as they absorb moisture and prepare to sprout.
Here's the thing—patience is key. Some seeds may sprout in 4 weeks, while others take closer to 6 weeks. Don't rush the process by moving them to warmth too soon. The cold treatment is what signals the seeds it's safe to grow. Once you see tiny white roots emerging from the seeds, they're ready for the next phase.
☀️ Step 4: Transfer to Warmth and Light
Remove the container from the refrigerator and place it in a warm, bright spot—a sunny windowsill or under a grow light works perfectly. Keep the mix consistently moist but not soggy. Within 1-2 weeks, you should see first true leaves pushing through the soil. These will be small and delicate, so avoid disturbing them.
When the seedlings reach 2-3 inches tall and develop 3-4 leaves, they're ready to transplant. I like to use 4-inch pots filled with a mix of potting soil and compost to give them a nutrient boost. Handle them gently—their roots are still tender and can break easily.
🌿 Step 5: Acclimate and Transplant
Before moving seedlings outdoors, harden them off by placing them in a sheltered spot for 1-2 hours the first day, gradually increasing their time outside over 7-10 days. This slow transition prevents shock and helps them adjust to natural light and temperature swings.
Choose a planting site with partial shade—lilies appreciate morning sun but can scorch in intense afternoon heat. Dig a hole twice as wide as the root ball but no deeper. Plant the seedlings at the same depth they were in their pots, and water deeply to settle the soil. Mulch around the base with 1-2 inches of organic mulch to retain moisture and regulate soil temperature.
Tips & tricks for perfect cold-stratified lily seedlings
Cold stratification transforms stubborn lily seeds into thriving seedlings—here's how to maximize your success without the guesswork.
Timing Secret: In Step 1, harvest pods when they're brown but still firm—this ensures maximum seed viability. I've learned the hard way that overly dry pods yield fewer seeds, while pods that've already split open may have released their seeds naturally. Aim for that sweet spot where the pods are just beginning to crack open.
Moisture Management: During Step 2, the peat moss-perlite mix should feel like a wrung-out sponge—not dripping wet, not bone dry. I use a spray bottle for precision, misting just until the surface looks evenly damp. Overwatering here can lead to rot, while too little moisture prevents germination. A quick squeeze test is your best friend: if water drips out, you've gone too far.
Refrigerator Placement: For Step 3, position your container on the crisper drawer's middle shelf where temperatures consistently stay between 35-40°F. The coldest part of the fridge (usually the back) can be too cold, while warmer areas won't provide proper stratification. I place a thermometer in my fridge to monitor—some models have hot spots that can vary by 10°F or more!
Light Transition: When moving to warmth in Step 4, place your container under a grow light if natural light is insufficient. I use a simple LED grow bulb that provides full-spectrum light—just 12-14 hours per day is perfect. The key is gradual exposure: start with 2-3 hours of light the first day, then increase by 1-2 hours daily to prevent shock.
Pro Tips for Lilly Seed Pod
- Cold stratification transforms stubborn lily seeds into thriving seedlings—here's how to maximize your success withou...
- Timing Secret: In Step 1, harvest pods when they're brown but still firm—this ensures maximum seed viability. I've le...
- Moisture Management: During Step 2, the peat moss-perlite mix should feel like a wrung-out sponge—not dripping wet, n...
Frequently asked questions
Got questions about growing Lilly seed pods? You’re not alone! Here are some of the most common queries—plus quick, actionable answers to help you succeed.
How long does cold stratification take for Lilly seed pods?
Cold stratification typically lasts 4–8 weeks for most Lilly seed pods. Place them in a moist, refrigerated environment (like a sealed bag with damp peat moss) for 4 weeks minimum—this mimics winter conditions and breaks dormancy. Pro tip: If your seeds don’t sprout after 8 weeks, they may need a longer chill period or could be non-viable.
Can I skip cold stratification and still grow Lilly seed pods?
Technically, yes—but success rates drop dramatically. Without stratification, germination can take months (or never happen). If you’re impatient, try soaking seeds in warm water for 24 hours before planting, but combine this with a short 2-week cold spell for better results.
When is the best time to plant stratified Lilly seed pods outdoors?
Plant them after the last frost when soil temps reach 60–70°F (15–21°C). For most climates, this is late spring (April–May). If you’re in a warmer zone, aim for early fall (September–October) to avoid summer heat stress. Pro tip: Start seeds indoors 6–8 weeks before your last frost date for a head start!
Why aren’t my Lilly seed pods germinating after stratification?
Several factors could be at play:
- Old seeds: Lilly seeds lose viability over time—use fresh seeds (<1 year old) for best results.
- Improper moisture: Too dry = dormancy; too wet = rot. Keep soil consistently moist (not soggy).
- Temperature issues: Seeds need warmth (70°F+) to germinate after stratification.
- Depth problems: Plant seeds ¼–½ inch deep—too shallow or deep can hinder sprouting.
Try scarifying (lightly nicking the seed coat) or using a germination aid like hydrogen peroxide (3%) if needed.
Are there easy alternatives to growing Lilly seed pods from scratch?
If starting from seed feels daunting, consider:
- Transplanting young seedlings: Buy 1–2 year old Lilly plants from nurseries (e.g., Lilium martagon or Lilium canadense).
- Division: Split mature clumps in early spring or fall—just dig up the rhizomes and replant sections.
- Hybrid varieties: Some daylilies (Hemerocallis) have similar foliage and are easier to propagate from divisions.
For true Lilly seed pods, though, stratification is the most reliable method for rare or heirloom varieties.
Wrapping up and next steps
Growing lilly seed pods from cold-stratified sprouts is a rewarding journey that unlocks stunning blooms in your lawn or garden! 🌱 With just a little patience and the right techniques—like proper moisture control, temperature management, and gentle handling—you’ll soon enjoy vibrant, fragrant flowers.
Whether you’re a seasoned gardener or a curious beginner, this method proves that even tricky seeds can thrive with care.
Ready to turn your green space into a showstopper? Start small—plant a few pods this season, monitor their progress, and let your success inspire bigger projects next year! 🌸 Happy growing!