
Lawn
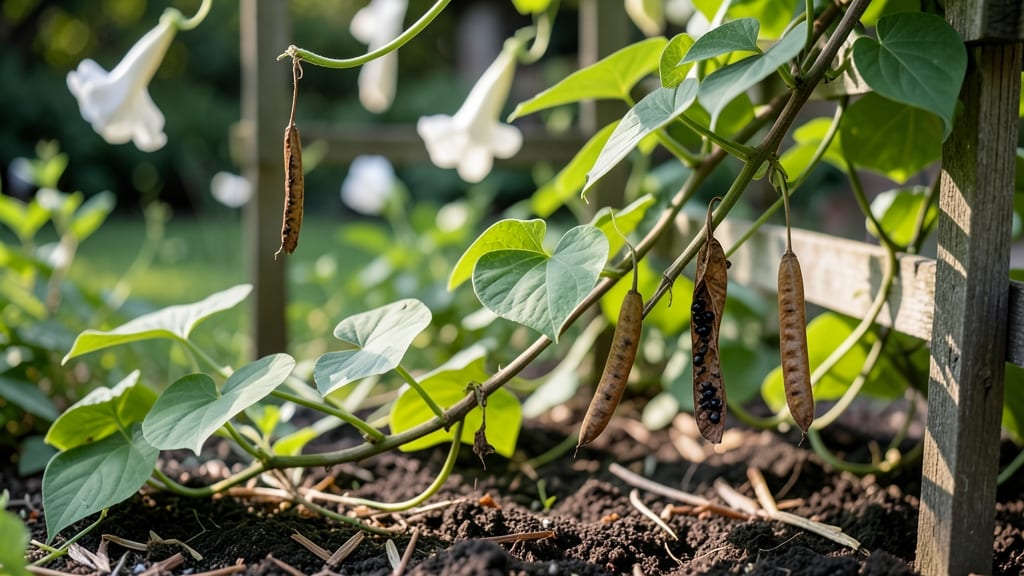
Harvesting moonflower bush seed pods is the secret to growing these night-blooming beauties year after year without buying new plants. 🌙 I learned the hard way that waiting too long turns the pods into brittle husks—so timing is everything when you want fresh seeds for next season’s garden.
The pods start green and firm, then turn brown and papery as they dry. Simply twist them off the vine before they split open naturally, and store them in a cool, dry place.
Properly harvested seeds stay viable for 2-3 years, giving you a free supply of moonflowers for future seasons. Once planted in well-draining soil and full sun, these fast-growing vines will climb and bloom within 60-90 days.
The first year focuses on establishing strong roots, but by year two, you’ll have a lush, fragrant trellis that attracts hummingbirds and moths at dusk. Works for both garden beds and containers—just give them space to spread. Here’s exactly how to handle every step without stress.
📚 In This Guide
- What you need
- Instructions
- Tips and common mistakes
- Wrapping up and next steps
What you need
- ● Moonflower bush seed pods: Fully mature, dried pods (typically brown and papery) from Ipomoea alba or Ipomoea violacea. Aim for 10–20 pods for a starter collection.
- ● Pruning shears or sharp scissors: For cleanly harvesting pods without damaging the plant.
- ● Paper bags or breathable fabric sacks: 2–3 medium-sized bags (12x15 inches) to collect pods and allow airflow.
- ● Labeling tags & permanent marker: To mark pods by variety and harvest date.
- ● Drying tray or wire rack: A flat surface (like a baking sheet) to spread pods for drying.
- ● Paper towels or newspaper: For cushioning pods during transport.
- ○ Gloves (optional): Thin gardening gloves to protect hands from prickly stems.
- ● Seed envelope or airtight container: For long-term storage (e.g., 1–2 mason jars with silica gel packets).
- ○ Magnifying glass (optional): To inspect pods for pests or damage before storage.
- ○ Humidity pack (optional): For containers to absorb excess moisture and prevent mold.
- ● Notebook or app: To log harvest dates, pod conditions, and germination notes.
How to harvest moonflower bush seed pods for reliable germination
Here's my foolproof method for collecting moonflower seeds that stay viable year after year.
🌿 Step 1: Identify and Select Mature Seed Pods
Moonflower pods turn from green to brown when ready—wait until they're completely dry and papery to the touch. I look for pods that split open naturally along the seams; these contain the most mature seeds. Avoid any that appear shriveled or moldy, as they won't germinate well.
Harvest on a dry morning after the dew has evaporated. This prevents moisture from getting trapped inside the pods, which can cause premature sprouting or rot. Use clean pruning shears to snip the pods from the vine, leaving a small stem attached for easier handling.
🌱 Step 2: Extract Seeds and Clean for Storage
Place the harvested pods in a paper bag and gently squeeze them to release the seeds. Moonflower seeds are large and flat, with a distinctive dark brown color. I spread them on a clean towel to air-dry for 24 hours in a warm, shaded spot. This prevents any remaining moisture from encouraging mold during storage.
Remove any debris or empty seed casings by hand. I like to use a fine mesh strainer to catch smaller particles while letting the seeds fall through. Store the clean seeds in an envelope or small paper bag—plastic traps too much moisture and reduces viability over time.
🪴 Step 3: Store Seeds for Long-Term Viability
Keep the seed envelope in a cool, dry place like a seed vault or even your refrigerator's crisper drawer. Moonflower seeds stay viable for 2-3 years when stored properly, but I've had them germinate successfully even after 4 years in ideal conditions. Label the bag with the harvest year to track freshness.
For best results, I test a few seeds annually by planting them in moist potting mix. If they sprout within 7-14 days, the remaining seeds are still good. This simple check prevents wasting storage space on seeds that may have lost viability.
⏰ Step 4: Prepare Seeds for Planting
Soak the seeds overnight in lukewarm water to soften the tough outer coating. This step is crucial—moonflowers have a hard seed coat that slows germination. After soaking, plant them ½ inch deep in well-draining soil. I use a mix of 50% potting soil and 50% perlite to prevent rot.
Keep the soil consistently moist but not soggy until germination, which typically occurs within 10-20 days at 70-75°F. Thin seedlings to 12 inches apart once they develop their first true leaves. Moonflowers grow fast, so give them space to climb or sprawl without competition.
Tips & tricks for perfect moonflower seed harvesting
Here's what nobody tells you about keeping those delicate moonflower seeds viable for years.
Timing Secret: Harvest pods when they've fully dried and turned brown, but before they split open completely on their own. I learned this the hard way after collecting seeds from partially opened pods that had already started releasing seeds prematurely. The 24-hour drying period after extraction is non-negotiable—this prevents mold from forming during storage, which can happen if any moisture remains.
Storage Wisdom: Paper bags are your best friend for long-term seed storage. I've tried plastic containers, but they trap moisture and reduce viability over time. Keep your seed envelope in a cool, dry place like your refrigerator's crisper drawer—this mimics ideal seed vault conditions right at home. That 2-3 year viability window expands to 4 years when stored properly, so don't skimp on the storage conditions.
Germination Check: The annual germination test is my favorite part of this process. Plant just a few seeds each year to check viability—if they sprout within 7-14 days, your remaining seeds are still good. This simple test prevents wasting storage space on seeds that may have lost viability. I've had seeds germinate after 4 years, but I always test first to be sure.
Planting Preparation: That overnight soak in lukewarm water is crucial for breaking the tough seed coat. I use a small bowl of water and let the seeds soak while I prepare the planting area. The seeds should feel slightly softened but not mushy after soaking. Planting them ½ inch deep in that 50/50 mix of potting soil and perlite creates the perfect drainage that moonflowers need to thrive.
Pro Tips for Moonflower Bush Seed Pod
- Here's what nobody tells you about keeping those delicate moonflower seeds viable for years.
- Timing Secret: Harvest pods when they've fully dried and turned brown, but before they split open completely on their...
- Storage Wisdom: Paper bags are your best friend for long-term seed storage. I've tried plastic containers, but they t...
Frequently asked questions
Got questions about harvesting, storing, or growing moonflower bush seed pods? You’re not alone! Here are some of the most common queries—and their answers—to help you master the process like a pro.
When is the best time to harvest moonflower seed pods?
The ideal time to harvest moonflower seed pods is in late fall or early winter, after the pods have fully matured but before they split open naturally. Look for pods that are dry, brown, and slightly papery to the touch. Harvesting too early risks underdeveloped seeds, while waiting too long means they’ll scatter on their own!
How do I store moonflower seed pods for long-term viability?
Store harvested pods in a cool, dry place (like a paper bag or breathable container) for 1–2 weeks to fully dry. Once dry, transfer seeds to an airtight container with a desiccant packet (like silica gel) to prevent moisture buildup. Label with the harvest date—viable seeds typically last 2–3 years if stored properly!
What should I do if my seed pods won’t open naturally?
If pods stay closed, gently squeeze or tap them to encourage seed release. For stubborn pods, place them in a paper bag and store in a warm, dry spot for a few days—the warmth mimics natural conditions and often triggers opening. Avoid cutting pods open unless necessary, as seeds may not be fully mature.
Can I grow moonflower bushes from store-bought seeds, or do I need pods?
Yes! While harvesting pods ensures 100% viability, store-bought seeds work too—just check the packaging date (older seeds may have lower germination rates). For best results, soak store-bought seeds in lukewarm water for 24 hours before planting to boost germination. Pod-collected seeds, however, often have higher success rates!
Will harvesting seed pods harm my moonflower bush?
Not at all! Harvesting pods after flowering (late season) won’t affect the plant’s health. In fact, removing spent pods can encourage new growth and reduce pests. Just avoid pruning healthy foliage or flowers—focus solely on mature pods. Your bush will thank you with more blooms next season!
Wrapping up and next steps
Growing and saving moonflower bush seed pods is a rewarding way to ensure a fresh supply of these fragrant climbers year after year—without the stress! 🌙 With the right tools, timing, and techniques, you can effortlessly collect, dry, and store seeds for future planting.
Whether you're a seasoned gardener or just starting out, this simple process opens the door to lush, low-maintenance vines that thrive in any season.
Ready to bloom with confidence? Start by marking your calendar for next year’s harvest season—then grab your gloves and get ready to enjoy the magic of moonflowers all over again! 🌱