
Lawn
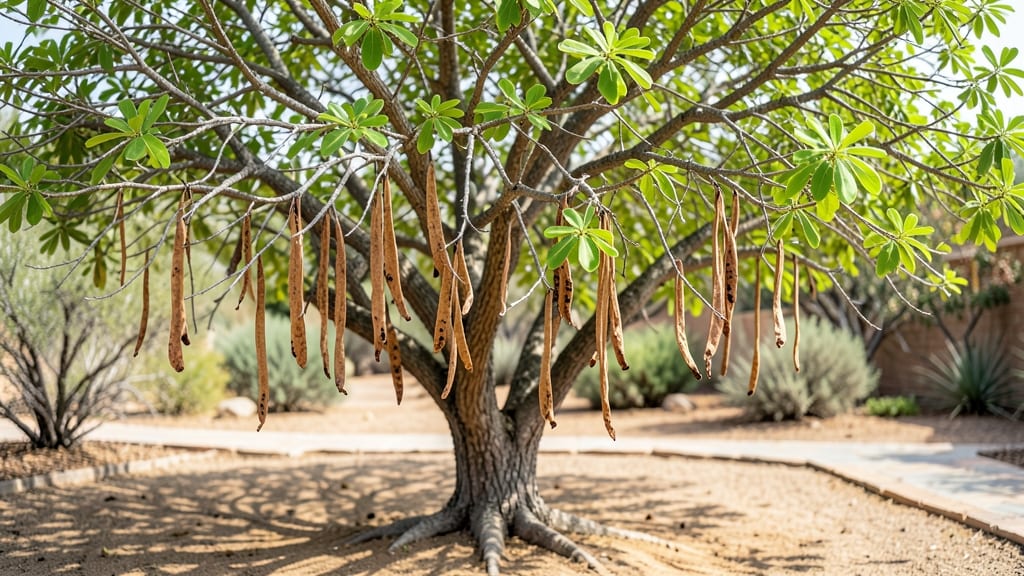
Harvesting palo verde seed pods turns a desert tree's messy winter show into next year's garden foundation. 🌱 Those flat, bean-like pods are packed with seeds that, with the right timing and care, will grow into sturdy, drought-tolerant trees perfect for Southwest landscapes.
The key is patience—wait until pods turn brown and begin splitting open naturally, usually in late winter or early spring. Collect them before they release seeds on the ground, then spread them in a dry, well-ventilated spot for 2-3 weeks to fully dry.
This simple drying step breaks seed dormancy, making germination far more reliable. Once dry, crack open the pods to extract the seeds, which look like tiny, dark brown beans. Plant them ¼ inch deep in a mix of cactus/succulent soil and sand, keeping the soil barely moist.
Seedlings emerge in 2-4 weeks, and with bright light and minimal water, they'll grow into hardy young trees. Break dormancy by soaking seeds in warm water for 24 hours before planting if germination seems slow.
Young trees need consistent moisture but zero coddling—once established, they thrive in full sun with almost no water. Perfect for anyone wanting to grow native trees from scratch!
📚 In This Guide
- What you need
- Instructions
- Tips and common mistakes
- Wrapping up and next steps
What you need
- ● Mature palo verde seed pods: Harvest when they turn from green to tan/brown and split open slightly (typically late summer to early fall). Aim for 50–100 pods for a reliable seed yield.
- ● Pruning shears or sharp scissors: One pair with bypass blades (to avoid crushing pods).
- ● Large bucket or tarp: A 5-gallon capacity (or larger) to collect fallen pods and debris.
- ● Newspaper or cardboard: A 2’ x 3’ sheet for drying seeds indoors.
- ● Fine-mesh sieve or strainer: With 1/4-inch holes to separate seeds from chaff.
- ● Paper towels or coffee filters: For gentle seed cleaning.
- ● Air-tight storage container: A quart-sized mason jar or resealable bag with a desiccant packet (to prevent moisture).
- ● Ladder or step stool: If pods are high up in the tree (6–10 ft tall).
- ● Gloves: Nitrile or cotton to protect hands from pod spines.
- ● Labeling tags: For marking containers with the harvest date.
- ● Fan or dehumidifier: To speed up drying in humid climates.
- ○ Seed viability test kit: Optional but handy for checking seed health before planting.
How to harvest palo verde seed pods for next year's trees
Here's the foolproof method I use to collect and store palo verde seeds—no special tools needed.
🌿 Step 1: Identify and Locate Ripe Seed Pods
Look for pods that have turned from bright green to tan or brown—this signals they're mature. They'll also feel dry and papery when you gently squeeze them. I check trees in late summer or early fall, usually around September or October in most climates.
Don't harvest pods that are still green or plump—they won't contain viable seeds. You'll know you've found the right ones when they rattle slightly when shaken, indicating the seeds inside are loose and ready for collection.
🪴 Step 2: Collect and Prepare the Pods
Use clean, dry hands or wear thin gardening gloves to avoid tearing the pods. Place them in a paper bag or breathable container—plastic traps moisture and can cause mold. I like to label each bag with the date and tree location, which helps track which seeds are freshest.
Once home, spread the pods out on a clean, dry towel or screen in a well-ventilated area. Let them dry completely for 3-5 days—they're ready when they crumble easily between your fingers. This drying step is critical for preventing mold during storage.
🌱 Step 3: Extract and Clean the Seeds
Gently crush each pod between your palms to release the seeds. Avoid using tools—palo verde seeds are delicate and can be damaged by pressure. I like to do this outdoors on a light-colored sheet of paper so the seeds stand out against the background.
Remove any debris or empty seed casings by hand. You'll notice good seeds are plump, dark brown, and slightly glossy, while shriveled or light-colored seeds should be discarded. Store only the viable seeds in a paper envelope or breathable container—never airtight.
⏰ Step 4: Store Seeds Properly for Next Season
Place the seeds in a cool, dry location—I keep mine in the fridge in a sealed envelope with a moisture-absorbing packet. Palo verde seeds stay viable for up to 5 years if stored this way, but I always label them with the harvest date to prioritize using the freshest seeds first.
When ready to plant, soak the seeds in lukewarm water for 24 hours before sowing. This breaks their hard outer coating and encourages faster germination. I plant them in well-draining soil in early spring, about ¼ inch deep, and keep the soil consistently moist until sprouts appear.
💧 Step 5: Monitor and Plant Next Year
Check your stored seeds periodically for signs of mold or dampness. If you notice any mustiness or discoloration, transfer them to a new container immediately. Palo verde seeds germinate best in spring when soil temperatures reach 65-75°F.
After soaking, plant the seeds in individual pots or directly in the ground where you want the tree to grow. Keep the soil moist but not soggy—overwatering is the #1 reason palo verde seeds fail to sprout. You'll see tiny sprouts in 2-4 weeks, and they'll grow into strong seedlings with proper care.
Tips & tricks for perfect palo verde seed pod harvesting
These simple tricks will help you collect and store palo verde seeds like a pro—no green thumbs required.
Timing Secret: Harvest pods when they're fully tan or brown, but don't wait too long—they'll split open and scatter seeds on their own. I aim for early fall when temperatures start dropping, usually around September or October. The pods should rattle when shaken, but if they're already opening on the tree, you've missed the window!
Drying Strategy: That 3-5 day drying period is non-negotiable. I spread pods on a screen in a breezy spot under a shade cloth to prevent overheating. If you're short on time, you can speed up drying by placing them in a single layer on a cookie sheet in a warm (not hot!) oven with the door slightly open for 1-2 hours. Just monitor closely—they're ready when they crumble easily.
Seed Selection: When cleaning seeds, look for plump, dark brown ones with a slight gloss. Shriveled or light-colored seeds won't germinate. I use a light-colored sheet of paper to make the dark seeds stand out against the background—it's like a natural sorting system. Pro tip: Store only the best seeds in paper envelopes, never airtight containers, to prevent mold.
Storage Wisdom: The fridge is perfect for long-term storage, but I also keep a small batch in my desk drawer wrapped in a paper towel. For extra protection, add a moisture-absorbing packet to your storage container. Label everything with the harvest date—you'll want to use the freshest seeds first, even though they stay viable for up to 5 years.
Pro Tips for Palo Verde Seed Pods
- These simple tricks will help you collect and store palo verde seeds like a pro—no green thumbs required.
- Timing Secret: Harvest pods when they're fully tan or brown, but don't wait too long—they'll split open and scatter s...
- Drying Strategy: That 3-5 day drying period is non-negotiable. I spread pods on a screen in a breezy spot under a sha...
Frequently asked questions
Got questions about harvesting and handling palo verde seed pods? You’re in the right place! Here are answers to common queries to help you navigate the process with ease.
When is the best time to harvest palo verde seed pods?
Harvest pods when they’re fully dry and brown (typically late fall to early winter). Avoid harvesting green pods—they won’t contain viable seeds. Wait until they split open naturally or gently pry them off the tree with gloves to protect your hands.
How do I tell if the seeds inside are still good?
Viable seeds are plump, firm, and light brown. Discard shriveled, discolored, or hollow seeds. For extra assurance, float-test them: Place seeds in water—good seeds sink, while empty ones float. Store viable seeds in a cool, dry place for planting next year.
Can I use palo verde seed pods for anything other than planting?
Beyond seeds, dried pods make rustic decorations (like centerpieces or wreaths) or even natural bird feeders. Just ensure they’re fully dry to avoid mold. For crafts, remove seeds first and let pods air-dry completely before use.
What should I do if my pods are infested with pests?
Inspect pods for weevils or beetles. If infested, don’t harvest—pests can damage seeds. Instead, drop pods into a bucket of soapy water for 10 minutes to drown pests, then rinse and dry seeds thoroughly. Store in sealed containers to prevent future infestations.
How long can I store harvested palo verde seeds?
Seeds stay viable for 1–2 years if stored properly in a paper bag or envelope in a cool, dark place (like a fridge). Avoid plastic—it traps moisture. Test a few seeds annually to check for germination before full planting.
Wrapping up and next steps
Harvesting palo verde seed pods is a rewarding way to ensure your desert landscape thrives next year—no stress, just simple steps! 🌱 Whether you’re a gardening pro or a curious beginner, these tips make the process effortless.
Now that you’re armed with the right tools and knowledge, why not give it a try? Grab your gloves, head outside, and enjoy the satisfaction of nurturing future trees. Your yard—and the local wildlife—will thank you!
Next step: Mark your calendar for late summer or early fall to start the process again. Happy harvesting! 🌞