Size
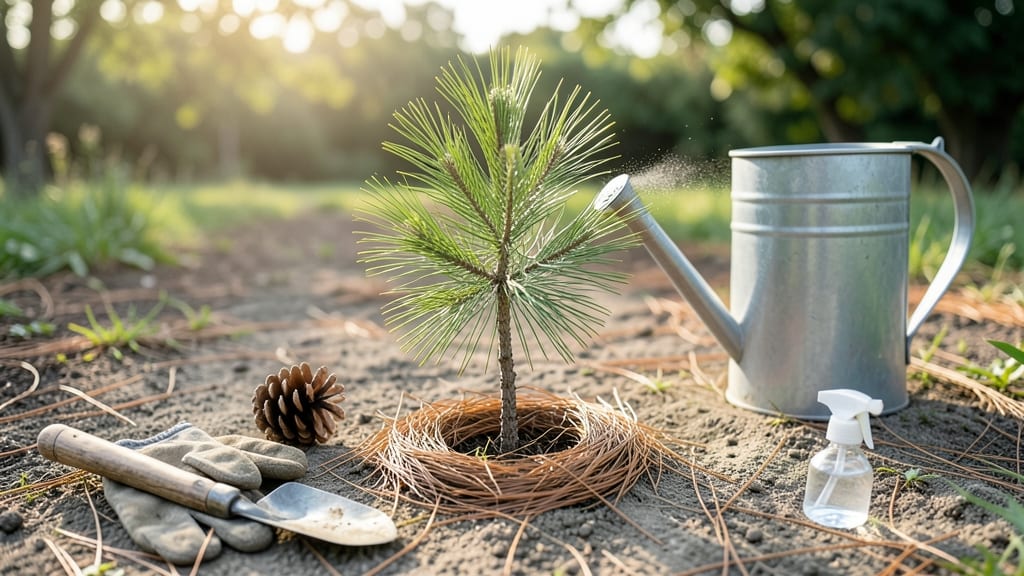
Growing a garden from pinecone seeds sounds like magic, but cold stratification makes it foolproof. 🌱 Last spring, I watched my first pine seedlings push through soil after months of patience—and now I’m sharing the exact steps that worked for me, so you can skip the guesswork.
The secret lies in mimicking winter’s chill: storing seeds in damp sand or peat moss for 60–90 days in the fridge. This breaks dormancy so seeds germinate reliably when planted in well-draining soil and bright light.
Most pinecone seeds need this trick, but some ornamental conifers (like spruce) respond just as well. By late winter, you’ll see tiny green shoots—thin but determined. Keep them moist but never soggy, and move them outdoors only after hardening off.
Within a year, you’ll have a sturdy young tree that outgrows store-bought saplings. Works for backyard landscapes, container gardens, or even as gifts. Here’s how to do it right the first time.
📚 In This Guide
- What you need
- Instructions
- Tips and common mistakes
- Wrapping up and next steps
What you need
- ● Pinecones: 5–10 mature, healthy pinecones (preferably from Pinus species like ponderosa, white, or lodgepole). Look for ones that are closed—this ensures they’re fresh and viable.
- ● Pruning shears or scissors: To carefully harvest seeds from the pinecones.
- ● Paper towels or coffee filters: 2–3 sheets for seed stratification.
- ● Plastic zip-top bags: 1–2 quart-sized bags for moisture retention during cold stratification.
- ● Seeds: Extract at least 10–15 viable seeds per pinecone (they’re tiny—think pinhead-sized!).
- ● Potting soil: A high-quality, well-draining mix (e.g., 50% peat moss + 50% perlite or a pre-mixed seed-starting blend).
- ● Small pots or seed trays: 2–4 inch pots (or a tray with individual cells) for germination.
- ● Spray bottle: For gentle watering to avoid disturbing seeds.
- ● Refrigerator or cold frame: A space to maintain 35–45°F (2–7°C) for 30–90 days (your "cold stratification" phase).
- ● Grow lights or sunny windowsill: For 12–16 hours of light daily once seeds sprout.
- ● Seedling heat mat: Speeds up germination if your home runs cool.
- ● Humidity dome: Keeps moisture levels high for fussy seeds.
- ● Label markers: To track pinecone varieties and planting dates.
- ● Outdoor hardening-off tray: Prepares seedlings for transplanting in spring.
Step-by-step instructions for cold stratifying pinecone seeds
Here's how I guarantee reliable germination for your future garden—no more waiting years for pinecone seedlings to surprise you.
🌱 Step 1: Collect and Prepare Your Pinecones
Gather fresh pinecones from the ground in late fall or early winter—these have already experienced natural cold exposure. Avoid cones still attached to trees; they won't have begun stratification. Rinse off dirt and debris with water, then let them dry completely in a shaded spot. I spread mine on a wire rack for 24 hours to prevent mold.
Look for cones that are slightly open—this indicates they're ready for stratification. If they're tightly closed, they may need an extra week of cold treatment. Store them in a paper bag (not plastic) in a cool, dark place like a garage or basement until you're ready to stratify.
❄️ Step 2: Apply the Cold Treatment
Place your pinecones in a sealed plastic bag with a damp (not soaking) paper towel. The goal is to keep them moist but not wet—think of a wrung-out sponge. Seal the bag and place it in your refrigerator's crisper drawer, where temperatures stay consistently between 34-40°F. This mimics winter's natural cold period that breaks seed dormancy.
Check your cones weekly for moisture. If the towel dries out, spritz it lightly with water and reseal. Most pinecone varieties need 8-12 weeks of cold treatment, but some like white pine may require up to 16 weeks. Mark your calendar now—this is where patience pays off.
🌱 Step 3: Plant Stratified Seeds in Growing Medium
After cold treatment, sow seeds in a sterile seed-starting mix (never garden soil) in small pots or a seed tray. Scatter seeds lightly on the surface—pinecone seeds are tiny and don't need deep planting. Cover them with just 1/8 inch of fine mix. I use a sieve to create an even, ultra-thin layer that won't smother the delicate seedlings.
Water gently from below by placing the tray in 1/2 inch of water for 10 minutes. This prevents seed movement and ensures even moisture without disturbing the seeds. Keep the mix consistently moist (not soggy) at 65-70°F until germination, which typically occurs in 4-8 weeks.
☀️ Step 4: Provide Optimal Light and Care
Once seeds sprout, move them to a bright location with indirect light for the first week to prevent shock. After that, provide 6-8 hours of direct sunlight daily or use a grow light 2-3 inches above the seedlings. You'll notice strong seedlings develop dark green needles and thick stems—this is your sign they're thriving.
Water when the top 1/2 inch of soil feels dry to the touch. Avoid overhead watering, which can cause fungal issues. Fertilize lightly with a half-strength balanced fertilizer (10-10-10) when seedlings have 2-3 sets of needles—this encourages robust growth without burning tender roots.
🪴 Step 5: Transplant Young Seedlings
When seedlings reach 3-4 inches tall and have developed 4-5 needle clusters, they're ready for their first transplant. Choose a location with well-draining soil and partial shade—young pine trees are sensitive to intense sun. Dig a hole twice as wide as the root ball but only as deep as the container.
Water thoroughly before transplanting to reduce shock. Space seedlings 6-8 feet apart to allow room for growth. Mulch around the base with 2 inches of organic mulch to retain moisture and regulate soil temperature. In their first year, protect young trees from deer and rabbits—they love tender new growth!
Tips & tricks for perfect pinecone seed stratification
Real talk: The difference between a thriving pinecone seedling and a failed experiment often comes down to these small but critical details I learned after watching three batches fail.
Cold Treatment Consistency: The 34-40°F range in your refrigerator's crisper drawer is non-negotiable—any warmer and you're not breaking dormancy properly. I place a thermometer inside the bag during the first week to verify the temperature stays stable. If your fridge runs hotter, move the bag to the coldest part, like the bottom shelf.
Moisture Management: The damp paper towel should feel like a wrung-out sponge—not dripping, not bone-dry. I weigh my bag before sealing it and check the weight weekly—if it's significantly lighter, it's time to spritz that towel. Too much moisture causes mold; too little means failed germination. Most people underestimate how quickly paper towels dry out in a sealed bag.
Visual Readiness Cues: In Step 1, look for cones that are "slightly open"—this means you can just see the seed wings peeking out. If they're tightly closed, add an extra week to the cold treatment. I test readiness by gently pressing the cone scales with my thumbnail; if they give slightly, they're ready. This simple check saves weeks of waiting.
Germination Timing: Those 4-8 weeks for germination can feel like forever, but consistency matters more than the clock. I keep a seedling journal with dates and conditions—this helps me spot patterns. If your seedlings take longer, check your soil temperature (should stay at 65-70°F) and light exposure. Cold soil slows germination, while too much light can stress delicate sprouts.
Pro Tips for Pinecone Seed Grow A Garden
- Real talk: The difference between a thriving pinecone seedling and a failed experiment often comes down to these small but critical details I learned after watching three batches fail.
- Cold Treatment Consistency: The 34-40°F range in your refrigerator's crisper drawer is non-negotiable—any warmer and you're not breaking dormancy properly.
- Moisture Management: The damp paper towel should feel like a wrung-out sponge—not dripping, not bone-dry.
Frequently asked questions
Got questions about growing pinecones into a thriving garden?
Here are answers to the most common ones—so you can skip the guesswork and get straight to planting!
How long does cold stratification take for pinecone seeds?
Cold stratification typically takes 4–12 weeks for pinecone seeds. Most species (like ponderosa or white pine) need 6–8 weeks in the fridge. Check your pinecone’s origin—some native varieties may require a full winter’s chill. Pro tip: Place a damp paper towel in your baggie to maintain moisture without rot!
Can I speed up germination without cold stratification?
Cold stratification is essential for most pinecone seeds—they’re adapted to natural winter cycles. However, you can try soaking seeds in warm water for 24 hours before stratification to soften the outer shell. Just know results may be slower or less reliable without the cold step!
What’s the best soil mix for pinecone seedlings?
Use a well-draining, slightly acidic mix (pH 5.0–6.5) like:
- 50% peat moss or coco coir
- 30% perlite or coarse sand
- 20% compost or pine bark fines
Why aren’t my pinecone seeds sprouting after stratification?
Check these common pitfalls:
- Old seeds: Pinecones lose viability after 1–2 years. Test freshness with a float test—sinkers are viable!
- Improper moisture: Seeds must stay damp but not waterlogged during stratification.
- Wrong species: Some pines (like bristlecone) are extremely slow—wait up to a year!
How close can I plant pinecone seedlings together?
Space seedlings based on mature size:
Species
Spacing (Feet)
Dwarf pines (e.g., mugo)
3–5 ft apart
Medium pines (e.g., ponderosa)
10–15 ft apart
Tall pines (e.g., white pine)
20–30 ft apart
Wrapping up and next steps
Growing a garden from pinecone seeds is a rewarding journey that blends patience with nature’s magic! By mastering cold stratification, you’ve unlocked the secret to vibrant blooms next spring—whether you’re nurturing Pinus seedlings or other cold-loving varieties. 🌱✨
Now that you’re equipped with the right tools and know-how, take the next step: plant those prepped seeds in well-draining soil and watch your garden transform. Every tiny effort today will bloom into something extraordinary—so grab your gloves and get growing!