
Propagation
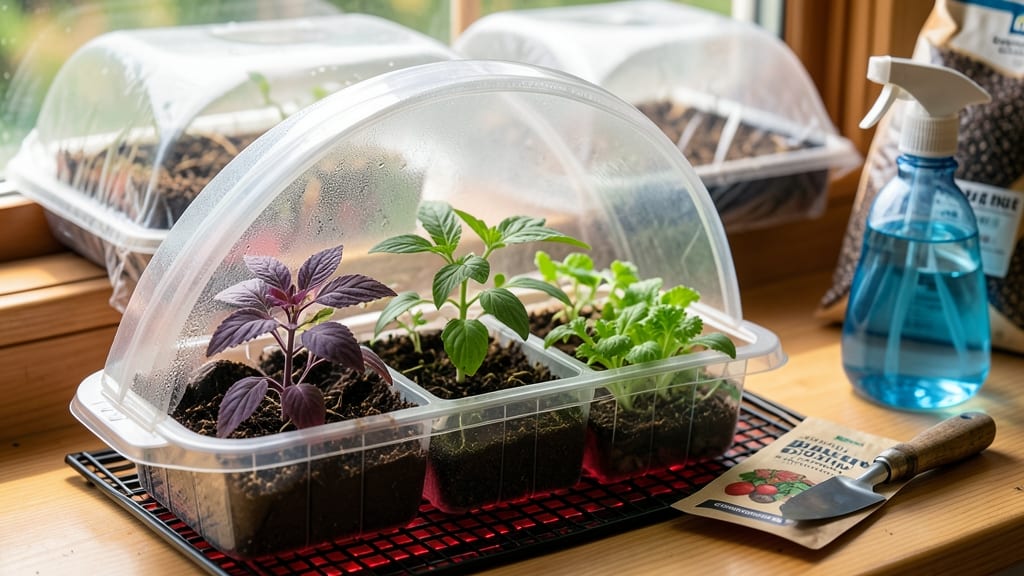
Plastic seed starting trays turn your basement or windowsill into a seedling factory—fast germination and all. 🌱 I’ve tried everything from egg cartons to peat pots, but these trays are the unsung heroes of my spring garden.
They’re lightweight, affordable, and hold moisture just right for tiny roots to take hold. The secret to their success lies in the drainage holes and how they stack neatly. No more guessing if you’ve watered enough—just press your finger in the soil, and you’ll know.
Plus, they’re reusable for years, which saves money and reduces waste. Even my black thumb can’t kill seedlings in these trays. You’ll see sprouts within 5-7 days for most vegetables, and once they’re ready, transplanting is a breeze.
The cells make it easy to pop them out without disturbing delicate roots. No more struggling with peat pots that dissolve or soil blocks that crumble. Compared to biodegradable options, plastic trays win for durability and cost.
They’re also better for larger batches, like starting a full garden of tomatoes or peppers. Just avoid overwatering—they dry out faster than you’d think.
📚 In This Guide
- What you need
- Instructions
- Tips and common mistakes
- Wrapping up and next steps
What you need
- ● Plastic seed starting trays: 1–2 trays (28–72 cell count, depending on seed size—smaller seeds like lettuce need 72+ cells, while larger seeds like beans work well in 28-cell trays).
- ● Tip: Opt for biodegradable or reusable trays to reduce waste.
- ● Seed starting mix: 1–2 bags (1–2 cubic feet, depending on tray size). Use a lightweight, sterile mix (avoid garden soil—it’s too dense!).
- ● Seeds: Your chosen variety (check seed packets for spacing recommendations).
- ● Misting bottle or spray nozzle: For gentle hydration without disturbing seeds.
- ○ Clear plastic dome or humidity lid: (Optional but helpful for retaining moisture during germination).
- ● Grow lights or sunny windowsill: Seedlings need 12–16 hours of light daily.
- ● Labels & marker: To track seed varieties (trust us, you’ll thank yourself later!).
- ● Heating mat: Speeds up germination for slow starters like tomatoes or peppers.
- ● Bottom tray or saucer: Catches excess water and prevents soggy trays.
- ● Fertilizer (low-dose): A balanced 5-10-5 or fish emulsion once seedlings sprout their first true leaves.
- ● Tweezers or popsicle sticks: For delicate seed placement (great for tiny seeds!).
Step-by-Step guide to using plastic seed starting trays
Here’s how I get seedlings off to a flying start with these lightweight, budget-friendly trays.
🌱 Step 1: Prepare Trays and Soil for Optimal Germination
First, wash your trays with warm, soapy water to remove any residue from previous use. Plastic trays hold moisture well, so I always use a seed-starting mix (not garden soil) to prevent compaction and fungal issues. Fill each cell about ¾ full—this gives roots room to grow without crowding.
Press the soil down lightly with your fingers until it’s firm but still fluffy. You want it to hold its shape when touched but not feel like concrete. Tap the tray gently on the table to settle everything evenly. This step ensures your seeds won’t sink too deep or sit too loose, both of which can delay germination.
💧 Step 2: Sow Seeds at the Right Depth and Moisture Level
Check the seed packet for depth recommendations, but a good rule of thumb is to plant seeds at a depth equal to 2-3 times their diameter. For tiny seeds like lettuce, a light sprinkle on top works best. I use a toothpick to create small holes—this prevents over-deep planting and makes it easier to space seeds evenly.
After sowing, mist the soil surface with a spray bottle until it’s damp but not soggy. Overwatering here can cause seeds to rot before they sprout. Place the tray in a warm spot (around 70-75°F) to encourage fast germination. You’ll see tiny sprouts in as little as 3-7 days, depending on the plant type.
☀️ Step 3: Provide Consistent Light and Humidity
Once seeds sprout, move the tray to a bright location with at least 12-14 hours of light daily. A south-facing window or grow light works best. If using natural light, rotate the tray a quarter turn daily so seedlings grow straight instead of leaning toward the sun.
Keep the soil lightly moist—never let it dry out completely, but avoid soggy conditions. Plastic trays help retain humidity, so you won’t need to water as often as with pots. Watch for the first set of true leaves (not the initial seed leaves) to appear. This is your signal that the seedlings are ready for their next growth phase.
✂️ Step 4: Thin and Transplant When Ready
When seedlings have 2-3 sets of true leaves, thin them so only the strongest plant remains in each cell. Use scissors to snip unwanted seedlings at soil level—this prevents disturbing the roots of the ones you’re keeping. If you’re transplanting soon, you can leave the trays intact and move them directly into the garden.
For hardier seedlings, gently press the soil around the roots to encourage root growth into the new environment. Water deeply after transplanting to help settle the soil. I’ve found that seedlings grown in plastic trays adapt well to outdoor conditions because the trays’ lightweight design makes them easy to handle without damaging roots.
Tips & tricks for perfect seed starting with plastic trays
Let me save you the trial-and-error of figuring out these trays on your own—these are the tricks that'll give you the fastest, healthiest seedlings every time.
Soil Prep Secret: After filling your cells ¾ full with seed-starting mix, I press down just enough so the soil holds its shape when you tap the tray—but don't pack it like dirt. Think "lightly compressed sponge." This creates the perfect balance: firm enough to support tiny roots but loose enough for water to penetrate. Too loose and seeds sink too deep; too packed and roots suffocate.
Planting Precision: That toothpick trick in Step 2 is a game-changer for tiny seeds. For larger seeds like beans or peas, make holes just deep enough to cradle them—no deeper. I've seen seeds planted too shallow fail to sprout because they dry out, while seeds planted too deep struggle to push through the soil. Aim for that 2-3 times diameter rule, and always label your trays with seed types to avoid mix-ups.
Light Rotation Hack: That quarter turn daily isn't just about straight growth—it's about preventing seedlings from stretching toward the light source. I set a timer on my phone for 9 AM and 5 PM to remind me, but even just rotating once every other day makes a noticeable difference. Seedlings grown without rotation often develop into lopsided plants that need pruning later.
Transplanting Timing: When you see those 2-3 sets of true leaves, that's your cue—but don't rush it. Hardier seedlings like tomatoes can handle transplanting at this stage, but more delicate plants like lettuce might need an extra week in the trays. The key is roots: if you see roots circling the bottom of the cell, it's definitely time to transplant. Use scissors to snip at soil level rather than pulling seedlings to avoid root damage.
Pro Tips for Plastic Seed Starting Trays
- Let me save you the trial-and-error of figuring out these trays on your own—these are the tricks that'll give you the...
- Soil Prep Secret: After filling your cells ¾ full with seed-starting mix, I press down just enough so the soil holds ...
- Planting Precision: That toothpick trick in Step 2 is a game-changer for tiny seeds. For larger seeds like beans or p...
Frequently asked questions
Got questions about plastic seed starting trays?
You’re not alone! Here are answers to the most common ones to help you grow with confidence.
Are plastic seed starting trays reusable?
Yes! Many plastic seed trays are highly reusable—just sanitize them with a 10% bleach solution or boiling water between uses. Avoid overusing them if they become brittle or cracked, though. For long-term use, opt for durable brands labeled "reusable."
How long can seeds stay in plastic trays before transplanting?
Most seedlings are ready for transplanting in 4-8 weeks, depending on the plant type. Watch for true leaves (not the first seed leaves) and sturdy stems. Overcrowding or leggy growth signals it’s time to move them to larger pots or soil. Check your seed packet for species-specific timing!
Are plastic trays better than biodegradable or peat pots?
Plastic trays offer cost-effectiveness and durability, making them ideal for bulk starts. Biodegradable pots reduce transplant shock but cost more and may not hold moisture as well. Peat pots break down but can wash out nutrients. Choose based on your budget, eco-goals, and plant needs!
Why are my seedlings dying in plastic trays?
Common culprits include overwatering (root rot), poor drainage (check for holes!), or insufficient light (leggy seedlings = more sun!). Ensure trays have drainage holes, use well-draining soil, and place them in bright, indirect light. If mold appears, improve airflow or reduce moisture.
Can I reuse plastic trays for different seed types?
Just sterilize them between uses to prevent disease. Mix 1 part bleach with 9 parts water, soak trays for 10 minutes, then rinse thoroughly. This keeps fungi and bacteria at bay, especially when switching between veggies and flowers.
Wrapping up and next steps
You’ve got everything you need to kickstart your gardening journey with plastic seed starting trays—lightweight, reusable, and perfect for fast germination! These trays make seedling care simple, whether you’re a beginner or a seasoned green thumb. 🌱
Now that you’re armed with tips and answers, it’s time to plant those seeds! Start small, experiment with different varieties, and watch your garden grow. Happy planting—your future harvest awaits! 🌿