
Lawn
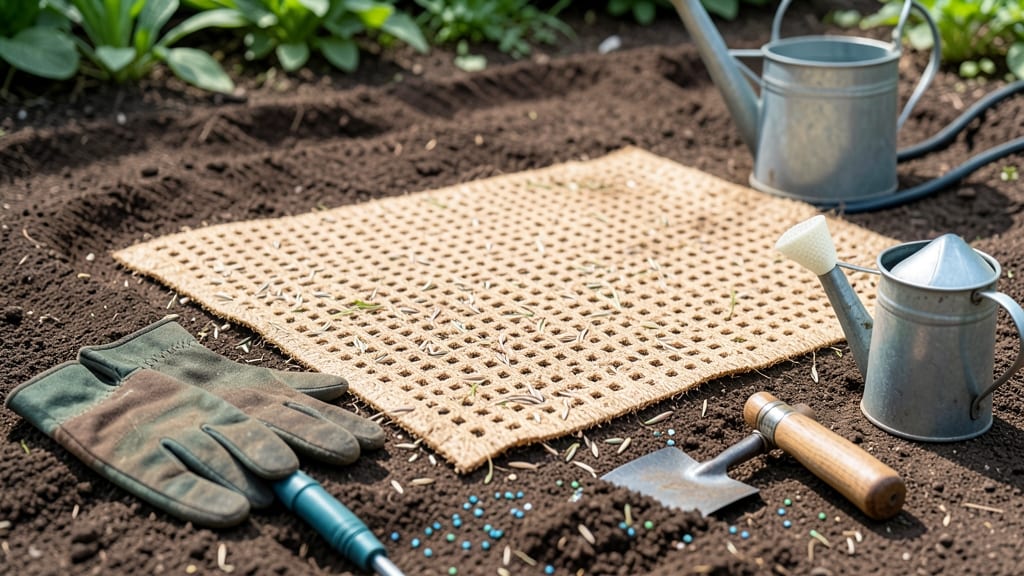
Seed mats for grass cut germination time to just 3-5 days—no soil required. 🌱 I was skeptical until I saw my first green shoots appear in days instead of weeks, and now I swear by them for quick lawn repairs or new patches.
The secret lies in their pre-moistened, nutrient-rich design that mimics ideal growing conditions without the hassle of traditional seeding.
You’ll need a clean, level area, a rake for smoothing, and a hose for watering—no fancy tools. Spread the mats directly onto bare soil or existing grass, securing edges with landscape pins if needed.
Water lightly afterward, but don’t soak them; these mats hold just the right amount of moisture to kickstart growth. The best time to use them is in early spring or fall, when temperatures are mild and rain isn’t a daily struggle.
Within a week, you’ll see vibrant green grass filling in gaps faster than you’ve ever achieved. The mats break down naturally over time, leaving no residue behind. Just keep them moist (not soggy) until the grass establishes, which usually happens in 2-3 weeks.
This method works especially well for small repairs, slopes, or areas where traditional seeding struggles.
Common pitfalls include overwatering or laying mats in direct sun before roots take hold. If birds peck at the seeds, cover lightly with a breathable fabric until sprouts appear. For larger areas, consider cutting mats to fit odd shapes—just make sure edges overlap slightly for seamless coverage.
Once established, your new grass will blend right in with the rest of your lawn.
📚 In This Guide
- What you need
- Instructions
- Tips and common mistakes
- Wrapping up and next steps
What you need
- ● Seed mats (hydroseeding mats): 1 roll per 100–200 sq. ft. (check coverage specs; typically 10–20 sq. ft. per roll). Opt for biodegradable mats for eco-friendliness.
- ● Grass seed blend: 2–4 lbs per 100 sq. ft. (choose fast-germinating varieties like ryegrass or annual ryegrass for 3–5 day sprouts).
- ● Water-soluble fertilizer: 1–2 lbs per 100 sq. ft. (look for a high-phosphorus formula, e.g., 10-20-10 NPK ratio).
- ● Water: 10–20 gallons per 100 sq. ft. (for mixing seed slurry).
- ● Spray nozzle or hydroseeder: To evenly distribute the seed slurry onto the mats.
- ● Staple gun or landscape staples: To secure mats to the ground (if not using adhesive-backed mats).
- ● Measuring tape: To calculate lawn area accurately.
- ● Garden hose with shutoff valve: For rinsing and hydration.
- ● Gloves & safety glasses: To protect hands and eyes during setup.
- ● Level ground or slight slope: Avoid areas with steep inclines or heavy foot traffic for the first 2 weeks.
- ○ Optional: Mulch or erosion control blanket: If seeding in windy conditions or slopes.
How to use seed mats for fast grass germination
Skip the soil prep and watch grass sprout in just days instead of weeks.
🌱 Step 1: Prepare Your Lawn Area
Start by clearing the area of any debris, rocks, or weeds using a rake or leaf blower. You want a clean, flat surface—think of it like preparing a blank canvas. If you have existing grass, mow it as short as possible to ensure good seed-to-mat contact. I like to do this on a dry day so the ground stays firm and doesn’t get muddy.
Check for low spots or uneven areas. Fill any depressions with a thin layer of sand or topsoil, then level it out. The goal is to create a smooth surface where the seed mat will lie flat. If you skip this, you’ll end up with uneven germination and weak spots in your lawn.
💧 Step 2: Apply the Seed Mat
Unroll the seed mat over the prepared area, starting from one end and working your way to the other. Press it firmly into place to ensure full contact with the ground. You’ll notice the mat is textured—this helps the seeds stay in place and makes it easier to push down. For larger areas, I use a lawn roller (even a small hand roller works) to press it evenly.
Make sure the edges overlap slightly if you’re using multiple mats. This prevents gaps where grass might fail to grow. Once it’s laid out, give it a final walk-through to check for any lifted edges or wrinkles. If you find any, press them down again before moving on.
☀️ Step 3: Water Gently but Thoroughly
Water the seeded area immediately after laying the mat. Use a gentle spray or a sprinkler set to a fine mist to avoid dislodging the seeds. The goal is to keep the mat damp but not soaked—think of it like giving it a light shower. You’ll know it’s right when the mat looks uniformly dark and the seeds feel slightly moist to the touch.
Water twice daily for the first 3-5 days, keeping the mat consistently damp. Overwatering can wash away seeds or create mud, so avoid heavy watering. After the seeds germinate, you can reduce watering to once daily. Watch for signs of drying—if the mat starts to look light-colored or crispy, it’s time to water again.
⏰ Step 4: Monitor Germination and Maintain
Germination typically begins in 3-5 days, but this can vary based on temperature and humidity. You’ll see tiny green shoots pushing through the mat first—this is your signal that everything is working. Once the grass reaches about 2-3 inches tall, it’s time to remove the mat carefully to avoid damaging the young blades.
After removing the mat, water deeply to help the roots establish. Keep the area moist but not soggy for the first 2-3 weeks to encourage strong root growth. Avoid walking on the new grass until it’s at least 3-4 inches tall—this prevents damage and helps the roots anchor properly.
🌿 Step 5: Transition to Regular Care
Once the grass is established and actively growing, switch to a regular watering schedule based on your climate. Most lawns need about 1-1.5 inches of water per week, either from rainfall or irrigation. Mow when the grass reaches 3-4 inches tall, and never cut more than one-third of the blade height at a time to avoid stressing the plants.
Fertilize after the first mowing to give the grass a nutrient boost. Use a slow-release fertilizer to keep it healthy and green. If you notice any bare spots or slow growth, you can overseed those areas later with the same method. The beauty of seed mats is that they make lawn care faster and more predictable—no more waiting weeks for grass to sprout!
Tips & tricks for perfect grass germination with seed mats
Transforming your lawn in just days instead of weeks starts with these game-changing insights.
Surface Prep Secret: In Step 1, don't rush the leveling—take 5 extra minutes to smooth any imperfections. I've seen uneven areas create bare patches even with seed mats. Use a straight board as a guide to check your level before applying the mat. The flatter the surface, the more consistent the germination will be.
Mat Application Technique: When pressing down the seed mat in Step 2, work from the center outward. This prevents air pockets that could create weak spots. For larger areas, a lawn roller works wonders, but even a heavy board dragged firmly across the mat will do the trick. I've found that pressing in a grid pattern helps ensure complete seed-to-ground contact.
Watering Wisdom: That "light shower" in Step 3 is crucial—aim for a gentle mist that dampens the mat without creating puddles. I use a sprinkler with a fine mist setting and move it slowly to avoid dislodging seeds. The key is uniform moisture: if you see dry spots after watering, give those areas a targeted spray. Overwatering here is just as bad as underwatering.
Pro Tips for Seed Mats Grass
- Transforming your lawn in just days instead of weeks starts with these game-changing insights.
- Surface Prep Secret: In Step 1, don't rush the leveling—take 5 extra minutes to smooth any imperfections. I've seen u...
- Mat Application Technique: When pressing down the seed mat in Step 2, work from the center outward. This prevents air...
Frequently asked questions
Got questions about seed mats for grass?
You’re not alone! Here are answers to the most common concerns—so you can grow a lush lawn fast and easy.
How do seed mats actually work without soil?
Seed mats use a biodegradable fiber matrix that holds moisture and nutrients directly to the seeds. The fibers mimic soil’s role by keeping roots hydrated while the grass sprouts—no dirt required! Just lay them down, water lightly, and watch your lawn take off in 3–5 days.
Why does germination happen so quickly with seed mats?
The secret is consistent moisture and optimal seed placement. Traditional seeds buried in soil can dry out or get too deep, slowing growth. Seed mats eliminate these issues by keeping seeds surface-level and hydrated. Plus, the fibers release nutrients gradually, giving seedlings a boost from day one.
Do I still need to water daily with seed mats?
Not quite! While seed mats retain moisture better than soil, they still need light watering (2–3 times/day) for the first 3–5 days to kickstart germination. After that, 1–2 deep waterings per week usually suffice. Pro tip: Water gently to avoid displacing the mat!
Can I use seed mats for overseeding an existing lawn?
Seed mats are perfect for overseeding—just lay them over bare spots or thin areas. They’ll outperform traditional seeds by blocking weeds and keeping new grass moist. For best results, mow lightly before applying to avoid seed damage.
What if my seed mat doesn’t germinate in 5 days?
Don’t panic! Check these 3 fixes:
- Moisture: Ensure the mat stays damp (not soggy).
- Temperature: Grass needs 60–75°F to sprout. If it’s too cold, wait or use a seed mat with built-in warmth.
- Sunlight: Place mats in full sun (6+ hours/day). Partial shade may delay growth.
Wrapping up and next steps
Transforming your lawn with seed mats for grass is faster, easier, and just as effective as traditional methods—if not more! 🌱 These innovative mats cut germination time to just 3-5 days without soil, saving you effort and frustration.
Whether you're a busy homeowner or a DIY enthusiast, this solution proves that growing a lush lawn doesn’t have to be complicated.
Ready to take the next step? Start small with a patch of your yard or balcony, follow the simple steps, and watch your grass sprout in record time. Your dream green lawn is closer than you think—go ahead and plant those seeds!