Flowers
Seed paper flowers bring magic to gardens that lasts only until they bloom—and then they feed the earth. 🌸 I’ve turned these delicate, biodegradable blooms into everything from wedding bouquets that grow into wildflowers to hanging garden decor that doubles as a pollinator buffet.
The best part? They dissolve into soil, leaving no trace except happy bees and butterflies.
These aren’t just pretty paper flowers—they’re a crafty way to grow seasonal blooms without permanent commitment. Use them for temporary garden art, eco-friendly event decor, or even as plantable place cards at a garden party.
The seeds inside will sprout when planted, turning your design into a living legacy. No green thumb required—just creativity and a little patience.
Imagine a wreath that blooms into a meadow, or a table centerpiece that becomes a pollinator paradise. You’ll create stunning displays that evolve with the seasons, all while giving back to the garden.
The possibilities are endless—whether you’re decorating for a special occasion or just adding whimsy to your outdoor space.
Perfect for gardeners who love art as much as they love plants, these flowers are the ultimate sustainable craft. They’re lightweight, easy to make, and always leave a lasting impression—literally. Let’s get crafting with nature’s disappearing act!
📚 In This Guide
- What you need
- Instructions
- Tips and common mistakes
- Wrapping up and next steps
What you need
- ● Seed paper – 1-2 sheets (pre-made or DIY; ensure it’s made from recycled paper and embedded with wildflower seeds).
- ● Wildflower seeds – 1-2 tbsp (if making your own seed paper; choose fast-growing, native varieties like cosmos, marigolds, or clover).
- ● Water – ½ cup (for mixing with seeds and paper pulp).
- ● Recycled paper – 1-2 sheets (for DIY seed paper; tear into small pieces).
- ● Flower petal shapes – Pre-cut templates or a craft knife + ruler (for cutting petals).
- ● Bone folder or popsicle stick – 1 (for scoring and shaping petals).
- ○ Glue or flour paste – 1 small bottle (optional, for extra adhesion if needed).
- ● Acrylic paint or watercolors – Small set (for decorating petals).
- ● Twine or ribbon – 1-2 feet (to turn flowers into hanging decorations).
- ● Drying rack or wire mesh – 1 (for air-drying petals).
- ● Essential oils (lavender, citrus, etc.) – 2-3 drops (for scenting seed paper).
- ● Stencils or lace – 1-2 pieces (for intricate designs).
Step-by-Step instructions for making seed paper flowers
Here's how to create these magical blooms that grow and fade away—no gardening experience required!
🌱 Step 1: Prepare Your Flower Templates and Seed Mix
Start by designing your flower shapes on cardstock or thick paper using petal outlines. I like to use a combination of simple circles and teardrop shapes for classic blooms. Cut out 4 identical petal pieces per flower—you'll need 16 total for 4 flowers. For the seed mix, combine 1 cup wildflower seeds (like cosmos or marigold) with 2 cups water in a blender. Pulse until you have a smooth, thick paste.
Add 1 cup flour and 1 cup water to the seed mixture, blending again until it reaches a thin, paint-like consistency. This is your seed paper "ink." The key here is patience—if it's too thick, add a splash more water. Too thin? Stir in a little more flour. You want it to coat a brush evenly without dripping.
🎨 Step 2: Paint and Layer Your Flower Petals
Lay your petal templates on a flat surface and use a small paintbrush to apply the seed mixture. Start with the center petal and work outward, leaving a ¼-inch border unpainted at the base—this will be your flower's "stem" later. Let the first layer dry completely, about 15-20 minutes. You'll see the petals turn slightly darker as moisture evaporates.
Once dry, carefully peel the petals off their templates. If they stick, gently slide a butter knife underneath to release them without tearing. For a 3D effect, paint a second layer on the edges of each petal, overlapping slightly. This creates depth and makes your finished flowers look more realistic. Let these layers dry fully before assembling.
🌿 Step 3: Assemble and Attach Stems
Arrange 4 petals in a circular pattern, overlapping slightly at the edges to form a complete flower. Use a small amount of the leftover seed mixture as "glue" to secure the petals together at the base. Press firmly and hold for 10 seconds—this ensures a strong bond. Repeat for all 4 flowers, spacing them evenly on a drying rack or flat surface.
For stems, roll strips of brown paper into 6-inch-long cones, securing with a dab of seed mixture. Slide each cone into the unpainted base of your flower assembly. Let everything dry completely—this can take up to 2 hours, depending on humidity. The drier they are, the longer they'll last once planted.
💧 Step 4: Plant and Water for Germination
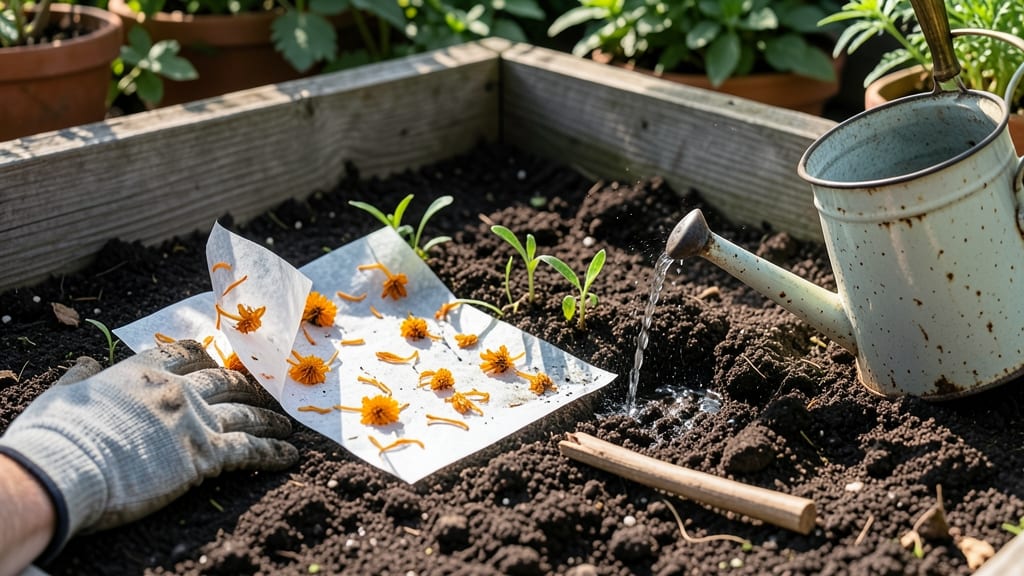
Once fully dry, your seed paper flowers are ready to bloom! Plant them directly into soil, pressing the stems 1 inch deep. Water gently but thoroughly—aim for 1 cup of water per flower—to activate the seeds. You'll know it's working when the paper starts to soften and darken within 24 hours.
Place your planted flowers in a location with 4-6 hours of sunlight daily. Within 7-14 days, you'll see tiny green sprouts pushing through the decomposing paper. The entire flower will dissolve naturally, leaving only the growing plants behind. It's like watching magic happen right before your eyes!
⏰ Step 5: Maintain and Enjoy the Blooms
After planting, keep the soil consistently moist but not soggy. A light misting every 2-3 days is perfect—you want the paper to break down without rotting. Once the sprouts reach 2 inches tall, you can transplant them to a garden bed if desired. The original paper will have fully decomposed by this point.
Here's the best part: these flowers aren't just beautiful—they're functional! The seeds you planted will grow into real wildflowers that attract pollinators and add color to your garden. When the blooms fade naturally, simply pull up the spent plants and compost them, completing the cycle.
Tips & tricks for perfect seed paper flowers
These little tricks will make your biodegradable blooms even more magical—and help you avoid common pitfalls along the way!
Seed Mix Consistency: The secret to perfect seed paper lies in getting that paint-like texture just right. After blending your 1 cup wildflower seeds, 2 cups water, 1 cup flour, and 1 cup water, test it on a scrap paper—it should spread smoothly but not drip. If it's too thick, add water 1 teaspoon at a time until it flows like thin paint. Too thin? Stir in flour ½ teaspoon at a time until it clings to the brush without dripping. This consistency ensures even coverage and prevents cracking when dry.
Template Prep: For easier petal removal in Step 2, lightly coat your cardstock templates with a thin layer of vegetable oil spray before painting. This creates a natural release layer so your petals slide off effortlessly. I also recommend using a sharp craft knife for cutting templates—it gives cleaner edges than scissors, which helps your final flowers look more polished. Pro tip: Number your templates if making multiple flowers to keep track of matching petals!
Drying Strategy: Humidity can be your best friend or worst enemy when drying your flowers. If your kitchen is humid (like mine often is!), place a small fan on low speed near your drying rack to speed up evaporation. For extra-dry air, I sometimes place my flowers on a wire cooling rack over a baking sheet in a 200°F oven for 5-10 minutes—just watch them closely so they don't over-dry. The goal is to reach full dryness in the 2 hours window mentioned, but faster drying prevents warping.
Planting Hack: To ensure your flowers get the perfect 1 cup of water when planted, use a small watering can with a fine rose attachment. This gives you precise control over water distribution without oversaturating the soil. I also like to plant mine in small pots first—this lets you monitor germination closely before transplanting to garden beds. The 4-6 hours of sunlight requirement is non-negotiable, so choose a spot that gets morning sun (less intense) if your area has scorching afternoons.
Pro Tips for Seed Paper Flowers
- These little tricks will make your biodegradable blooms even more magical—and help you avoid common pitfalls along the way!
- Seed Mix Consistency: The secret to perfect seed paper lies in getting that paint-like texture just right.
- Template Prep: For easier petal removal in Step 2, lightly coat your cardstock templates with a thin layer of vegetable oil spray before painting.
Frequently asked questions
Got questions about seed paper flowers? You’re not alone! Here are some of the most common queries—and their answers—to help you craft with confidence.
How long does it take for seed paper flowers to grow?
Seed paper flowers typically sprout within 7–14 days if planted in moist, well-draining soil with sunlight (6+ hours daily). Growth speed depends on the seed type—some wildflowers bloom in weeks, while others take months. Check the packaging for specific timelines!
Can seed paper flowers survive winter?
Most seed paper flowers are annuals, meaning they won’t survive harsh winters. Plant them in spring or early fall for best results. If you live in a cold climate, consider pressing them into soil before the first frost or storing them in a cool, dry place until planting season.
Do I need to water seed paper flowers differently than regular plants?
Yes! Keep the soil consistently moist (but not soggy) for the first 2 weeks. After sprouting, water deeply 2–3 times per week, depending on your climate. Seed paper breaks down faster when wet, so avoid overwatering—let the top inch of soil dry slightly between waterings.
What if my seed paper flowers don’t grow?
Don’t worry—try these fixes:
- Check sunlight: Move to a sunnier spot if growth is slow.
- Test soil moisture: Dry soil is the #1 killer. Water gently and cover with plastic wrap temporarily to retain humidity.
- Verify seed viability: Some seeds need scarification (lightly scratching the seed coat) or stratification (cold treatment). Check the seed type’s needs!
Can I use seed paper flowers for events like weddings?
They’re perfect for eco-friendly decor—just plant them in biodegradable pots or directly in soil. For post-event blooms, place them in a sunny garden bed or give them as take-home favors with care instructions. Pro tip: Label them with planting tips for guests!
Wrapping up and next steps
Seed paper flowers aren’t just a creative craft—they’re a thoughtful way to give back to nature while adding beauty to your space. Whether you’re gifting them, decorating for an event, or simply enjoying a sustainable hobby, these blooms prove that small actions can make a big difference. 🌱
Ready to turn your green thumb into a green project? Start small—try making a single flower or a set for a friend—and watch your confidence (and garden!) grow. Who knows? You might inspire others to join the eco-friendly crafting movement too!