
Propagation
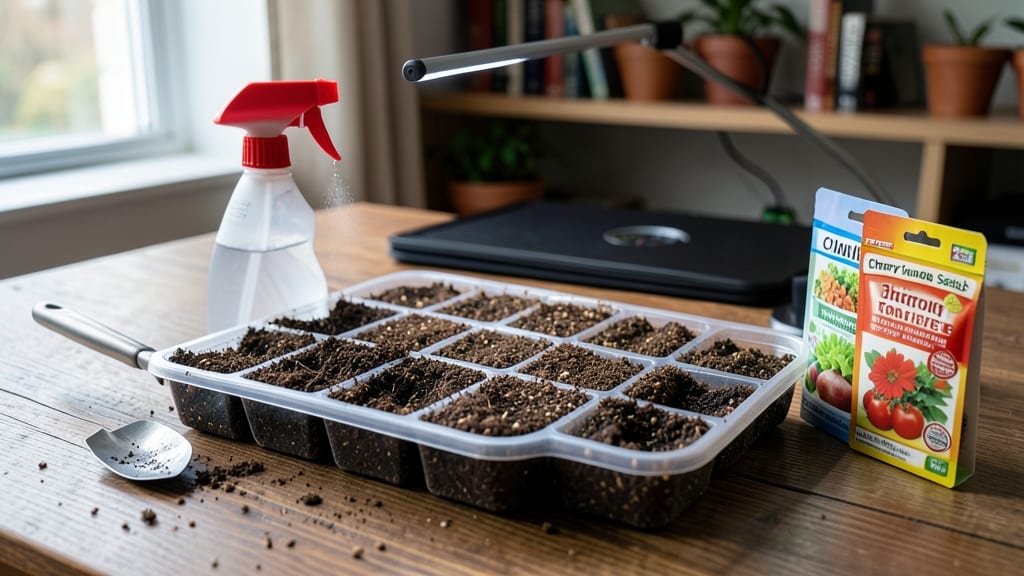
The right seed starting soil can make the difference between a thriving seedling and a sad, moldy mess. 🌱 I’ve lost count of the seedlings I’ve watched wither from damping-off—until I finally cracked the code on a sterile, well-draining mix that actually works.
The secret isn’t just any soil; it’s a carefully balanced blend that keeps roots happy and diseases at bay from day one.
Most commercial seed-starting mixes already do the heavy lifting by sterilizing the ingredients and adding perlite or vermiculite for drainage. But if you’re mixing your own, focus on 50% peat or coco coir (for moisture retention) and 50% perlite or coarse sand (for aeration).
Skip garden soil—it’s too heavy and packed with pathogens that can smother tiny roots. For delicate seedlings like lettuce or petunias, add a sprinkle of horticultural charcoal to further reduce mold risk.
What you’ll end up with is a fluffy, crumbly medium that holds moisture without turning into a swamp. Seedlings will sprout faster, develop stronger roots, and avoid that heartbreaking collapse from damping-off. The payoff? A tray of uniform, sturdy seedlings ready to transplant without shock—no more weak, leggy failures.
This method works for everything from finicky herbs to hardy vegetables, and it’s just as effective in small seedling trays as it is in deep grow bags.
The key is consistency: once you find a blend that works, stick with it. Here’s how to set it up right the first time.
📚 In This Guide
- What you need
- Instructions
- Tips and common mistakes
- Wrapping up and next steps
What you need
- ● Sterile base soil: 1 part sterilized peat moss or coco coir (2-3 lbs per 5-gallon bucket)
- ● 1 part perlite or vermiculite (1-1.5 lbs per 5-gallon bucket)
- ● Sterilization supplies: Baking sheet or large tray
- ● Oven or microwave (for small batches)
- ● Aluminum foil (to cover trays)
- ● Mixing tools: 5-gallon bucket or large container (with lid)
- ● Garden trowel or large spoon
- ● Clean gloves (to avoid contamination)
- ● Containers: Seed-starting trays (with drainage holes) or small pots (2-4 inches deep)
- ○ Plastic nursery flats or biodegradable pots (optional)
- ● Amendments for extra fluffiness: 1 part sand (coarse, horticultural-grade)
- ● 1 part rice hulls (for aeration)
- ● Fungicide or disease prevention: 1 tsp hydrogen peroxide (3%) per gallon of mix (to disinfect)
- ● 1 tbsp mycorrhizal fungi (for root health)
- ● pH testing kit (to ensure mix is neutral, pH 6.0-7.0)
- ● Misting bottle (for gentle watering)
How to create a sterile seed starting mix that prevents damping-off
Here's my go-to method for a disease-free, lightweight mix that gives seedlings the perfect start.
🌱 Step 1: Combine Base Materials for Lightweight Structure
Start with 50% peat moss or coco coir—this holds moisture while allowing airflow. I measure this first because it forms the foundation. Add 30% perlite or vermiculite next; this creates those crucial air pockets that prevent soggy roots. Toss them together in a large bin, breaking up any clumps in the peat.
For the remaining 20%, sprinkle in compost or worm castings—just enough to feed seedlings without overwhelming them. Too much organic matter heats up and can cook tender roots. Mix gently with a garden fork until you see an even, fluffy texture throughout. The final blend should look like crumbled styrofoam with a hint of dark brown speckles.
💧 Step 2: Sterilize the Mix to Eliminate Pathogens
Spread the blended materials in a 1-inch layer across a baking sheet. Pop it in the oven at 200°F for 30 minutes—this kills fungi, bacteria, and weed seeds without damaging the structure. I set a timer because overheating can turn the mix into a brick. Let it cool completely before handling.
For larger batches, use a microwave-safe container instead. Heat in 30-second bursts, stirring between each, until the center reaches 180°F. The mix should smell fresh, not musty. If you detect any earthy odor after cooling, repeat the sterilization process—this is your first line of defense against damping-off.
✂️ Step 3: Test Moisture Before Using
Squeeze a handful of the cooled mix—it should hold together when pressed but crumble easily. If it feels dry, mist with lukewarm water until damp (not wet). I like to use a spray bottle for even distribution. Avoid cold water; it can shock seeds and stunt germination.
Fill your seed trays or pots, pressing down lightly to eliminate air gaps. The surface should be level—no depressions where water could pool. Tap the tray gently on the counter to settle the mix evenly. This step ensures roots encounter consistent moisture without sitting in waterlogged conditions.
🪴 Step 4: Store for Future Use (With Caution)
Keep unused portions in a sealed container at room temperature for up to 3 months. I store mine in a plastic bin with a tight lid, labeled with the date. Before reuse, give it a quick sniff—any sour or moldy smell means it's time to make a fresh batch.
For long-term storage, add a 1/4 cup of food-grade diatomaceous earth per gallon to deter fungal growth. This isn't necessary for short-term use, but it extends shelf life if you're prepping ahead. Just mix it in thoroughly after sterilization—it's non-toxic but can irritate lungs if inhaled dry.
⏰ Step 5: Use Immediately for Best Results
Seed starting mix loses its ideal properties over time. Use it within 4-6 weeks for optimal germination rates. The moment you open the container, check for any signs of mold—even a faint white fuzz means it's compromised. If you notice this, discard it immediately and start fresh.
For best results, I recommend making small batches as needed. This ensures you're always working with fresh, sterile materials. The extra effort now prevents weeks of frustration later with weak, rotting seedlings. Trust me—your future self will thank you when those first true leaves pop through clean and strong.
Tips & tricks for perfect seed starting soil
Here's what nobody tells you about making a foolproof seed starting mix that actually works.
Mixing Ratio Matters: When combining your 50% peat moss or coco coir with 30% perlite or vermiculite, use a kitchen scale for accuracy. Volumetric measurements can vary wildly—especially with peat moss—which throws off the crucial air-to-moisture balance. I weigh mine to ensure that exact 50/30 ratio every single time. This balance is what prevents those dreaded waterlogged conditions that cause damping-off in the first place.
Sterilization is Non-Negotiable: That 200°F for 30 minutes in Step 2 isn't just a suggestion—it's your first line of defense. I've seen gardeners skip this and end up with moldy batches. For the microwave method, your mix should reach 180°F at the center, not just the surface. Use a food thermometer to verify—this ensures you're actually killing those pathogens hiding deep in the mix.
Moisture Testing is an Art: The squeeze test in Step 3 should feel like damp sand between your fingers—not like a wet sponge. If you're unsure, add water gradually using that spray bottle. Too much moisture creates anaerobic conditions where fungi thrive, while too little prevents proper seed hydration. Aim for that perfect "squishy but not dripping" texture that holds together when pressed but crumbles easily.
Storage Hack: For that 3-month storage period mentioned in Step 4, I add a small silica gel packet to my sealed container. It absorbs excess moisture that could encourage mold growth, keeping your mix dry and ready for future use. Just remember to remove it before use—silica gel isn't edible!
Pro Tips for Seed Starting Soil
- Here's what nobody tells you about making a foolproof seed starting mix that actually works.
- Mixing Ratio Matters: When combining your 50% peat moss or coco coir with 30% perlite or vermiculite, use a kitchen s...
- Sterilization is Non-Negotiable: That 200°F for 30 minutes in Step 2 isn't just a suggestion—it's your first line of ...
Frequently asked questions
Got questions about seed starting soil? You’re not alone! Here are answers to the most common concerns—so you can grow strong, healthy seedlings without stress.
What’s the difference between seed starting mix and regular potting soil?
Seed starting mix is lightweight, sterile, and designed to promote drainage and aeration—critical for tiny seeds and roots. Regular potting soil is heavier, nutrient-dense, and can compact or harbor pathogens like damping-off. Think of it as the difference between a fluffy baby blanket and a dense winter coat!
When should I start using seed starting mix instead of garden soil?
Switch to seed starting mix as soon as you sow seeds—whether indoors or in outdoor trays. Garden soil is too dense, retains too much moisture, and may contain weeds or diseases. For fast-growing veggies (like lettuce or radishes), use it for the first 4–6 weeks. For slower growers (tomatoes, peppers), extend to 8+ weeks before transplanting.
Can I make my own seed starting soil at home?
Mix 50% peat moss or coco coir (for moisture retention), 30% perlite or vermiculite (for aeration), and 20% compost or worm castings (for gentle nutrients). Sterilize by baking in the oven at 200°F for 30 minutes or microwaving in 1-minute bursts. Pro tip: Add a handful of mycorrhizal fungi to boost root health!
Why are my seedlings turning mushy or collapsing? Could it be the soil?
Mushy stems or yellowing leaves are classic signs of damping-off, often caused by overwatering or non-sterile soil. Fix it by:
- Using sterile seed starting mix (never garden soil).
- Watering only at the base and avoiding wet foliage.
- Spacing seedlings for airflow (2–3 inches apart).
- Adding 1 tsp cinnamon or hydrogen peroxide (3%) to water for fungal prevention.
How long can I reuse seed starting soil?
Ideally, replace it every season—or after one use if you notice mold, pests, or poor germination. If you reuse it, sterilize first (bake, microwave, or solarize) and avoid adding fresh compost, which can introduce pathogens. For long-term use, mix in 10% fresh perlite to refresh aeration.
Wrapping up and next steps
Starting seeds successfully hinges on the right seed starting soil—one that’s sterile, well-draining, and free from pathogens like damping-off.
By choosing a high-quality mix (or crafting your own with coconut coir, perlite, and compost) and following best practices, you’ll give your seedlings the best shot at thriving. Your green thumb is closer than you think—just grab that tray and get growing!
Ready to take the next step? Explore our guide on transplanting seedlings or dive into troubleshooting common seed-starting mistakes to keep your garden flourishing.