
Lawn
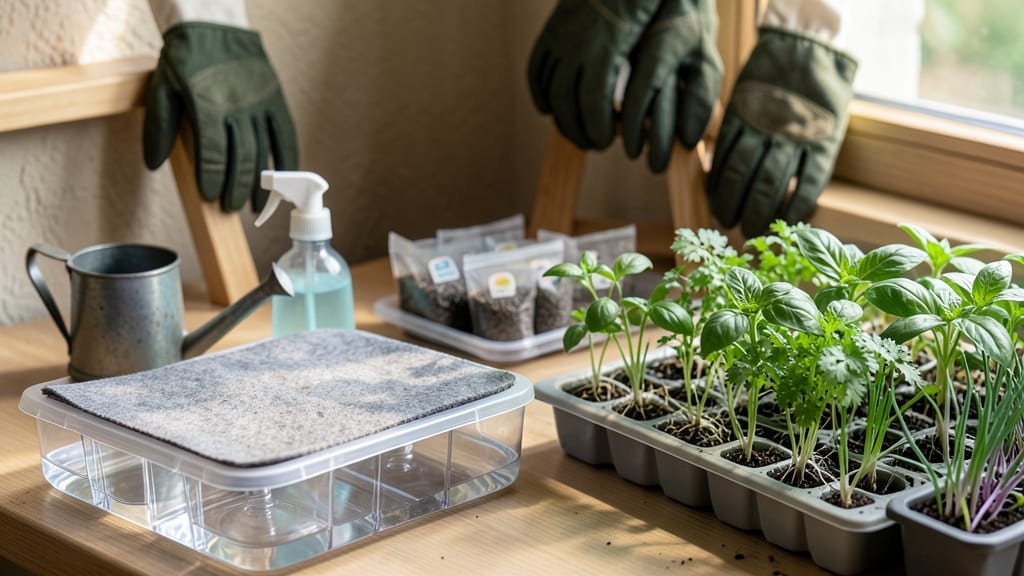
A self-watering seed starter cuts your germination time in half while keeping seedlings from drying out. 🌱 I’ve used mine for three seasons now, and the difference between these lush, even seedlings and my old, uneven starts is night and day—especially for fiddly seeds like lettuce or parsley that need perfect moisture.
The setup couldn’t be simpler: a clear plastic container with a water reservoir at the bottom, a wicking mat to deliver moisture, and a lid to trap humidity. You fill the reservoir once, and the system waters your seeds automatically for weeks.
No more checking trays every morning or rushing to water before the soil dries out. You’ll see sprouts in half the time compared to traditional trays, with stronger roots that handle transplanting like pros.
The clear sides let you watch the magic happen—tiny green hooks breaking through the soil—without the guesswork of when to water next. Perfect for beginners, busy gardeners, or anyone who’s ever killed a tray of seedlings. Here’s how to get started without the stress.
📚 In This Guide
- What you need
- Instructions
- Tips and common mistakes
- Wrapping up and next steps
What you need
- ● Clear plastic bottle (16–32 oz) – A soda or water bottle with a cap (recycle or repurpose!)
- ● Scissors or craft knife – For cutting the bottle (safety first—adult supervision recommended 👨🔧).
- ● Potting soil – Seed-starting mix or lightweight, well-draining soil (1–2 cups per bottle).
- ● Seeds – Choose fast-growing varieties like lettuce, herbs, or marigolds for quick results!
- ● Water – Room-temperature, filtered water (avoid chlorine if possible).
- ○ Optional: Wick material – A cotton string, rope, or paper towel (for advanced self-watering systems).
- ● Drill or hole punch – To create drainage holes in the bottle cap (prevents waterlogging).
- ● Plastic wrap or lid – For humidity retention (especially for tiny seeds).
- ● Label markers – To track seed types and planting dates.
- ● Tray or shallow container – To collect excess water and organize multiple starters.
- ● Grow lights or sunny windowsill – Ensures consistent light exposure (6+ hours/day).
Step-by-step instructions for building a self-watering seed starter
Here's how to create a foolproof system that keeps seedlings happy while you focus on other tasks.
🪴 Step 1: Assemble the Reservoir and Wicking System
Start with a clear plastic container—like a 1-gallon water bottle or a repurposed food storage bin. Cut a hole in the center of the lid large enough to fit your seed-starting cells or pots. This will be your water reservoir. Fill it halfway with water, leaving space for the wicking material to absorb moisture without becoming waterlogged.
Next, take a length of cotton rope or a roll of paper towels and cut it into strips about 1 inch wide. These will act as your wicks. Tuck one end of each strip into the water reservoir and let the other end drape over the edge. You'll want enough wicks to reach every seed cell or pot you plan to use. The goal is to create a capillary action that slowly delivers water to the soil surface.
💧 Step 2: Prepare the Seed Starting Cells or Pots
Fill your seed-starting cells or small pots with the seed-starting mix you've chosen, leaving about ½ inch of space at the top. Press the soil down gently so it's firm but not compacted. This ensures good contact with the wicks, which is critical for even moisture distribution. Place each cell or pot on top of the wicks, making sure the wicking material makes contact with the soil surface.
Here's the thing—don't water the cells before placing them on the wicks. The wicking system will draw up moisture from the reservoir as needed, but pre-watering can lead to soggy soil and poor drainage. You'll see the soil begin to absorb moisture from the wicks within a few hours, and that's exactly what you want.
☀️ Step 3: Sow the Seeds and Set Up Light
Plant your seeds according to the packet instructions—usually about ¼ inch deep—and cover them lightly with more seed-starting mix. Once the seeds are in, place the entire setup under a grow light or in a spot that gets 6-8 hours of indirect light daily. The grow light should be positioned about 2-3 inches above the seedlings to prevent leggy growth. Raise it slightly as the seedlings grow taller.
Watch for condensation to form on the lid of your reservoir container. This is a good sign that the wicking system is working correctly and the humidity levels are ideal for germination. If you notice the soil surface drying out too quickly, check that the wicks are properly placed and making good contact with the soil.
⏰ Step 4: Monitor and Maintain the System
Check your seed starter every 2-3 days to ensure the wicks are still drawing water effectively. If the soil feels dry to the touch, gently refill the reservoir with water. You'll know the system is balanced when the soil stays consistently moist but not soggy. This hands-off approach means you won't have to worry about overwatering or underwatering, which are common pitfalls with traditional seed-starting methods.
Once your seedlings have their first true leaves—not the initial cotyledons—you can start thinning them if necessary. Use small scissors to snip the weaker seedlings at soil level, leaving the strongest one in each cell. This step is crucial for giving your remaining seedlings room to grow without competing for nutrients.
Tips & tricks for perfect hands-off seedling growth
These little adjustments will help you avoid common pitfalls and maximize your seedling success with this self-watering system.
Wicking System Check: The 1-inch wide wicks are your secret weapon, but they need proper placement. Make sure each wick touches the soil surface in every cell—this creates consistent moisture distribution. I've found that using two wicks per cell (crossed like an X) works even better for larger cells, ensuring no dry spots develop. If you notice condensation forming on the reservoir lid but soil stays dry, your wicks might not be making full contact.
Lighting Position Tip: That 6-8 hours of light is non-negotiable, but placement matters just as much. Position your grow light so it's just 2-3 inches above the tallest seedlings. Here's what I do: I use a simple ruler to mark the light height on the stand, then adjust it every 3-4 days as seedlings grow. Too high? You'll get leggy, weak stems. Too low? You risk burning the delicate leaves. Watch for leaves touching the light—this is your warning sign to raise it immediately.
Soil Moisture Balance: The goal is consistently moist but never soggy soil. After your initial setup, check moisture by pressing your finger about ½ inch into the soil—it should feel damp like a wrung-out sponge, not dry or waterlogged. In Step 4, when you check every 2-3 days, also look for mold or foul odors. These are red flags that your reservoir might be overfilled or wicks aren't working properly. A quick fix is to reduce water in the reservoir by about 25% and trim any wicks that look waterlogged.
Thinning Technique: When those first true leaves appear, thinning becomes essential. Instead of pulling seedlings (which can damage roots), use small scissors to snip at soil level. I've found that doing this on a cloudy day reduces stress on remaining seedlings. For extra care, leave the thinned seedlings in place until they've wilted completely—this gives their roots time to absorb any remaining nutrients from the soil.
Pro Tips for Self Watering Seed Starter
- These little adjustments will help you avoid common pitfalls and maximize your seedling success with this self-wateri...
- Wicking System Check: The 1-inch wide wicks are your secret weapon, but they need proper placement. Make sure each wi...
- Lighting Position Tip: That 6-8 hours of light is non-negotiable, but placement matters just as much. Position your g...
Frequently asked questions
Got questions about self-watering seed starters? You’re not alone! Here are answers to the most common queries to help you get started with confidence.
How long do seeds take to germinate in a self-watering starter?
Germination time varies by seed type (e.g., fast growers like radishes sprout in 3–7 days, while tomatoes take 5–10 days). Self-watering starters maintain ideal moisture, but avoid overwatering—keep the reservoir topped and check soil daily. Warmth (70–85°F) and indirect light speed things up! Learn more about seed-specific timelines.
What happens if I overwater my self-watering seed starter?
Overwatering suffocates seeds by cutting off oxygen or triggers damping off (a fungal disease). Use the starter’s wicking system wisely: fill the reservoir only halfway, and empty excess water from the tray. Ensure good airflow—prop seeds in a bright, humid spot (like a plastic dome) but avoid sealing them completely.
Are self-watering seed starters worth the cost compared to regular trays?
Yes, if you’re impatient or new to gardening! They eliminate daily watering (saving time and preventing seed loss), and their built-in drainage reduces transplant shock. For budget-conscious growers, DIY versions (e.g., repurposed plastic containers with wicks) work too. See our DIY guide.
Can I reuse a self-watering seed starter for multiple plantings?
Sterilize the tray between uses by soaking it in a 1:10 bleach-water mix for 10 minutes, then rinsing thoroughly. Replace wicks if they degrade (every 2–3 uses) and refresh the growing medium. Just avoid reusing soil—it may harbor pathogens or pests.
Why aren’t my seeds germinating, even with the self-waterer?
Check these fixes:
- Temperature: Seeds need warmth (use a heat mat if below 65°F).
- Depth: Plant seeds at the depth listed on the packet (too deep = no light).
- Freshness: Old seeds (over 1 year) may have low viability.
- Light: Some seeds (like lettuce) need light to germinate—press them gently into the soil.
Wrapping up and next steps
Growing your own plants has never been easier—or more rewarding! With a self-watering seed starter, you eliminate guesswork and give your seeds the perfect start, ensuring faster germination and healthier seedlings.
Whether you're a seasoned gardener or a curious beginner, this hands-off approach makes gardening accessible and fun.
Ready to dive in? Start small—pick a few easy seeds like herbs or lettuce—and watch your green thumb grow! 🌱 For even better results, explore our guide on transplanting seedlings once they’re ready.