
Propagation
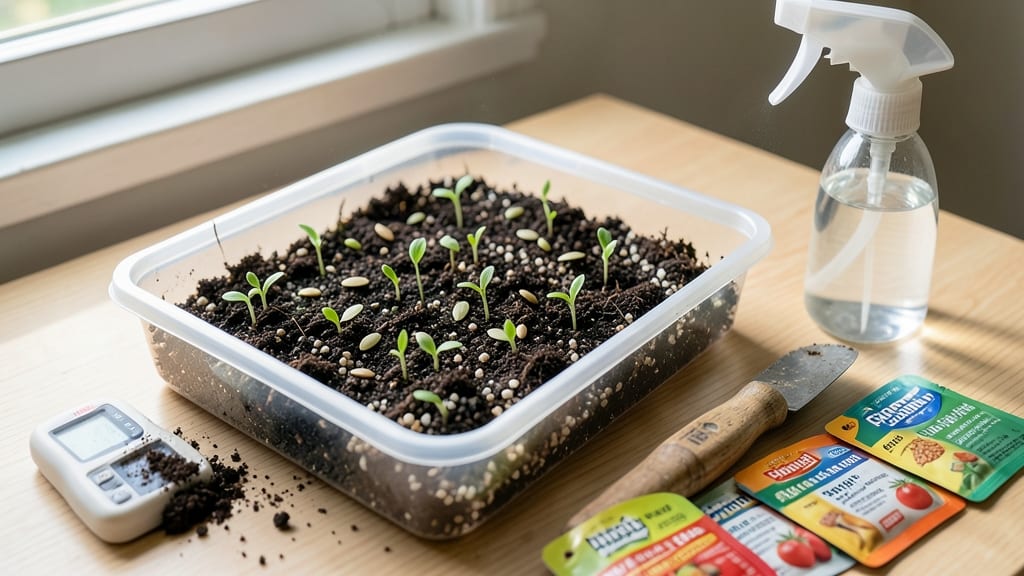
Your seed-starting soil mix makes or breaks those first tender sprouts. 🌱 I learned that the hard way—my first batch of seedlings drowned because garden soil was too dense. The perfect mix balances moisture, air, and drainage to give seeds the exact conditions they need to germinate strong and fast.
The magic formula is simple: one part peat moss or coco coir (for moisture), one part perlite or vermiculite (for airflow), and one part compost or worm castings (for nutrients).
Store-bought mixes work in a pinch, but homemade gives you control over drainage and sterility—just avoid garden soil, which compacts and blocks roots. You’ll see seeds pop in 5-14 days (depending on the plant) with this mix, and seedlings grow sturdy instead of leggy.
The texture stays fluffy, not muddy, so you avoid the dreaded "damping off" fungus that kills weak seedlings. For fussy plants like cacti, add extra perlite (up to 50% of the mix), while herbs like basil thrive with slightly more compost.
Sterilize your mix by baking it at 200°F for 30 minutes to kill pathogens before use.
📚 In This Guide
- What you need
- Instructions
- Tips and common mistakes
- Wrapping up and next steps
What you need
- ● Coco coir (or peat moss) – 2 parts (retains moisture while allowing airflow)
- ● Perlite or vermiculite – 1 part (boosts drainage and aeration; perlite for extra dryness, vermiculite for moisture retention)
- ● Compost or worm castings – 1 part (adds nutrients without compacting the mix)
- ● Seed-starting containers – Trays with drainage holes or small pots (4–6" deep)
- ● pH testing kit – Ensures your mix is 5.8–6.5 (ideal for most seeds)
- ● Mixing container – A clean wheelbarrow, bucket, or large tub
- ● Sterilizing agent – Hydrogen peroxide (3%) or a sterilizing soil drench (prevents mold)
- ● Fine mesh screen – Sifts out clumps for a fluffy texture
- ● Spray bottle – For gentle watering (avoids compacting the mix)
- ○ Optional amendments: Charcoal (1 tbsp per gallon) – Reduces fungus risk
- ● Biochar (10%) – Improves water retention and microbial life
- ● Mycorrhizal fungi – Boosts root development (great for veggies and trees)
How to create the perfect lightweight loam for seed starting
This mix ensures your seedlings grow strong and healthy—no more leggy, weak sprouts.
🌱 Step 1: Gather the Base Components
Start with 50% peat moss or coconut coir—this holds moisture without compacting. I like coconut coir because it’s renewable and drains better than peat. Add 25% perlite or vermiculite for airflow; perlite adds grit while vermiculite holds moisture better. Finally, include 25% compost or worm castings for nutrients. Skip garden soil—it’s too dense and may carry disease.
Mix these dry ingredients thoroughly in a large bin. Use a shovel or trowel to break up any clumps. The goal is a fluffy, airy texture that looks like crumbled styrofoam with dark bits. If it feels too heavy, add more perlite—you’ll know it’s right when it holds its shape but crumbles easily between your fingers.
💧 Step 2: Hydrate the Mix Gently
Add water slowly while mixing, about 1 cup per 4 gallons of dry mix. You want it damp enough to hold together when squeezed but not dripping. Overwatering now will compact the mix and suffocate roots. I use a spray bottle for the last bit—just until the surface looks evenly moist, like a wrung-out sponge.
Let the mix sit for 10-15 minutes before using. This lets the moisture distribute evenly. If it feels clumpy, fluff it again with your hands. The perfect mix should feel like a damp, crumbly cake—light enough to hold seeds in place but airy enough for roots to explore.
☀️ Step 3: Test for Ideal Texture
Fill a small container with the mix and press it down lightly. It should hold its shape but not feel packed. Drop a seed in—it should sink just enough to stay covered but not disappear into a dense block. If it sinks too far, add more perlite. If it stays on top, mix in a little compost to improve moisture retention.
For the ultimate test, grab a handful and squeeze. It should hold together but crumble when you open your hand. If it sticks like wet sand, you’ve overwatered—add dry perlite to fix it. If it falls apart completely, add a little more water and remix. This mix is your foundation—get it right, and your seedlings will thrive.
✂️ Step 4: Sterilize for Disease Prevention
To kill any pathogens, microwave 1 cup of the mix at a time in a heat-safe bowl for 2 minutes. Or, bake it at 200°F for 30 minutes on a sheet tray. This step is critical—disease lurks in garden soil and can wipe out seedlings overnight. If you skip it, you risk damping-off, a fungal infection that turns stems to mush.
After sterilizing, let the mix cool completely before using. Store any extras in a sealed container for up to 3 months. Label it with the date—old mix loses its fluffiness and nutrient power. Now you’re ready to sow seeds in a sterile, airy environment where roots can grow unhindered.
🪴 Step 5: Use Immediately for Best Results
Fill your seed-starting trays or pots with the mix, leaving ½ inch of space at the top for watering. Press it down gently—just enough to remove air pockets but not compact it. The mix should feel light, like a cloud you can mold with your fingers. If it feels heavy or sticky, remix with more perlite.
Sow your seeds directly into the mix, following packet depth guidelines. Water gently from the bottom if possible—this prevents disturbing the seeds. Within 5-7 days, you’ll see strong, sturdy sprouts instead of weak, leggy seedlings. That’s your reward for getting the mix just right.
Tips & tricks for perfect seed starting soil mix
These small adjustments make all the difference between healthy seedlings and wasted efforts.
Ingredient Ratio Secret: The 50-25-25 ratio works perfectly, but here's the thing—if you're growing moisture-loving plants like lettuce, bump the coconut coir to 60% and reduce perlite to 20%. For succulents or cacti, reverse it: 40% coir and 35% perlite. The key is matching the mix to your plants' natural growing conditions.
Hydration Hack: When adding that 1 cup per 4 gallons of water, use a spray bottle for the final adjustment. This prevents overwatering while ensuring even moisture distribution. I've learned the hard way that too much water at this stage can create a compacted mess that suffocates roots. Think "wrung-out sponge" texture—not dripping.
Sterilization Shortcut: For larger batches, divide your mix into smaller portions before sterilizing. Instead of microwaving 1 cup at a time for 2 minutes, try baking the entire batch at 200°F for 30 minutes on a sheet tray. Just stir it halfway through to ensure even heat distribution. This saves time while still killing pathogens that could ruin your seedlings.
Texture Troubleshooting: If your mix feels too heavy after adding water, don't panic—just sprinkle in dry perlite and remix. The goal is that cloud-like consistency where it holds shape but crumbles easily. I've ruined batches by ignoring this step, so trust me when I say: the texture test is non-negotiable for strong roots.
Pro Tips for Soil Mix For Seed Starting
- These small adjustments make all the difference between healthy seedlings and wasted efforts.
- Ingredient Ratio Secret: The 50-25-25 ratio works perfectly, but here's the thing—if you're growing moisture-loving p...
- Hydration Hack: When adding that 1 cup per 4 gallons of water, use a spray bottle for the final adjustment. This prev...
Frequently asked questions
Got questions about crafting the perfect soil mix for seed starting? You’re not alone! Here are answers to the most common queries to help you grow with confidence.
What’s the best ratio for a DIY seed-starting mix?
A balanced mix typically combines 50% peat moss or coco coir (for moisture retention), 30% perlite or vermiculite (for airflow), and 20% compost or worm castings (for nutrients). Adjust perlite/vermiculite if your climate is extra humid or dry!
When is the ideal time to use this mix for starting seeds?
Use your seed-starting mix 4–6 weeks before your last frost date (or 8–12 weeks for slower growers like tomatoes). Early starts ensure seedlings are robust enough to transplant. Pro tip: Label trays with seed types and dates to avoid mix-ups!
Can I reuse old seed-starting mix?
Reusing mix isn’t recommended—it can harbor fungal diseases or pests from last season’s seeds. If you’re desperate, sterilize it by baking at 200°F (93°C) for 30 minutes or soaking in a 1:10 bleach-water solution (let dry completely). Fresh is always best!
What’s a good alternative if I don’t have perlite?
No perlite? Try coarse sand (sterilized), chicken grit, or even crushed styrofoam peanuts (for temporary airflow). Avoid fine sand—it compacts and suffocates roots. Vermiculite is the next best budget-friendly swap!
Why are my seeds rotting in the mix?
Overwatering or poor drainage are usually culprits. Check your mix’s texture—it should crumble easily when dry. Use well-draining pots with drainage holes, and water only when the top inch feels dry. Fungal gnats? Add a sprinkle of cinnamon to deter them!
Wrapping up and next steps
Creating the perfect soil mix for seed starting is all about balance—lightweight loam that cradles tiny roots while ensuring airflow and drainage.
With the right blend of ingredients like perlite, vermiculite, and coco coir, you’ll give your seedlings the best possible start. Now that you’re equipped with the knowledge, it’s time to roll up your sleeves and get growing!
🌱 Next step: Grab your materials, mix your custom soil, and watch those seeds sprout into vibrant seedlings. Happy planting! 🌿