
Lawn
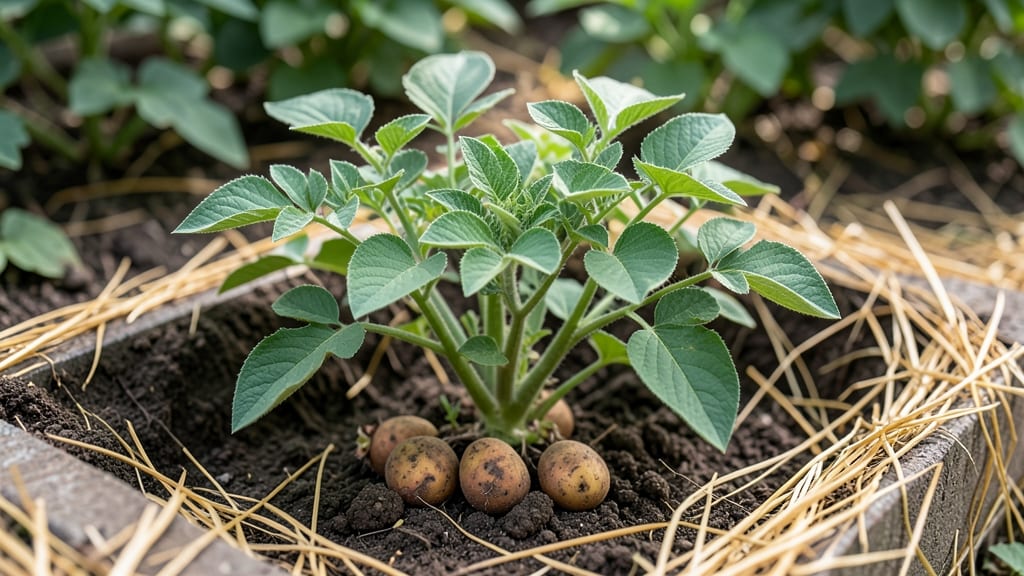
Those sprouted seed potatoes with their little green shoots are nature’s way of telling you: it’s time to grow. 🌱 I've learned the hard way that ignoring them leads to weak plants, but with the right cold stratification tricks, you'll get reliable, vigorous tubers ready for planting.
The secret starts with 3-4 weeks of chilling—no fancy equipment needed. Just place your sprouted potatoes in a cool, dark spot (like a basement or garage) where temps stay between 40-50°F.
This toughens up the sprouts so they don't rot when planted, and you'll see them grow into sturdy stems ready for the garden.
When planting time comes, you'll bury them just 4-6 inches deep with 12 inches between plants. The soil should stay consistently moist but never soggy—this is where most beginners go wrong. Within 2-3 weeks, you'll spot those first green leaves breaking through the soil.
Even if you've struggled before, this method works for first-timers and veterans alike. The key is patience—those sprouts you see now will turn into bountiful harvests if you give them the right start. Let's get those potatoes in the ground!
📚 In This Guide
- What you need
- Instructions
- Tips and common mistakes
- Wrapping up and next steps
What you need
- ● Seed potatoes: 1–2 lbs (450–900g) of certified organic or disease-free seed potatoes (avoid grocery-store potatoes—they’re treated to prevent sprouting!). Choose varieties suited to your climate (e.g., Yukon Gold, Red Pontiac, or Fingerlings).
- ● Growing containers: A shallow tray (10"x20" or larger), cardboard box, or even a repurposed plastic bin with drainage holes. Ensure it’s at least 6–8 inches deep.
- ● Growing medium: A mix of 50% peat moss or coconut coir and 50% perlite or vermiculite (or a pre-mixed seed-starting mix). Avoid garden soil—it can introduce pathogens.
- ● Spray bottle: For gentle watering (a fine-mist setting helps avoid disturbing sprouts).
- ○ Plastic wrap or humidity dome: To maintain moisture during cold stratification (optional but highly recommended for beginners).
- ● Refrigerator or cold storage: A cool, dark space (34–40°F / 1–4°C) for stratification (e.g., a fridge crisper drawer).
- ● Pruning shears or knife: For cutting seed potatoes into smaller chunks (if needed—each piece should have at least 2–3 eyes).
- ● Label markers: To track potato varieties if testing multiple types.
- ○ Grow lights (optional): A LED bulb (6–8 inches above seedlings) if natural light is limited during early growth.
- ● Fertilizer (balanced 10-10-10 or organic compost tea): Lightly mix into the growing medium after sprouts emerge (avoid over-fertilizing!).
- ● Thermometer/hygrometer: To monitor temperature and humidity (helpful in tricky climates).
Step-by-Step instructions for growing sprouted seed potatoes
Cold stratification is the secret to vigorous potato growth—here’s how to do it right.
🌱 Step 1: Select and Prepare Your Seed Potatoes
Choose organic seed potatoes with 1-2 inch sprouts—these are your best bet for strong starts. Cut larger tubers into 2-3 inch pieces, ensuring each has at least one sprout and one "eye" (the dimple where sprouts emerge). Let the cut pieces air-dry for 24 hours to prevent rot. This step is critical: fresh cuts ooze starch and invite disease.
Place the dried pieces in a paper bag (not plastic) and store them in a cool, dark place like a basement or refrigerator for 4-6 weeks. The cold slows sprout growth temporarily, but it primes the tubers for vigorous root development later. Think of it as a natural shock treatment—like waking up your potatoes from hibernation.
☀️ Step 2: Chit Sprouts in Light Before Planting
After cold storage, move the potatoes to a bright, cool spot (around 55-60°F) where they’ll receive indirect light for 2-3 weeks. This encourages short, thick sprouts (called "chits") rather than long, leggy ones. You’ll know they’re ready when the sprouts reach ½ to 1 inch—they should look stubby and green-tipped, not stretched like a sunflower seedling.
Here’s the thing—if your sprouts grow too tall before planting, they’ll flop over in the soil. The goal is compact, sturdy growth. If you notice any sprouts turning black or mushy, remove them immediately. This is a sign of rot, and it spreads fast.
🪴 Step 3: Plant at the Right Depth and Spacing
Dig trenches or holes 6-8 inches deep and space them 12-18 inches apart in rows 3 feet apart. Plant the potatoes with the sprouts facing upward—this ensures they’ll push through the soil quickly. Cover them with 2-3 inches of loose soil, leaving the top ½ inch of sprout exposed. This prevents the stems from rotting underground.
Water lightly right after planting to settle the soil, but don’t drown them. Overwatering now can suffocate the sprouts. Instead, wait until the soil feels dry to the touch before watering again. You’ll see new green growth within 7-10 days—that’s your signal everything is working.
💧 Step 4: Hill Soil for Stronger Tubers
When the stems reach 6 inches tall, mound another 4-6 inches of soil around the base, covering the lower half of the plant. Repeat this every 2-3 weeks until the plants flower. Hilling (piling soil) encourages more tuber formation and prevents the potatoes from turning green and bitter when exposed to light.
This might seem counterintuitive—why bury living plants?—but it mimics the natural process of soil buildup. The extra soil insulates the tubers, keeping them cool and protected while they grow. Just don’t overdo it: if the soil pile collapses or feels compacted, loosen it gently with your hands.
✂️ Step 5: Harvest at Peak Maturity
Potatoes are ready to harvest when the flowers fade and the foliage starts yellowing, usually 2-3 weeks after flowering. Use a fork to gently loosen the soil around the plants, then pull them up carefully. Avoid digging directly into the soil—you’ll risk cutting the tubers. Shake off excess dirt and cure them in a dark, dry place for 1-2 weeks to toughen the skins.
If you harvest too early, the potatoes will be small and watery. If you wait too long, they’ll shrivel or sprout in the ground. The best time is when the top growth dies back naturally—that’s nature’s way of saying, "Dig me now." Store the cured potatoes in a cool, dark, well-ventilated spot for long-term use.
Tips & tricks for perfect sprouted seed potatoes
Here's what nobody tells you about getting those stubborn sprouts to grow reliably—these tricks make all the difference.
Cold Stratification Timing: The 4-6 week cold storage period is non-negotiable for reliable sprouts, but here's the thing: if your basement hovers around 40°F, you'll need the full 6 weeks. Warmer spaces (50°F+) may only require 3-4 weeks. Check your sprouts weekly—if they're growing too fast during cold storage, they'll be leggy by planting time. The goal is to slow growth just enough to prime the tubers without letting them wake up completely.
Sprout Health Check: When inspecting your organic seed potatoes for Step 1, look for sprouts that are firm to the touch with no soft spots. The 1-2 inch size guideline is ideal, but don't discard potatoes with smaller sprouts—just plant them slightly deeper (6-8 inches) to give those little guys room to push through. The key is the "eye" (growth node)—each piece needs at least one to ensure new growth. I've had great success with potatoes that had ½-inch sprouts when planted properly.
Chitting Environment Secrets: For Step 2's 2-3 week chitting period at 55-60°F, I've found that placing potatoes on a seedling heat mat (set to 60°F) speeds up the process without risking leggy growth. The indirect light requirement is crucial—direct sun will stretch those sprouts like overwatered weeds. A north-facing windowsill or under fluorescent lights works best. Pro tip: Rotate your potatoes daily so all sides get even light exposure, preventing one-sided growth that flops over when planted.
Planting Depth Precision: The 6-8 inch planting depth in Step 3 might seem deep, but here's why it matters: potatoes need darkness to form tubers. Planting too shallow (less than 4 inches) exposes them to light, triggering green (toxic) potato formation. For the ½ inch of sprout left exposed, think of it as a visual cue—when you see new green growth emerge, you'll know the roots are establishing below. This exposed portion also helps prevent soil-borne diseases from smothering the tender new shoots.
Pro Tips for Sprouted Seed Potatoes
- Here's what nobody tells you about getting those stubborn sprouts to grow reliably—these tricks make all the difference.
- Cold Stratification Timing: The 4-6 week cold storage period is non-negotiable for reliable sprouts, but here's the t...
- Sprout Health Check: When inspecting your organic seed potatoes for Step 1, look for sprouts that are firm to the tou...
Frequently asked questions
Got questions about sprouting seed potatoes? You’re not alone! Here are answers to the most common queries to help you grow confidently.
How long does it take for seed potatoes to sprout?
With cold stratification, sprouts typically appear in 3–6 weeks when stored in a cool, dark place (like a basement or fridge). Warmth speeds this up—place them in a sunny window or near a heat source (like a radiator) to see sprouts in 2–3 weeks. Patience is key—don’t rush!
Can I use sprouted potatoes right away, or do I need to wait?
You can plant them immediately if sprouts are 1–2 inches long (ideal for early planting). However, if sprouts are tiny or uneven, wait another 2–4 weeks to encourage stronger growth. For best results, plant when sprouts are ½–1 inch long—this balances vigor and timing.
What if my seed potatoes rot before sprouting?
Rot is usually caused by too much moisture or warmth. Store them in a paper bag or mesh bag with good airflow, and avoid plastic containers. If you notice soft spots, trim the bad areas with a clean knife and replant the healthy portion. Prevent rot by checking weekly for dampness!
Can I use store-bought potatoes as seed potatoes?
Yes, but only certified seed potatoes guarantee disease-free, high-yield plants. Store-bought potatoes may carry blight or other pathogens. If you must use grocery-store potatoes, chit (sprout) them first to ensure viability, but plant them in a separate area of your garden to avoid spreading diseases.
What’s the best time to plant sprouted seed potatoes?
Plant 2–4 weeks before your last frost date (when soil reaches 45°F+). In warm climates, plant in fall for winter harvests. Sprouted potatoes thrive in well-draining soil—wait until nighttime temps stay above 50°F to avoid frost damage. Pro tip: Mulch after planting to retain warmth!
Wrapping up and next steps
Growing sprouted seed potatoes is a rewarding way to jumpstart your garden with vigorous, healthy plants—no fancy equipment needed! 🌱 By mastering cold stratification and proper care, you’ll unlock stronger yields and earlier harvests. Whether you’re a seasoned gardener or just starting, these tricks make success effortless.
Ready to plant your sprouts? Grab your chits, prep your soil, and watch your garden thrive! 🌿 Start planting now—your future harvest is waiting!