
Lawn
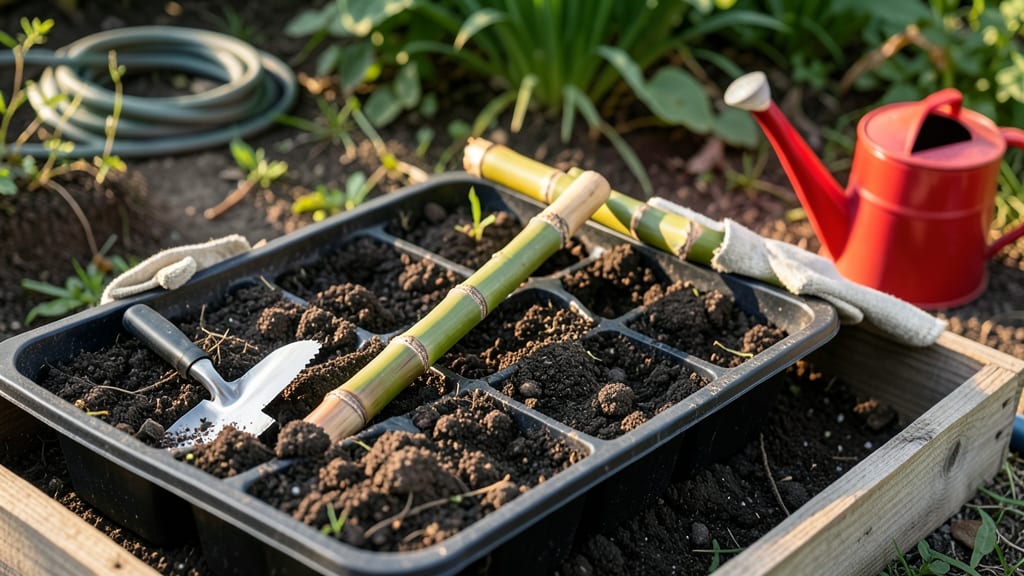
Growing sugarcane from seed cane means sweet harvests without the wait. 🌱 I’ve turned my backyard into a mini sugarcane patch using just cuttings, and the results—juicy stalks ready in under a year—are worth the effort.
The key lies in selecting healthy seed cane and mimicking its tropical roots, even in warmer climates.
Start with 12-inch cuttings from mature stalks, ensuring each has at least two buds. Plant them in well-drained soil, 6 inches deep, with the top bud facing up—this mimics how sugarcane grows naturally.
Warmth is your best friend: sugarcane thrives in 75-95°F and needs full sun to bulk up those sweet stalks.
Keep the soil moist but not soggy—1-2 inches of water per week—and watch those stalks shoot up. Within 6-12 months, you’ll harvest stalks packed with natural sweetness. The best part? Once established, sugarcane spreads, giving you year-round harvests with minimal effort.
Works in USDA Zones 9-11, but container growing extends it to cooler areas. Just move pots indoors before frost. Here’s how to avoid common pitfalls and keep your patch thriving!
📚 In This Guide
- What you need
- Instructions
- Tips and common mistakes
- Wrapping up and next steps
What you need
- ● Sugarcane seed cane: 5–10 healthy, mature stalks (1–2 feet long) with at least 3–4 buds per stalk. Pro tip: 💡 Choose stalks from disease-free, high-yielding sugarcane varieties for better results.
- ○ Well-draining soil: Mix 2 parts topsoil with 1 part compost or coconut coir. Optional: Add perlite or sand for improved aeration.
- ● Containers or planting area: Containers: 5–10 gallon pots (1 per stalk) with drainage holes.
- ● In-ground: A sunny spot with at least 6–8 hours of sunlight daily. Test soil pH (ideal: 5.5–7.0).
- ● Watering can or hose: With a gentle spray nozzle for hydration.
- ● Pruning shears or sharp knife: For trimming seed cane to the right length.
- ● Gloves: To protect hands from sharp cane edges.
- ● Mulch: Straw or wood chips to retain moisture and suppress weeds.
- ● Fertilizer: Balanced 10-10-10 or organic options like compost tea (apply 2–3 weeks after planting).
- ● Shade cloth: 30–50% coverage for seedlings during hot climates.
- ● pH testing kit: To monitor soil acidity over time.
- ○ Stakes or trellis: For taller varieties (optional, but helps support growth).
Step-by-Step instructions for growing sugarcane from seed cane
Here’s how to propagate healthy, productive sugarcane plants from cuttings—no nursery experience needed.
🌱 Step 1: Select and Prepare Healthy Seed Cane
Choose mature, disease-free stalks from last season’s harvest or a trusted source. Each cutting should be 12-18 inches long with 3-4 nodes (the swollen joints where leaves attach). Use clean, sharp pruners to cut just below a node at a 45-degree angle—this maximizes rooting surface area.
Strip off all leaves except the top 2-3 inches to reduce moisture loss. Soak the cuttings in lukewarm water for 24 hours to rehydrate and encourage root initiation. I like to add a pinch of cinnamon powder to the water—it acts as a natural antifungal and prevents rot during the rooting phase.
🪴 Step 2: Plant in Warm, Well-Draining Soil
Fill 6-inch deep containers with a mix of 50% potting soil and 50% perlite (or coconut coir) to ensure excellent drainage—sugarcane roots rot quickly in soggy conditions. Warm the soil to 75-85°F by placing the pots in a sunny window or under a heat mat for 2-3 days before planting.
Insert each cutting 2-3 inches deep, leaving the top node exposed. Space cuttings 6 inches apart in the container. Gently firm the soil around the stems to eliminate air pockets. Water lightly until moisture seeps from the drainage holes, then let excess water drain completely. Avoid waterlogged soil—it smothers roots and invites fungal diseases.
☀️ Step 3: Provide High Humidity and Indirect Light
Cover the container with a clear plastic dome or plastic wrap to maintain 80-90% humidity—sugarcane cuttings thrive in tropical conditions. Place the setup in bright, indirect light (like a south-facing window with sheer curtains) for the first 2-3 weeks. Direct sun at this stage causes cuttings to scorch before roots establish.
Check soil moisture daily—water only when the top inch feels dry. Mist the leaves lightly every 2-3 days to maintain humidity. You’ll see new leaves unfurl in 3-4 weeks, signaling successful rooting. Once you spot new growth, remove the cover gradually over 5-7 days to acclimate the plants to normal humidity.
💧 Step 4: Transition to Outdoor Conditions
After 6-8 weeks, when cuttings show 4-5 new leaves and roots fill the container, they’re ready for transplanting. Harden them off by moving the container outside to a sheltered, shaded spot for 3-4 hours the first day, gradually increasing exposure over 10 days. Sugarcane prefers full sun, but sudden exposure causes leaf burn.
Plant outdoors in well-draining, slightly acidic soil (pH 5.5-6.5) with 12-18 inches between stalks. Water deeply after planting to settle the soil, then maintain 1-2 inches of consistent moisture in the root zone. Mulch with 2-3 inches of straw to retain moisture and suppress weeds—sugarcane has shallow roots and needs stable soil conditions.
✂️ Step 5: Maintain and Harvest for Year-Round Yields
Fertilize every 4-6 weeks with a balanced 10-10-10 fertilizer (or organic compost) to encourage rapid growth. Sugarcane is a heavy feeder, so don’t skimp—it rewards you with thick, juicy stalks. Watch for pests like aphids or borers; treat infestations early with neem oil or insecticidal soap to avoid systemic damage.
Harvest when stalks reach 1-2 inches in diameter and leaves turn slightly yellow at the base. Cut stalks at the base with pruners, leaving 2-3 inches of stubble to encourage regrowth. Store harvested cane in a cool, dark place for up to 2 weeks—or process immediately for syrup, juice, or fermented drinks. With proper care, your plants will regrow and produce 3-4 harvests per year in warm climates.
Tips & tricks for perfect sugarcane propagation
Here's what I've learned after propagating sugarcane for years—these details make all the difference between thriving plants and struggling cuttings.
Node Placement Matters: When cutting your seed cane in Step 1, always make sure the bottom node is just below the soil line when planted. This is where roots will emerge most vigorously. I've found that burying the second node slightly (about ½ inch) increases root density. The exposed top node will become your first new shoot, so positioning it correctly prevents stunted growth.
Soil Temperature is Critical: The instructions call for warming soil to 75-85°F before planting, and this isn't optional. Use a heat mat if your window isn't warm enough—cold soil delays root formation. I've seen cuttings take twice as long to root when planted in soil below 70°F. Test your soil temperature with a thermometer before planting to ensure optimal conditions for those first critical roots.
Humidity Management: Maintaining 80-90% humidity during the first 3-4 weeks is essential, but don't overdo it. Condensation on the plastic cover can lead to fungal issues. I've found that lifting the cover daily for 10 minutes helps prevent mold while still maintaining high humidity. Watch for water droplets on the leaves—this is your sign to ventilate. The goal is tropical conditions without creating a petri dish for pathogens.
Transplanting Timing: The 6-8 week mark for transplanting isn't just about leaf count—check root development by gently removing the plant from its container. If you see roots filling the bottom and sides, it's ready. I've made the mistake of transplanting too early, which leads to shock and stunted growth. Wait until you see a dense root ball before moving outdoors, even if it means extending the container phase by a week or two.
Pro Tips for Sugarcane Seed Cane
- Here's what I've learned after propagating sugarcane for years—these details make all the difference between thriving...
- Node Placement Matters: When cutting your seed cane in Step 1, always make sure the bottom node is just below the soi...
- Soil Temperature is Critical: The instructions call for warming soil to 75-85°F before planting, and this isn't optio...
Frequently asked questions
Got questions about growing sugarcane from seed cane? You’re not alone! Here are some of the most common queries—and their straightforward answers—to help you get started with confidence.
What’s the best time to plant sugarcane seed cane?
Plant sugarcane seed cane in early spring (after the last frost) or late summer for a fall harvest. In warmer climates (zones 9-11), you can plant year-round. Seed cane thrives in soil temps between 60–95°F (15–35°C), so avoid planting when nights are still chilly.
How often should I harvest sugarcane seed cane?
Harvest mature stalks 12–18 months after planting when they’re thick, hollow, and 6–10 feet tall. For continuous harvests, cut stalks 6–12 inches above ground and leave the base to regrow. Avoid over-harvesting—let at least 30% of stalks remain to sustain the plant.
Why isn’t my sugarcane seed cane growing? Troubleshooting tips.
Slow growth? Check these fixes:
- Poor drainage → Amend soil with sand or compost.
- Nutrient deficiency → Fertilize with high-potassium (like 10-10-20) every 3 months.
- Pests (rats, borers) → Use chicken wire or neem oil.
- Cold snaps → Mulch heavily or grow in containers for mobility.
Can I grow sugarcane from store-bought stalks?
Yes! Use organic, pesticide-free stalks (like from a grocery store). Cut into 12–18-inch sections with 2–3 nodes, soak in water for 24 hours, then plant. For best results, use certified seed cane from nurseries to avoid diseases.
How cold can sugarcane seed cane tolerate?
Sugarcane is tender—it dies in frost (below 28°F/-2°C). In cold climates, grow it in containers and move indoors or to a greenhouse in winter. Alternatively, harvest stalks before first frost and store cuttings in moist sand at 50–60°F (10–15°C) until spring.
Wrapping up and next steps
Growing sugarcane seed cane is a rewarding journey that yields sweet, sustainable harvests with minimal stress—once you’ve mastered the basics! Remember, patience and consistency are key, whether you’re selecting healthy cuttings, optimizing soil conditions, or protecting your plants from pests. 🌱
Ready to take the next step? Start small with a few seed canes in your backyard or even a container, and watch your confidence (and harvests!) grow.
Before you know it, you’ll be sharing your sugarcane bounty with friends—or even scaling up for a thriving home garden. Sweet success awaits—go plant that seed cane! 🌿✨