
Lawn
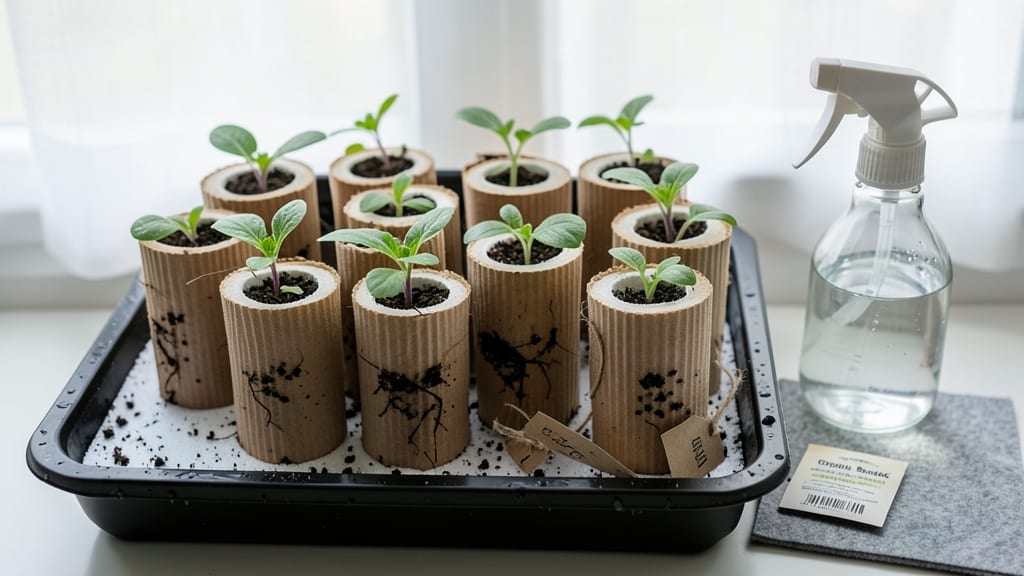
My toilet paper roll seed starters saved me $20 last spring—and kept 200 seedlings from ending up in the trash. 🌱 The best part? You already have everything you need in your bathroom.
This zero-waste method turns what would be waste into sturdy, biodegradable seedling pots that nurture plants from day one.
Here's the magic: cut the rolls into 3-inch sections, fill with seed-starting mix, plant seeds, and water gently. The cardboard breaks down completely when transplanting, so roots slide into the soil without shock.
I've used this for tomatoes, peppers, and herbs—anything that benefits from early starts. The cost? Less than $5 for an entire season's worth of starters.
By day 30, you'll have stocky seedlings ready for the garden, with no plastic pots to recycle. The method works especially well for slow starters like parsley or delicate seedlings that hate transplant shock. Plus, your kids can help—it's the perfect hands-on gardening activity for little green thumbs.
Works in apartments, greenhouses, or sunny windowsills—anywhere you can spare a few inches of space. Once you try it, you'll never buy those flimsy plastic cell packs again. Here's how to get started with my foolproof setup.
📚 In This Guide
- What you need
- Instructions
- Tips and common mistakes
- Wrapping up and next steps
What you need
- ● Empty toilet paper rolls: 5–10 (clean, dry, and free of labels or tape). Pro tip: 💡 Save them from your bathroom or ask friends to collect theirs!
- ● Potting soil: 1–2 bags (sterile, seed-starting mix or a blend of 60% peat moss/coir and 40% perlite/vermiculite). 🌡️ Avoid garden soil—it’s too dense for seedlings!
- ● Seeds: Choose fast-growing varieties like basil, lettuce, or marigolds (or any seeds you love!). 🎯 Check seed packets for planting depth—most need just a light cover.
- ● Water spray bottle: 1 (for gentle hydration). ✨ Avoid overwatering—soggy rolls = rotten seeds!
- ● Scissors or knife: 1 (to trim rolls if needed).
- ● Biodegradable mesh or coffee filters: To cover the bottom of rolls (prevents soil loss).
- ● Plastic wrap or clear plastic bags: For a mini greenhouse effect (speeds up germination).
- ● Plant markers: Popsicle sticks or toothpicks to label seeds.
- ● Tray or shallow container: To hold rolls and catch excess water (a baking sheet works great!).
- ● Grow lights or sunny windowsill: 6+ hours of light daily (south-facing is ideal!).
Step-by-step guide to using toilet paper roll seed starters
Here's how to transform empty toilet paper rolls into a zero-waste, space-saving way to start seeds indoors.
🪴 Step 1: Prepare Your Toilet Paper Rolls and Soil
Gather 4 empty toilet paper rolls and cut them into 3-inch sections—this gives each seedling enough room to grow without crowding. Remove any paper labels or tape that might interfere with planting. I like to cut the rolls on a clean surface so the edges are smooth and won't tear when handling.
Fill each section with moistened seed-starting mix—press it down gently so the soil is firm but not packed. Leave about ½ inch of space at the top for seeds and watering. Tap the rolls lightly on the table to settle the soil evenly. This ensures roots have room to spread without hitting the bottom of the roll.
🌱 Step 2: Plant Seeds at the Correct Depth
Check the seed packet for planting depth—most seeds need to be buried twice their diameter deep. For small seeds like lettuce or basil, this might be just a sprinkle on top, while larger seeds like beans need a ¼-inch hole. I use a toothpick to poke small indentations if the soil feels too firm.
Place 1-2 seeds per roll (two gives you a backup if one doesn't sprout). Cover them lightly with a pinch of soil—don't press down, just pat it gently. Label each roll with the seed type and planting date using a marker or a small piece of tape. This saves headaches later when seedlings look identical.
💧 Step 3: Water and Provide Humidity for Germination
Mist the soil surface with a spray bottle until it's evenly damp but not soggy. You'll know it's right when water beads up slightly on the surface but doesn't pool. Place the rolls in a shallow tray or container to catch any excess water—this keeps the bottoms from getting waterlogged, which can rot seeds.
Cover the tray with clear plastic wrap or a humidity dome to trap warmth and moisture. Seeds germinate best at 70-75°F, so a sunny windowsill or a seedling heat mat works well. Check daily for condensation—if the plastic fogs up, the humidity is perfect. Remove the cover once 50% of seeds sprout to prevent damping-off disease.
☀️ Step 4: Move to Light and Care for Seedlings
As soon as you see the first signs of green—usually 5-14 days—move the rolls to a bright spot with 12-14 hours of light daily. A south-facing window or a grow light works best. I place mine under a T5 fluorescent grow light about 2-3 inches away, adjusting the height as seedlings grow to avoid leggy stems.
Water when the top inch of soil feels dry to the touch. Use a small watering can or spray bottle to avoid disturbing the soil. Fertilize lightly with a diluted fish emulsion or seaweed extract once the first true leaves appear—this gives seedlings a gentle nutrient boost without burning tender roots.
🌿 Step 5: Transplant Seedlings to Soil or Pots
When seedlings have 2-3 sets of true leaves (usually 3-4 weeks), they're ready to move. Gently squeeze the sides of the toilet paper roll—it should disintegrate easily in water, making transplanting stress-free. Fill a larger pot or garden bed with soil and dig a hole slightly deeper than the roll.
Slip the seedling out of the roll and place it in the hole, covering the roots with soil. Press lightly around the base to secure it. Water deeply to help roots establish. If transplanting outdoors, wait until nighttime or a cloudy day to reduce shock. The rolls break down completely in the soil, leaving no waste behind.
Tips & tricks for perfect toilet paper roll seed starters
Real talk: turning toilet paper rolls into seed starters is one of the simplest ways to grow seedlings without waste. Here's what nobody tells you—
Soil Settling Secret: After filling your 3-inch roll sections with moistened seed-starting mix, give them a good tap on the table to settle the soil. This creates a firm base that prevents the rolls from toppling when you handle them. I learned this the hard way after watching rolls tip over and spill soil everywhere. A quick tap also helps prevent air pockets that can stunt root growth.
Labeling Hack: Instead of just writing the seed type on your rolls, include the planting date too. I use a tiny piece of masking tape and a permanent marker—this helps track germination progress and reminds you when to thin seedlings. Pro tip: write on the outside of the roll where you can see it without disturbing the soil.
Lighting Adjustment: When using a T5 fluorescent grow light, start with it about 3 inches away from your seedlings. As they grow, gradually increase the distance to 4-5 inches to prevent leggy stems. I adjust mine weekly—watch for seedlings stretching toward the light as your cue to move it further away. This mimics natural sunlight patterns and keeps your plants sturdy.
Transplanting Timing: The 3-4 week window for transplanting is flexible, but look for those 2-3 sets of true leaves as your guide. I've found that waiting until the third set appears gives seedlings just enough strength to handle the transition. If your seedlings are small but have the right number of leaves, don't wait too long—they'll start competing for space in the roll.
Pro Tips for Toilet Paper Roll Seed Starter
- Real talk: turning toilet paper rolls into seed starters is one of the simplest ways to grow seedlings without waste....
- Soil Settling Secret: After filling your 3-inch roll sections with moistened seed-starting mix, give them a good tap ...
- Labeling Hack: Instead of just writing the seed type on your rolls, include the planting date too. I use a tiny piece...
Frequently asked questions
How long does it take for seeds to sprout in a toilet paper roll starter?
Most seeds sprout within 7–30 days, depending on the plant type. Fast growers like radishes or herbs may sprout in a week or less, while slower varieties (e.g., tomatoes or peppers) can take up to 4 weeks. Keep the rolls moist and in a warm, sunny spot to speed up germination!
Can I reuse toilet paper rolls for seed starters?
Reusing rolls is a great way to cut waste. Just ensure they’re clean and free of ink (some dyes may leach into soil). For extra hygiene, give them a quick rinse or wipe with vinegar before repurposing. Pro tip: Flatten used rolls to save space until your next gardening session!
What if my seeds aren’t sprouting? Troubleshooting tips?
If seeds aren’t sprouting, check these common issues:
- Moisture: Too dry? Mist rolls daily. Too soggy? Drain excess water.
- Light: Most seeds need bright, indirect light (a sunny windowsill works).
- Temperature: Warmth (70–80°F) helps. Place rolls on a seedling heat mat if needed.
- Depth: Some seeds need light to germinate—don’t bury them too deep!
Are toilet paper roll starters better for the environment than plastic pots?
Yes! Toilet paper rolls are 100% biodegradable and compostable, unlike plastic pots that take hundreds of years to break down. Plus, they’re free and widely available. For extra eco-friendliness, opt for recycled or unbleached rolls to minimize chemical exposure to your plants.
Can I use this method for all types of plants?
Toilet paper roll starters work best for small seeds and seedlings, like herbs, lettuce, flowers, and fast-growing veggies (e.g., beans, peas). For larger plants (e.g., tomatoes, squash), transfer seedlings to bigger pots or directly into the ground once roots emerge. Avoid delicate or deep-rooted plants like carrots or corn—they’ll outgrow the rolls quickly!
Wrapping up and next steps
Transforming empty toilet paper rolls into thriving seed starters is more than just a clever hack—it’s a zero-waste way to kickstart your gardening journey with minimal effort and maximum impact. 🌱 Whether you're a seasoned green thumb or a curious beginner, this method proves that sustainability and simplicity go hand in hand.
Now that you’re armed with the know-how, why not grab a roll and turn your next gardening project into an eco-friendly masterpiece?
Ready to grow? Start small—pick one or two plants to nurture, and watch your confidence (and garden!) flourish in just 30 days. Happy planting! 🌿