
Propagation
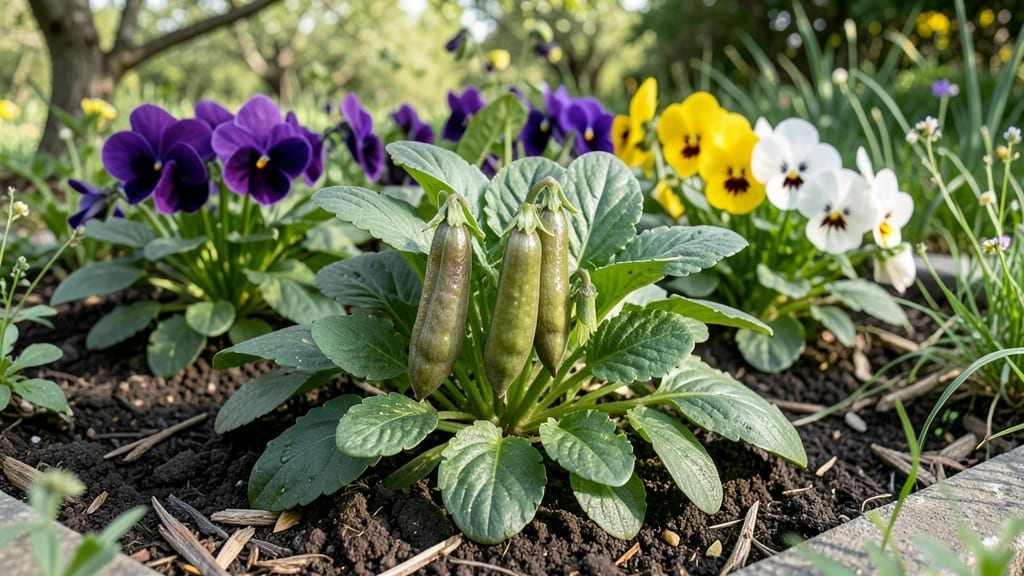
Cold-stratified viola seed pods transform into fresh seedlings in just 30 days—no fancy equipment needed. 🌱 I used to toss those dried pods without realizing they hold the secret to next year's cheerful blooms.
The key is timing: harvest them when they turn brown and papery, then give them a winter chill to break dormancy.
You'll need just a few supplies: paper bags for collecting pods, a sealed container for storage, and a damp paper towel for quick germination tests. The magic happens when you mimic nature's timing—store the pods in the fridge for 4-6 weeks before sowing them in well-draining soil.
This cold treatment tricks the seeds into thinking spring has arrived.
What you'll end up with is a tray of tiny, heart-shaped violas pushing through the soil within weeks. Their delicate blooms arrive even earlier than store-bought plants, and you'll have saved seeds that adapt perfectly to your climate.
The first flush of purple, yellow, and white flowers will make your garden look like it's been there for years.
Works for pansies too, and the same method applies whether you're growing in containers or garden beds. Here's how to get those pods working for you—without the guesswork.
📚 In This Guide
- What you need
- Instructions
- Tips and common mistakes
- Wrapping up and next steps
What you need
- ● Viola seed pods: 10–20 pods (fresh or dried, from a reliable source).
- ● Paper towels or coffee filters: 2–3 sheets (for moisture retention).
- ● Plastic zip-top bags: 1–2 (quart-sized, resealable).
- ● Spray bottle: 1 (with water, for gentle misting).
- ● Small containers or seed trays: 1–2 (with drainage holes, 2–3 inches deep).
- ● Potting mix: 1–2 cups (sterile, seed-starting blend).
- ● Plastic wrap or dome lid: 1 (to retain humidity).
- ● Refrigerator: For cold stratification (must stay at 34–40°F (1–4°C)).
- ● Fine-mesh strainer: 1 (to separate seeds from pods if needed).
- ● Labeling tags: 2–3 (to track seed varieties).
- ● Grow lights or sunny windowsill: For post-stratification warmth (65–75°F / 18–24°C).
- ○ Humidity tray: 1 (optional, for extra moisture control).
- ○ Fungicide (optional): 1 spray bottle (to prevent mold).
How to cold-stratify viola seed pods for reliable germination
Violas need a little winter magic to wake up—here's how to trick them into sprouting fast.
🌱 Step 1: Harvest and Prepare the Seed Pods
Collect mature viola seed pods when they've turned completely brown and begin splitting open on their own. The pods should feel dry and papery to the touch, indicating full ripeness. I like to harvest them in late summer or early fall when the plants have finished flowering for the season.
Gently open each pod over a clean sheet of paper or envelope—viola seeds are tiny and will scatter easily. You'll see hundreds of tiny, dark brown seeds inside. Store these seeds in a dry, cool place until you're ready to stratify them, but don't let them sit for more than a few months or germination rates will drop.
❄️ Step 2: Create the Cold Stratification Mix
Fill a shallow container—like a seed tray or even a plastic storage box—with a mix of equal parts moistened peat moss and perlite. This combination provides both moisture retention and aeration that viola seeds need. I use about 2 cups of each for a standard seed tray, but adjust based on your container size.
Moisten the mix until it feels like a damp sponge—you should be able to squeeze a handful without water dripping out, but it shouldn't feel dry. Viola seeds need consistent moisture during stratification, so this preparation is critical. Spread the seeds evenly across the surface, spacing them about ¼ inch apart since they're so tiny.
⏰ Step 3: Stratify in the Refrigerator
Cover the container with a clear plastic lid or wrap it tightly in plastic wrap to maintain humidity. Place the sealed container in your refrigerator's crispier drawer—this spot typically stays around 35-40°F, which is perfect for viola stratification. Viola seeds need 4-6 weeks of cold treatment to break their dormancy.
Check the seeds after 2 weeks—they shouldn't show any signs of germination yet. If the mix feels dry to the touch, mist it lightly with water. Viola seeds are sensitive to drying out during this process, so consistent moisture is key. This is where patience pays off—don't peek too often or disturb the seeds.
☀️ Step 4: Move to Warmth for Germination
After 4-6 weeks in the fridge, transfer the container to a warm, bright spot. I place mine on a seedling heat mat set to 65-70°F under a grow light. Viola seeds typically germinate within 7-14 days after this temperature shift—you'll see the first tiny green shoots pushing through the soil surface.
Once you notice germination, remove the plastic cover immediately to prevent fungal growth. Viola seedlings are delicate, so keep the soil consistently moist but never soggy. You'll see the first true leaves appear about 2-3 weeks after germination, signaling it's time to transplant them into individual pots.
🌿 Step 5: Transplant and Care for Young Seedlings
When seedlings have 2-3 sets of true leaves (about 4-6 weeks after moving to warmth), it's time to transplant. Gently lift each seedling with a small spoon or your fingers, being careful not to disturb the delicate roots. Place them in 2-inch pots filled with seed-starting mix.
Viola seedlings need bright, indirect light for the first week after transplanting to help them recover. Gradually introduce them to more direct sunlight over the next week. Keep the soil lightly moist—violas hate soggy roots but won't tolerate drying out either. This is where you'll see their true colors emerge as the plants mature.
Tips & tricks for perfect viola seed germination
These little tricks will help you coax those stubborn viola seeds into sprouting like clockwork—no more waiting forever for tiny green shoots.
Harvest Timing: The pods should be completely brown and dry before harvesting. If you pick them too early, the seeds won't be fully mature, and if you wait too long, they'll scatter on their own. I like to harvest in late summer when the plants have finished flowering but before the pods start opening naturally. This gives me the freshest seeds with the highest germination potential.
Moisture Management: Viola seeds need that "damp sponge" moisture level—squeeze a handful of your mix, and if water drips out, it's too wet. If it crumbles, it's too dry. I use a spray bottle to mist the mix at the 2-week check, which keeps everything perfectly balanced without overwatering. Too much moisture can cause mold, while too little will dry out the delicate seeds.
Refrigerator Spot Selection: The crispier drawer might be your best bet, but every fridge is different. If your crispier drawer feels warmer than 40°F, try the main fridge section instead. I've even used the vegetable crisper in some models—just check with a thermometer if you're unsure. Viola seeds are sensitive to temperature fluctuations, so consistency is key during those critical 4-6 weeks.
Light Transition: When moving your seeds to warmth, place them under a grow light or near a sunny window—but not direct sunlight at first. Viola seedlings can get sunburned if introduced too quickly. I start with 4-6 hours of indirect light and gradually increase to full sun over a week. This slow transition helps them develop strong stems that can support themselves.
Pro Tips for Viola Seed Pods
- These little tricks will help you coax those stubborn viola seeds into sprouting like clockwork—no more waiting forev...
- Harvest Timing: The pods should be completely brown and dry before harvesting. If you pick them too early, the seeds ...
- Moisture Management: Viola seeds need that "damp sponge" moisture level—squeeze a handful of your mix, and if water d...
Frequently asked questions
Got questions about viola seed pods? You’re not alone! Here are some of the most common queries—and their answers—to help you navigate germination like a pro.
Why do viola seed pods need cold stratification?
Viola seeds have a natural dormancy that mimics winter conditions. Cold stratification (chilling moist seeds) tricks them into thinking spring has arrived, breaking dormancy and boosting germination rates from 30-50% to 80-90%! Without it, seeds may take months—or never sprout.
How long should I cold-stratify viola seed pods?
Most viola seeds need 4-6 weeks of cold treatment (33–40°F). For faster results, try 30 days in a fridge (wrapped in damp paper towels). Pro tip: Don’t overdo it—longer than 8 weeks can reduce viability. Check for mold weekly!
Can I skip cold stratification and still grow violas?
Yes, but expect slower, uneven germination. Some seeds may sprout in 2-4 weeksgold standard. It’s worth the extra effort for vibrant, healthy seedlings!
What if my viola seeds mold during stratification?
Mold is a red flag! If you spot fuzzy green/black growth, discard the batch immediately. To prevent it:
- Use sterile paper towels or peat moss.
- Store seeds in a sealed container with tiny air holes.
- Avoid over-moistening—squeeze out excess water.
If mold appears, try a fresh batch with 1/3 less water.
How do I know when viola seeds are ready to plant?
Seeds are ready when they’ve swollen slightly and the seed coat softens (usually after 30 days). Gently press a seed—if it squishes or cracks, it’s time to sow! Plant 1/4-inch deep in well-draining soil and keep it moist (not soggy).
Still stumped? Drop your question in the comments—we’re happy to help!
Wrapping up and next steps
Mastering the art of cold-stratifying viola seed pods unlocks a world of vibrant blooms in just 30 days! Whether you're a seasoned gardener or a curious beginner, this method simplifies propagation while ensuring strong, healthy seedlings.
Your patience and preparation will soon reward you with a burst of cheerful violets brightening up your garden.
Ready to dive deeper? Start experimenting with your own batch of seeds today—grab those pods, follow the steps, and watch your garden transform! 🌱✨