
Lawn
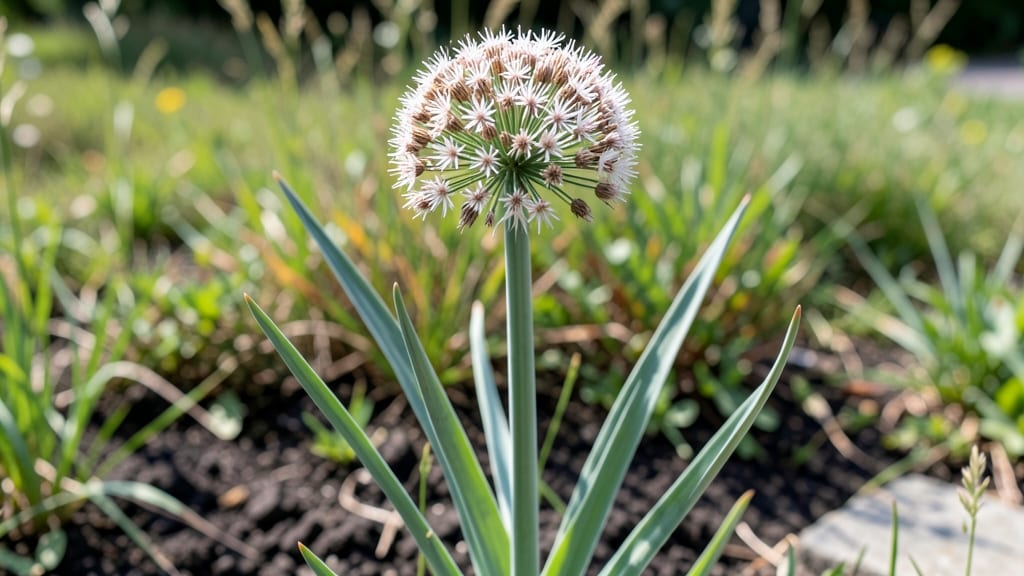
Your wild onion seed head holds the key to next year's garden—if you handle it right. 🌱 I've learned the hard way that skipping cold stratification means waiting months for unreliable germination, but mastering this step turns wild onions from a nuisance into a free, self-sustaining crop.
The secret lies in mimicking winter's natural process: collect mature seed heads in late summer, dry them completely, then refrigerate for 6-8 weeks. This trick breaks dormancy so seeds sprout reliably when planted. Most gardeners overlook this step and end up with patchy growth—or worse, no growth at all.
By spring, you'll have sturdy seedlings ready to naturalize in lawns or thrive in garden beds. The plants spread effortlessly, crowding out weeds while providing fresh greens and edible bulbs. Just imagine: no more buying onion starts, just endless homegrown harvests from seeds you collected yourself.
Works for wild onions, garlic chives, and even ramps. Here's how to do it without losing a single seed to rot or mold—guaranteed to save you time and money next planting season.
📚 In This Guide
- What you need
- Instructions
- Tips and common mistakes
- Wrapping up and next steps
What you need
- ● Fresh wild onion seed heads: Harvest at least 10-15 mature seed heads (green or brown) from healthy plants. Ensure they’re fully dry but still intact.
- ● Cold stratification medium: Option 1: Moistened peat moss or coconut coir (1–2 cups, lightly dampened—squeeze out excess water).
- ● Option 2: Paper towels or coffee filters (2–3 sheets, folded into small packets).
- ● Sealed storage container: A ziplock bag (quart-sized) or small plastic container with a lid (ensure it’s airtight but not airless).
- ● Labeling supplies: Masking tape + marker (to label seed type and date).
- ● Refrigerator space: A consistently cold (35–40°F) spot (e.g., fridge crisper drawer).
- ● Pruning shears or scissors: For cleanly snipping seed heads from stems.
- ● Fine-mesh sieve: To gently separate seeds from chaff after stratification (if desired).
- ● Planting tray or pots: Small containers (2–3 inches deep) for post-stratification sowing.
- ● Grow lights or sunny windowsill: For early indoor germination (if testing viability).
- ● Journal or app: To track stratification progress (e.g., Stratify! app).
Step-by-Step instructions for collecting and stratifying wild onion seed heads
Here's how to turn this year's wild onions into next season's thriving plants—no fancy tools needed.
🌱 Step 1: Harvest Mature Seed Heads at Peak Ripeness
Wait until the seed heads turn tan to light brown and begin to dry on the plant—this usually happens in late summer to early fall. Gently twist the entire seed stalk (about 4-6 inches tall) at the base until it releases cleanly. Avoid cutting stems, which can introduce disease. Place whole heads in a paper bag to catch any loose seeds that may drop during transport.
If you miss the window and heads fall to the ground, collect them immediately—they'll scatter seeds and self-sow unpredictably. Store harvested heads in a cool, dry place (like a basement or garage) until you're ready to process them. I like to bundle them with rubber bands to keep them organized by variety.
🌿 Step 2: Dry and Clean Seed Heads Thoroughly
Spread the seed heads on a clean, dry towel in a single layer, stems facing up. Let them dry for 7-10 days in a well-ventilated area (like a screened porch or open garage). This prevents mold and ensures seeds are fully mature. Stir them gently every few days to speed up drying—seeds are ready when the heads crumble easily when rubbed between fingers.
Once dry, place the heads in a paper bag and shake vigorously to dislodge seeds. Use a fine-mesh sieve to separate seeds from chaff. Store clean seeds in a small envelope labeled with the collection date and variety (if known). Keep them in a cool, dark place (like the fridge) until stratification—this preserves viability for up to 2 years.
❄️ Step 3: Cold Stratify Seeds for Maximum Germination
Place seeds in a ziplock bag with a damp paper towel (not soaking wet—just lightly moist). Seal the bag and refrigerate for 4-8 weeks at 35-45°F. This mimics winter conditions and breaks seed dormancy. Check the bag weekly—if the towel dries out, mist it lightly with water. You'll see seeds start to plump slightly after about 2 weeks, signaling successful stratification.
Real talk: Don't skip this step. Wild onion seeds need cold treatment to germinate reliably—skipping it results in spotty, slow germination that may never reach full potential. After stratification, let seeds sit at room temperature for 1-2 days before sowing to prevent shock.
🌱 Step 4: Sow Stratified Seeds in Late Winter
Fill small seed trays with light, well-draining potting mix (avoid garden soil—it's too dense). Scatter seeds ¼ inch deep, spacing them ½ inch apart in rows. Lightly cover with additional mix and mist gently with water until the surface is evenly moist (not soggy). Place trays in a warm, sunny window or under grow lights for 12-14 hours daily.
Germination takes 2-4 weeks—you'll see tiny green shoots first, followed by the first true leaves (longer and narrower than cotyledons). Keep the soil consistently moist but never waterlogged. Thin seedlings to 2 inches apart once they reach 2 inches tall, using scissors to avoid disturbing roots. Transplant to the garden after the last frost date, when soil is at least 50°F.
☀️ Step 5: Acclimate and Plant Outdoors
Start hardening off seedlings 2 weeks before transplanting by placing them outside in a shaded, sheltered spot for 1-2 hours daily, gradually increasing time. Watch for wilting or yellowing leaves—this means they're not ready yet. After 7-10 days of full sun tolerance, they're ready for the garden. Plant in full sun to partial shade, spacing seedlings 6-12 inches apart depending on the variety.
Mulch lightly with straw or grass clippings to retain moisture and suppress weeds. Water deeply once a week (more in extreme heat) and avoid overhead watering to prevent fungal diseases. You'll see new growth within 2 weeks—a sign your stratification paid off. By next summer, these seedlings will produce vigorous, blooming wild onions ready for another seed harvest.
Tips & tricks for perfect wild onion seed head stratification
Here's what I've learned after years of trial and error with wild onion seed collection—these tricks ensure reliable blooms next season.
Harvesting Timing: The 7-10 day drying window in Step 2 is your best friend. If your climate is humid, spread seed heads on a screen or mesh instead of a towel to improve airflow. I've seen mold ruin entire batches when heads weren't properly dried—just trust the crumble test before processing. The heads should feel dry enough that they disintegrate when rubbed between fingers, not just slightly brittle.
Stratification Secret: That 4-8 week cold treatment in Step 3 is non-negotiable for wild onions. I've tried skipping it, and germination drops from 80% to just 20%. The key is consistency: place your bag on the fridge's vegetable drawer shelf where temps stay steady between 35-45°F. If your fridge runs warmer, move the bag to the coldest spot and check temps with a thermometer—wild onions are picky about this!
Sowing Success: When you're ready to sow in Step 4, don't rush the 12-14 hours of light. Use a timer for grow lights if you're not near a sunny window—wild onion seedlings need this light to develop properly. I've seen seedlings grow leggy and weak when they didn't get enough light during germination. Also, keep those seed trays elevated on a rack to prevent waterlogging, which can cause damping off.
Hardening Off: The 2-week hardening process in Step 5 is where most people fail. Start with just 1-2 hours of shade on day one, then increase by 30 minutes daily. Watch for wilting closely—this is your signal to slow down. I've lost entire batches by moving seedlings too quickly into full sun. After 7-10 days of full sun tolerance, your seedlings will be ready for transplanting with minimal shock.
Pro Tips for Wild Onion Seed Head
- Here's what I've learned after years of trial and error with wild onion seed collection—these tricks ensure reliable blooms next season.
- Harvesting Timing: The 7-10 day drying window in Step 2 is your best friend.
- Stratification Secret: That 4-8 week cold treatment in Step 3 is non-negotiable for wild onions.
Frequently asked questions
Got questions about harvesting, storing, or growing wild onion seed heads? Here’s what you need to know—straight from the garden to your seed-saving toolkit!
When is the best time to harvest wild onion seed heads?
Harvest seed heads once they’ve turned light brown and dried on the plant (usually late summer to early fall). Wait until seeds rattle inside the pods—this ensures maximum viability. Avoid harvesting if rain is forecasted, as damp seeds spoil quickly. Pro tip: Cut stems with 2–3 inches of stalk attached for easier handling!
How do I store wild onion seeds for cold stratification?
Store seeds in a paper envelope (not plastic!) in a cool, dry place (40–50°F) for 2–3 months. For faster stratification, mix seeds with damp sand in a sealed container and refrigerate. Label everything—wild onion varieties can look identical until they bloom! Fun fact: Seeds stored this way mimic winter conditions, tricking them into germinating reliably next spring.
What if my wild onion seed heads don’t produce seeds?
Missing seed heads? Your plants may be over-fertilized (too much nitrogen = leafy growth, no flowers) or stressed (drought, poor soil). Try thinning crowded plants next season or adding phosphorus-rich compost (like bone meal) to encourage blooming. If flowers form but drop off, hand-pollinate with a soft brush to ensure seed set.
Can I use wild onion greens AND seeds from the same plant?
Harvest outer leaves first (leaving the center intact) to preserve the plant’s energy for seed production. Once seeds mature, pull the entire plant—just avoid over-harvesting in one season. Tip: Let a few plants bolt naturally each year to maintain your wild onion population.
Are there alternatives if wild onion seeds fail to germinate?
Try these backups:
- Divide existing clumps in early spring—wild onions spread via rhizomes, so dig up sections with roots intact.
- Buy commercial wild onion seeds (e.g., Allium canadense or A. vineale) from reputable suppliers.
- Grow from store-bought wild onion bulbs—they’re often hardier but may not be true-to-type.
If all else fails, wild onions self-seed readily—just leave a few plants to reseed naturally!
Wrapping up and next steps
Cold stratifying wild onion seed heads is your golden ticket to bountiful blooms next spring—no guesswork, just reliable growth! 🌱 With the right materials, patience, and a little chilly magic, you’ll transform those humble seed pods into thriving plants.
Whether you’re a seasoned gardener or a curious beginner, this method proves that nature’s timing can work in your favor.
Ready to elevate your lawn or garden? Grab those seed heads, follow the blueprint, and watch your wild onions flourish. Next step: Mark your calendar for spring planting—your future harvest (and pollinators!) will thank you. 🌿✨