
Lawn
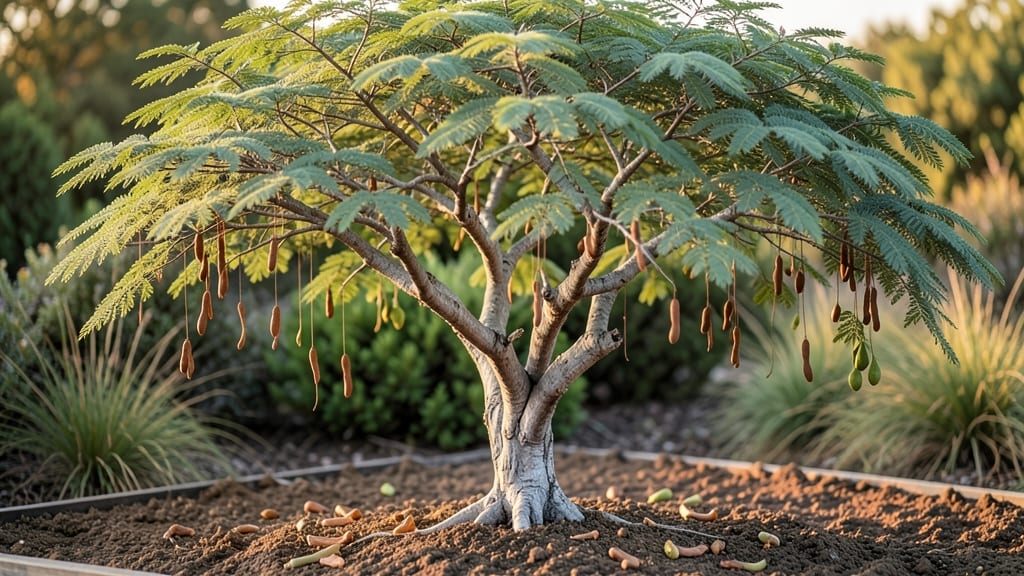
Acacia seed pods twist open like nature’s secret treasure chest—no tools needed. 🌿 I’ve cracked open dozens of these pods, and the moment the seeds spill out feels like uncovering a gardening secret.
The key is patience and knowing exactly when to handle them, because timing makes all the difference between easy extraction and wasted effort.
You’ll need just three things: a pair of gloves (acacia seed pods have tiny barbs), a dry, sunny spot for curing, and a little elbow grease. The pods must be fully dried—when they twist open with a gentle tug, you’re ready.
For Acacia koa or Acacia dealbata, aim for late summer harvests when pods turn brown and papery.
Once the seeds are free, soak them overnight to soften the hard outer shell. Plant them in well-draining soil mix with a touch of sand, and keep the soil barely moist. Within 2-4 weeks, you’ll see those first tiny green sprouts pushing through—proof that your patience paid off.
Outdoor planting works best in full sun, but start seeds indoors if your climate gets chilly. Watch for overwatering (acacias hate soggy roots) and give them space—they’ll grow into sturdy trees with time. Here’s how to avoid the most common pitfalls and set your seeds up for success.
📚 In This Guide
- What you need
- Instructions
- Tips and common mistakes
- Wrapping up and next steps
What you need
- ● Fresh or dried acacia seed pods – Collect 5–10 pods (or more if experimenting). Look for pods that are slightly dry but not brittle for the best twist-release effect.
- ○ Heavy-duty gloves (optional but recommended) – Acacia pods can be sticky or sharp in some varieties. Choose nitrile or leather gloves for grip and protection.
- ● Tweezers or small pruning shears – For pods that resist twisting or need a little help popping open.
- ● Paper towels or a clean towel – To wipe away debris and seed dust after extraction.
- ● Small bowl or container – For collecting seeds (a glass jar with a lid works great for storage).
- ● Rubbing alcohol (70% isopropyl) or vinegar – A 1:10 dilution helps disinfect seeds if you plan to plant them.
- ○ Fine-mesh strainer or sieve (optional) – Useful for separating seeds from chaff or small debris.
- ● Know your acacia type! Some pods (like Acacia koa) twist open easily, while others may need a gentle tap or soak in warm water first. 💡 Test one pod first to see how yours behave.
- ● Work in a well-ventilated area – Acacia seed dust can be irritating if inhaled. Open a window or step outside!
- ● Patience is key – If pods feel stubborn, let them sit in a paper bag for 24 hours to dry further before twisting. ⏳
- ● Storage solutions – Keep seeds in a cool, dry place (like a sealed jar in the fridge) to maintain viability for up to 6 months.
How to extract acacia seeds using the twist-release method
This clever technique lets you open acacia pods without damaging the seeds—ideal for growing these drought-resistant beauties.
🌱 Step 1: Harvest and Dry the Pods
Collect fully mature acacia pods when they turn a deep brown and begin to rattle when shaken. The seeds inside are ready when the pod's outer skin feels slightly leathery rather than crisp. I like to gather them after a light frost, as the cold helps loosen the seed attachment naturally.
Spread the pods in a single layer on a paper towel or mesh screen in a warm, dry place out of direct sunlight. Turn them every 24 hours to ensure even drying. You'll know they're ready when the pod splits open slightly along its seam—this means the seeds are fully mature and the twist-release method will work perfectly.
✂️ Step 2: Prepare the Pods for Twist-Release
Take one dried pod and hold it firmly between your thumb and forefinger at the wider end. The seam should be facing downward. Gently tap the pod on a hard surface to loosen any remaining moisture inside—this prevents seeds from sticking to the pod walls during extraction.
Here's the thing—don't force anything. If the pod resists, it might still need more drying time. A properly dried pod will feel light and hollow when tapped. You'll hear a faint crackling sound, which is your signal that the seeds are ready to release.
🪴 Step 3: Perform the Twist-Release Technique
With the pod still held at the wider end, begin twisting it gently but firmly in a circular motion. You'll feel resistance at first, but as you apply steady pressure, the pod will begin to split along its seam. Keep twisting until the two halves separate completely—this usually takes 10-20 seconds per pod.
Watch closely as the seeds pop out naturally. They'll tumble out in a small cluster, and you'll see them glisten slightly from the pod's natural oils. Don't be tempted to shake the pod—this can damage the delicate seed coats. If seeds stick to the pod walls, lightly tap the pod over a bowl to dislodge them.
💧 Step 4: Clean and Store the Seeds
Spread the extracted seeds on a clean paper towel and let them air-dry for another 24 hours. This final drying step ensures they won't mold during storage. Use a soft brush to gently remove any remaining pod fragments or debris—acacia seeds are surprisingly delicate, so avoid rubbing them together.
Store the clean seeds in a small glass jar with a tight-fitting lid. Keep them in a cool, dark place like a pantry or seed drawer. Labeled properly, these seeds will remain viable for 2-3 years. I always write the harvest date on the jar—this helps track seed freshness for future planting.
☀️ Step 5: Prepare Seeds for Planting
Before sowing, soak the seeds in lukewarm water for 12-24 hours to soften the tough outer coating. This step dramatically improves germination rates. I use a small glass and cover it with a paper towel to keep the seeds submerged without letting them float away.
After soaking, plant the seeds ¼ inch deep in well-draining soil mix. Acacia seeds need warmth to germinate—place the container on a seedling heat mat set to 75-80°F. Keep the soil consistently moist but never soggy. You'll see the first sprouts in 10-20 days, though some varieties can take up to 30 days.
Tips & tricks for perfect acacia seed extraction
These simple strategies will help you master the twist-release technique and avoid common pitfalls along the way.
Drying is Everything: The 24-hour drying period in Step 1 is non-negotiable for success. I've learned this the hard way—underdried pods resist twisting and often crack prematurely, wasting seeds. Place pods on a mesh screen instead of paper towels for better airflow, and check for that telltale seam split as your readiness indicator. If pods still feel heavy after 24 hours, extend drying by another 12 hours in a warm spot.
Twisting Technique: In Step 3, the key is consistent pressure—not brute force. I twist pods over a bowl to catch any seeds that might fall early. Start at the wider end and work your way toward the narrower tip, applying steady pressure. The 10-20 second range is perfect—if you're struggling after 20 seconds, your pods need more drying time. Watch for that satisfying crack as the pod splits, signaling seeds are about to release.
Seed Handling: After extraction, those delicate seeds need gentle care. In Step 4, use a soft paintbrush instead of your fingers to remove pod fragments—they're more effective and prevent seed damage. When storing seeds in Step 4, add a small silica gel packet to your jar to absorb any residual moisture, extending their viability beyond the 2-3 year mark.
Pro Tips for Acacia Seed Pods
- These simple strategies will help you master the twist-release technique and avoid common pitfalls along the way.
- Drying is Everything: The 24-hour drying period in Step 1 is non-negotiable for success.
- Twisting Technique: In Step 3, the key is consistent pressure—not brute force.
Frequently asked questions
Got questions about acacia seed pods and their twist-release magic? You’re not alone! Here are some of the most common queries—plus quick, practical answers to help you master seed extraction like a pro.
Why do acacia seed pods twist open on their own?
Acacia seed pods twist open naturally as a survival strategy! When dry, the pods spiral to release seeds—helping them disperse in wind or water. This twist-release happens after the pods turn brown and brittle (usually in late summer or fall). No force needed—just patience!
How do I know when acacia seed pods are ready to harvest?
Harvest pods when they’re completely dry and brown, with a papery texture. Gently tap them—if seeds rattle inside, they’re ready! Avoid harvesting green or partially dry pods, as they won’t release seeds easily. Timing varies by climate, but late summer to early autumn is prime.
Can I force acacia seed pods to open if they’re still green?
Nope! Forcing green pods to open can damage them or the seeds inside. Wait for nature’s cue: full dryness. If you’re impatient, store pods in a well-ventilated, dry spot (like a mesh bag) for 1–2 weeks to speed up drying. Never microwave or heat them—this ruins the seeds!
What’s the best way to store acacia seeds after extraction?
Store seeds in a cool, dry place (like a sealed jar or airtight container) with a desiccant packet to prevent moisture. Label with the date! Most acacia seeds stay viable for 1–2 years. For long-term storage, refrigerate (up to 5 years). Avoid humidity—it’s enemy #1!
Are acacia seed pods safe for pets or wildlife?
Generally yes, but with a caveat: Acacia seeds are non-toxic, but the pods themselves can be a choking hazard for small pets (like birds or rodents). If you’re growing acacias for wildlife, leave some pods on the tree—they’re a natural snack! Just avoid overconsumption if your pet is prone to digestive issues.
What if my acacia seed pods won’t twist open at all?
Try these fixes:
- Dry them longer: Place pods in a sunny, dry spot for 1–2 extra weeks.
- Gently crack them: Use a hammer or mallet to tap the pod lightly—just enough to coax the twist.
- Check humidity: High moisture can lock pods shut. Use a dehumidifier if needed.
Wrapping up and next steps
Acacia seed pods offer a natural, eco-friendly way to extract seeds effortlessly—perfect for gardeners, landscapers, or DIY enthusiasts! Their unique twist-and-release mechanism simplifies the process while minimizing waste, making them a sustainable choice for lawn and garden projects.
Whether you're reviving a lawn or experimenting with native plants, these pods are a game-changer for seed handling.
Ready to give it a try? Grab a few pods, follow the steps, and transform your outdoor space with ease! 🌱✨