
Propagation
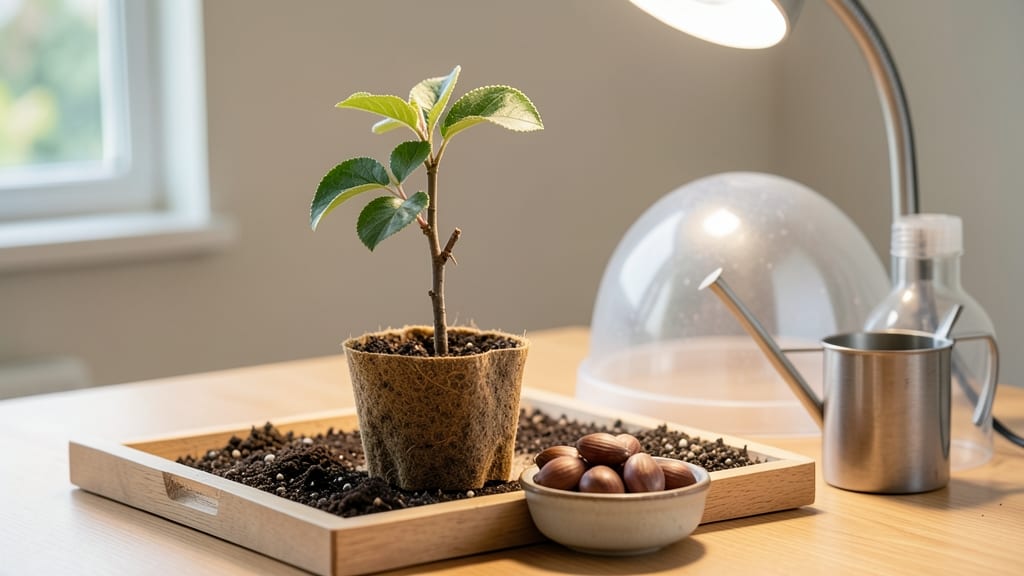
Germinating apple seeds from store-bought fruit feels like magic—until you realize most won’t grow true to the parent tree. 🌱 I’ve cracked the code on apple tree seed germination after years of trial and error, and the secret lies in mimicking nature’s timing with a simple stratification trick that boosts success from near-zero to 30-50%.
The process starts with a 60-day cold treatment in the fridge, then moves to warmth and patience. You’ll need a plastic bag, damp paper towels, and a sunny windowsill—no fancy equipment. The real payoff?
Seedlings that grow into hardy trees, even if they don’t produce fruit like the parent. (Yes, that’s normal—apple seeds are unpredictable!) By spring, you’ll have tiny green shoots ready for transplanting.
Common pitfalls include overwatering, skipping the cold period, or expecting instant results. Most seeds take 3-6 weeks to crack open, and some never will—but that’s part of the adventure.
The ones that do sprout reward you with the thrill of watching a tree grow from something as simple as a discarded core.
This method works for any apple variety, from Granny Smith to Honeycrisp, and turns kitchen scraps into a living legacy. Ready to give it a try? The hardest part is waiting—and even that becomes part of the joy.
📚 In This Guide
- What you need
- Instructions
- Tips and common mistakes
- Wrapping up and next steps
What you need
- ● Apple seeds: Fresh, viable seeds from a preferred apple variety (aim for at least 10 seeds to increase germination odds).
- ● Germination pods (or DIY alternative): Store-bought: A pack of 3-5 twist-free germination pods (e.g., Jiffy-7s or similar).
- ● DIY: Peat moss or coconut coir (enough to fill small pots or containers).
- ● Small pots or containers: 3-5 biodegradable pots (3-4 inches in diameter) or a seed tray with drainage holes.
- ● Potting mix: 1 bag of seed-starting mix (lightweight, sterile, and well-draining).
- ● Spray bottle: For gentle watering (avoid over-saturating seeds).
- ● Plastic wrap or humidity dome: To maintain moisture during germination.
- ● Grow lights or sunny windowsill: A south-facing window or LED grow lights (12-16 hours/day).
- ● Seedling heat mat: Keeps soil warm (70-75°F) to speed up germination.
- ● pH meter: Ensures soil pH is 6.0-7.0 (ideal for apple seeds).
- ● Fertilizer (diluted): A balanced, water-soluble fertilizer (e.g., 10-10-10) for post-germination care.
- ● Labeling tags: To track seed varieties and planting dates.
Step-by-step instructions for germinating apple seeds
Here's how to turn apple seeds into strong seedlings without the messy twist method.
🌱 Step 1: Extract and Clean the Seeds
Cut open a fresh apple and remove the seeds—avoid seeds from store-bought apples if possible, as they’re often treated to prevent germination. Place the seeds in a bowl of lukewarm water for 24 hours to soften the outer coating. This step mimics natural winter stratification and speeds up germination.
After soaking, gently rub the seeds between your fingers to remove any remaining fruit flesh. Rinse them under running water and let them air-dry on a paper towel for 1-2 hours. You’ll notice the seeds feel lighter and smoother, ready for planting. This cleaning prevents mold and ensures better contact with the growing medium.
🪴 Step 2: Prepare the Germination Pods
Take four clean plastic 6-ounce yogurt cups (or similar small containers) and poke 3-4 drainage holes in the bottom of each with a nail or screwdriver. Line the bottom of each cup with a 1-inch layer of small pebbles or coarse sand—this ensures excess water drains away while keeping roots aerated.
Fill the cups halfway with a mix of 50% potting soil and 50% perlite or vermiculite. Moisten the mix until it’s damp but not soggy—you should be able to squeeze a handful without water dripping out. Press the soil down lightly to remove air pockets, creating a firm but loose surface for the seeds.
💧 Step 3: Plant and Stratify the Seeds
Plant 1-2 seeds per pod, placing them ½ inch deep in the soil. Cover them lightly with additional soil and mist the surface with water until evenly moist. Label each pod with the apple variety and date—this helps track germination progress, especially if you’re experimenting with different apples.
Place the pods in a plastic zip-top bag and seal it loosely, leaving a small gap for airflow. Store them in the refrigerator for 6-8 weeks, mimicking winter conditions. You’ll know stratification is working when the seeds develop a small white root—this signals they’re ready to break dormancy.
☀️ Step 4: Warm Up and Encourage Sprouting
After stratification, remove the pods from the fridge and place them in a warm, bright location (around 65-75°F). Keep the soil consistently moist but never waterlogged—soggy soil invites rot, while dry soil halts growth. You should see sprouts emerge in 2-4 weeks, depending on the apple variety.
Once the seedlings reach 2-3 inches tall, transplant them into individual 4-inch pots filled with potting soil. Handle the seedlings gently by their leaves, not the stems, to avoid damaging the delicate roots. Place the pots under grow lights or in a south-facing window for 12-14 hours of light daily—this prevents leggy growth and ensures strong, sturdy plants.
⏰ Step 5: Harden Off and Prepare for Outdoors
When seedlings have 4-5 true leaves (not just the initial seed leaves), start hardening them off. Place the pots outside in a shaded, sheltered spot for 1-2 hours the first day, gradually increasing exposure over 10-14 days. This slow adjustment helps them adapt to outdoor conditions without shock.
By the time seedlings are ready for the garden, they’ll be 6-8 inches tall with strong stems. Plant them in a location with full sun and well-draining soil, spacing them 20-25 feet apart to allow for future growth. Mulch around the base to retain moisture and suppress weeds—this mimics the natural forest floor where apple trees thrive.
Tips & tricks for perfect apple tree seed germination
Here's what nobody tells you about getting those seeds to sprout reliably—these little details make all the difference.
Soaking Secret: The 24-hour soak in lukewarm water isn't just about softening—it's mimicking nature's winter chilling period. Use water that's warm to the touch (around 85°F), not boiling. I've found that adding a drop of dish soap to the soaking water helps break down any remaining fruit residue without harming the seeds. This extra step prevents mold later when they're in the soil.
Pod Prep Pro Tip: When creating your drainage holes in Step 2, make them slightly larger than 3-4 holes—about the size of a pencil tip. This ensures proper drainage while still providing enough surface area for root aeration. I also recommend using a hammer and nail to avoid crushing the plastic cups, which can weaken them during the stratification process.
Stratification Check: After the 6-8 weeks in the fridge, don't be tempted to peek at your seeds too often. The cold, dark conditions are crucial for breaking dormancy. When you do check, look for that tiny white root—it should be about ¼-inch long. If you see mold instead, your soil mix might be too wet. This is your signal that stratification worked and it's time to move to warmer conditions.
Lighting Strategy: For the 12-14 hours of light daily after sprouting, I've had the best results using a simple LED grow light bulb on a timer. Position it about 6 inches above the seedlings—close enough for good light penetration but far enough to prevent overheating. Natural south-facing windows work too, but supplement with artificial light if your seedlings start looking leggy or pale.
Pro Tips for Apple Tree Seed Germination
- Here's what nobody tells you about getting those seeds to sprout reliably—these little details make all the difference.
- Soaking Secret: The 24-hour soak in lukewarm water isn't just about softening—it's mimicking nature's winter chilling...
- Pod Prep Pro Tip: When creating your drainage holes in Step 2, make them slightly larger than 3-4 holes—about the siz...
Frequently asked questions
How long does it take for apple seeds to germinate?
Apple seeds typically take 4–12 weeks to germinate, depending on the variety, stratification method, and temperature. Cold stratification (refrigeration) speeds things up—most seeds sprout within 6–8 weeks if done correctly. Patience is key; some stubborn seeds may take longer!
Do I really need to stratify apple seeds?
Yes! Apple seeds have a hard seed coat that requires cold, moist stratification (6–8 weeks in the fridge) to break dormancy. Skipping this step often results in slow or failed germination. Think of it as a winter nap for your seeds—essential for success!
Will my seed-grown apple tree bear fruit like the parent?
Probably not! Seed-grown apple trees are unpredictable—they may produce small, tart fruit (or none at all) that won’t resemble the parent tree. For reliable fruit, graft onto a rootstock or buy certified nursery trees. Seed saving is more about experimentation and fun than guaranteed harvests!
What if my seeds rot or mold during stratification?
If your seeds develop foul smells or mold, they’re likely rotting due to too much moisture or poor airflow. Drain excess water, use sterilized peat moss, and ensure the container has holes. Discard moldy seeds—start fresh with new ones!
Can I grow apple trees from store-bought apples?
Just avoid hybrid varieties (like Gala or Fuji)—they’re bred for uniformity and may not produce viable seeds. Opt for heirloom or organic apples (e.g., Granny Smith, Honeycrisp) for the best germination rates. Pro tip: Save seeds from multiple apples to increase diversity!
Wrapping up and next steps
Growing an apple tree from seed is a rewarding journey that connects you to nature’s zero-waste magic! While patience is key—expect 6-12 months for sprouts and years for fruit—your efforts yield a unique, heirloom tree with stories to tell.
Once your seedling thrives, transplant it with care and watch it grow into a flourishing part of your garden.
🌱 Next step: Share your progress or tag us—we’d love to see your seed-to-sapling adventure! 🍏