
Lawn
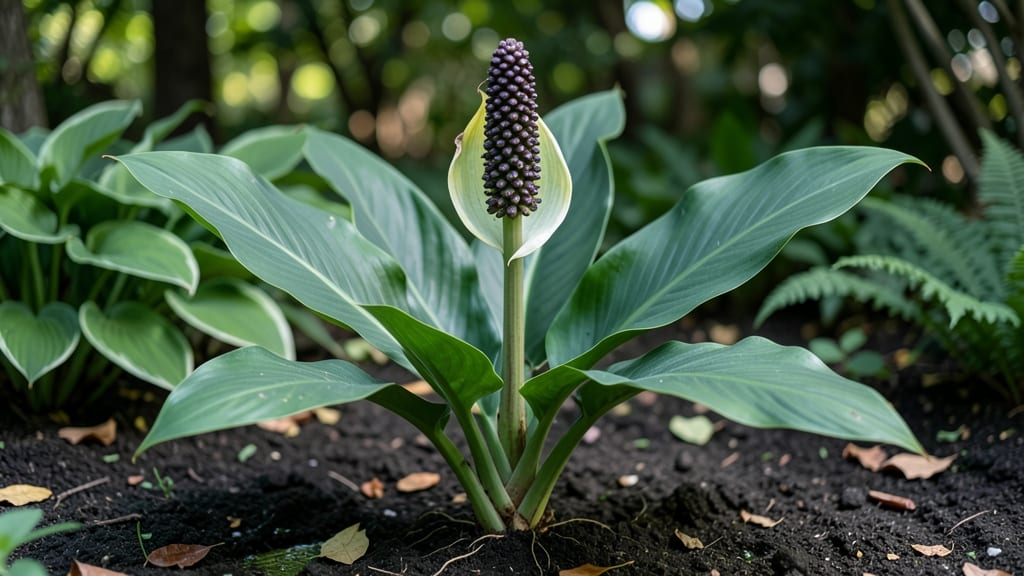
Those twist-resistant arum lily seed heads are nature’s clever way of protecting seeds—until you’re ready to harvest them. 🌿 I’ve spent years working with arum lilies (Zantedeschia), and the key to managing their seed pods is knowing when to leave them and when to act.
The pods can stay on the plant for weeks, but if you’re saving seeds, timing matters—especially if you want to avoid self-seeding where you don’t want it.
The pods start green and firm, then turn brown and papery as they mature. If you’re not saving seeds, snip them off cleanly at the base with pruners to keep the plant tidy.
If you are saving seeds, wait until the pods are fully dry and brown before gently twisting them open—they’ll release seeds that you can sow fresh or store for later. This method works for all arum lily varieties, from classic white to bold purple.
Leaving seed heads on too long can drain the plant’s energy, so remove them by early fall if you’re not saving seeds. The plant will reward you with stronger growth next season, and you’ll avoid a messy garden bed full of volunteer seedlings.
Plus, the dried pods add a rustic touch to winter arrangements if you’re feeling creative.
For overwintering, cut back the foliage once it yellows, but leave the seed heads if you’re saving seeds—just store them in a dry place until spring. If you’re not, trim everything back to the ground.
Either way, your arum lilies will bounce back with vibrant blooms next year, ready to repeat the cycle.
📚 In This Guide
- What you need
- Instructions
- Tips and common mistakes
- Wrapping up and next steps
What you need
- ● Mature arum lily seed heads – Harvest when pods turn brown and dry (typically late summer to fall). Aim for 5–10 healthy pods for a good seed yield.
- ● Sharp pruning shears or scissors – For cleanly snipping seed heads from the plant.
- ● Paper towels or newspaper – To line a tray for drying seeds (use 2–3 sheets per batch).
- ● Brown paper bags or seed envelopes – For storage. Label with the date and plant variety!
- ○ Small paintbrush or cotton swab – For gently extracting seeds from pods (optional but helpful).
- ● Fine-mesh sieve or colander – To separate seeds from chaff (if pods are fibrous).
- ● Desiccant packet or silica gel – For extra-dry storage environments (place 1–2 packets in sealed containers).
- ● Magnifying glass – To inspect seeds for viability (look for plump, intact seeds).
- ● Spray bottle with water – For lightly misting stubborn pods if they’re too dry.
- ● A well-ventilated workspace – Avoid dusty or humid areas to prevent mold.
- ● Patience (2–4 weeks) – Seed drying requires time—don’t rush it!
- ● Basic seed-saving knowledge – Familiarize yourself with arum lilies’ self-pollination nature (no cross-contamination risks!).
How to extract and save arum lily seeds without the twist
Here's the simple method I use every year to collect arum lily seeds without the messy, sticky struggle.
🌱 Step 1: Identify and Harvest Mature Seed Heads
Wait until the seed pod turns a deep, papery brown—this means the seeds inside are fully mature and ready. The pods will feel firm but slightly give when pressed gently with your thumb. Avoid harvesting when pods are still green or orange, as seeds won't be viable yet.
Use clean, sharp pruning shears to snip the entire seed head from the stem. Hold the pod upright as you cut to avoid spilling seeds. Place the harvested pod in a paper bag immediately—this prevents seeds from sticking to surfaces or dropping prematurely. I like to write the variety name on the bag with a marker to keep things organized.
💧 Step 2: Dry the Pods Completely
Spread the harvested pods out on a clean, dry surface in a well-ventilated area. A mesh screen or an old window screen works perfectly for this. Keep them out of direct sunlight—bright light can dry them too quickly and cause the pods to crack prematurely. A shady spot with good airflow is ideal.
Drying takes about 1-2 weeks, depending on your climate. You'll know they're ready when the pods feel completely dry and brittle to the touch. Gently squeeze one—if it crumbles or splits easily, it's overripe. The perfect pods will hold their shape but feel light as a feather.
✂️ Step 3: Extract Seeds Without the Sticky Mess
Place a dried pod on a clean cutting board or sturdy paper towel. Use a small, sharp knife to carefully slit the pod lengthwise—start at the top and work your way down. Hold the pod firmly with one hand while cutting with the other to prevent seeds from scattering. I like to wear gloves for this step because the seeds can still be slightly sticky.
Once the pod is open, gently tap the sides to release the seeds. You'll see clusters of small, glossy seeds inside. Use a soft paintbrush to sweep any remaining seeds out of the pod and onto your work surface. Avoid blowing on them—their lightweight nature means they'll float away easily. Collect the seeds in a small envelope or jar for storage.
🪴 Step 4: Store Seeds Properly for Next Year
Place the collected seeds in a small, airtight container like a glass jar or resealable plastic bag. Add a desiccant packet to absorb any moisture and prevent mold. Label the container with the date and variety name. Store the seeds in a cool, dark place—like a pantry or refrigerator—where they'll stay viable for up to 2-3 years.
Check the seeds occasionally to ensure they're not developing moisture or mold. If you notice any signs of dampness, transfer them to a new container with a fresh desiccant packet. This method keeps seeds fresh and ready for planting whenever you're ready to grow more arum lilies.
Tips & tricks for perfect arum lily seed pod handling
Real talk: The secret to saving arum lily seeds without the sticky twist is all in the timing and technique. Here's what nobody tells you—
Timing Secret: Harvest pods when they're deep papery brown, not just brownish-green. I learned this the hard way after trying to extract seeds from pods that were still slightly orange—those seeds were underdeveloped and wouldn't germinate. The 1-2 week drying period is non-negotiable, especially in humid climates. If you're in doubt, wait an extra day or two rather than rushing it.
Equipment Upgrade: While you can use any clean cutting board, I recommend using a self-healing mat for Step 3. The non-stick surface makes seed collection effortless—no more chasing seeds across your kitchen! For the drying process, a window screen with a frame (like an old storm window) works perfectly, but you can also use a wire cooling rack from your kitchen. Just make sure it's elevated to allow airflow underneath.
Common Mistake Fix: If you find your pods cracking prematurely during drying, it's because they're getting too much direct sunlight or heat. Move them to a cooler, shadier spot immediately. I've had this happen when drying pods on a sunny windowsill—next thing you know, seeds are everywhere! A north-facing window or a spot under a shelf works best. And if you accidentally crack a pod, don't panic—just carefully collect any seeds that fall out with a small brush.
Storage Wisdom: The 2-3 year viability window is accurate, but only if you maintain proper storage conditions. I've had seeds last up to 4 years in my refrigerator, but germination rates drop significantly after 3 years. To test viability before planting, place a few seeds in a damp paper towel and check for sprouting after 7-10 days. This simple test saves you from planting hundreds of seeds only to find they won't grow.
Pro Tips for Arum Lily Seed Head
- Real talk: The secret to saving arum lily seeds without the sticky twist is all in the timing and technique.
- Timing Secret: Harvest pods when they're deep papery brown, not just brownish-green.
- Equipment Upgrade: While you can use any clean cutting board, I recommend using a self-healing mat for Step 3.
Frequently asked questions
Got questions about arum lily seed heads? You’re not alone! Here are some of the most common queries—plus clear, practical answers to help you master zero-waste seed saving with these twist-resistant pods.
What makes arum lily seed heads "twist-resistant"?
The arum lily’s seed head has a unique spiral structure that resists twisting when dry, unlike many other seed pods. This design helps protect the seeds from premature dispersal and makes them easier to harvest intact. Think of it like nature’s built-in twist-proof packaging!
When is the best time to harvest arum lily seed heads?
Wait until the seed pods turn brown and papery—usually late summer to early fall. Press gently on the pod; if the seeds rattle inside, it’s ready! Harvesting too early risks underdeveloped seeds, while waiting too long may mean the pod splits open naturally.
How do I safely remove seeds from twist-resistant pods?
Gently squeeze the pod over a bowl or paper—no twisting needed! The seeds should pop out easily once dry. If stubborn, let the pod dry further in a warm, dry place (like a sunny windowsill) for 1–2 days. Avoid cutting or forcing it open to preserve seed viability.
Can I save seeds from store-bought arum lilies?
Unfortunately, no. Most commercially sold arum lilies (like Zantedeschia) are hybrids and won’t produce true-to-type seeds. For reliable seed saving, grow from seeds of Arum italicum or Arum maculatum—native species with consistent seed heads.
What should I do if my seed head molds or rots before harvesting?
If you spot mold or soft spots, discard the pod immediately—fungus can ruin seeds. To prevent this, harvest in dry weather and store pods in a paper bag (not plastic) in a cool, dry place with good airflow. If humidity is high, speed up drying with a fan on low.
Pro Tip: Label your seed pods!
Use a pencil or masking tape to mark the variety and harvest date directly on the pod. This saves time later when you’re ready to plant. A quick habit now = no guesswork in spring!
Wrapping up and next steps
Saving arum lily seeds is a rewarding way to embrace zero-waste gardening while adding a touch of drama to your landscape. These twist-resistant seed pods are nature’s clever design—perfect for beginners and eco-conscious gardeners alike!
Whether you’re harvesting for propagation or simply admiring their unique structure, every step brings you closer to a self-sustaining garden. 🌱
Ready to dive in? Start by observing your arum lilies—look for those iconic seed heads and follow the simple steps to collect, dry, and store them. Your future garden (and the planet) will thank you! Grab your tools and get growing today! ✨