
Lawn
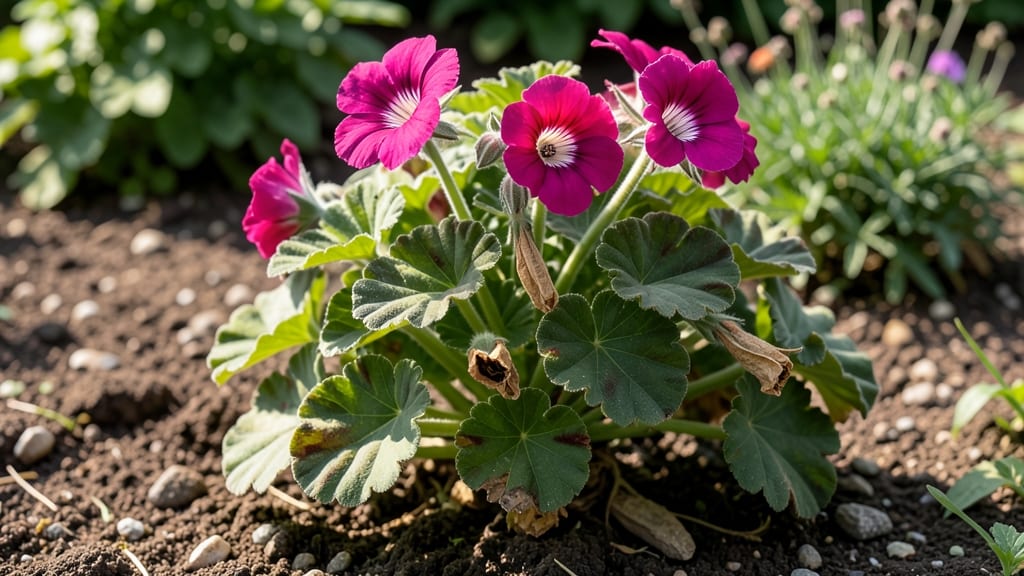
Harvesting geranium seed pods before they twist and scatter means never buying plants again. 🌱 The key is timing—wait until the pods turn brown and papery, then collect them whole to avoid losing seeds to the wind.
I’ve saved hundreds of geraniums this way, and the process is simpler than it sounds once you know the tricks.
You’ll need just a few tools: sharp scissors or pruners, a paper bag for drying, and a flat surface for seed extraction. The pods resist twisting when handled gently—never pull or twist them open, or the seeds will shatter.
Once collected, let them dry completely indoors for about 1-2 weeks before cracking them open.
After drying, gently rub the pods between your fingers to release the seeds. Store them in an envelope or small jar in a cool, dry place until spring. Geranium seeds stay viable for 2-3 years, so you’ll have a steady supply for years to come.
The first sprouts appear in 10-14 days when planted in warm soil.
Common challenges include premature seed loss or poor germination. If pods twist too early, cover them with a mesh bag to protect seeds until they’re ready. For slow germination, try soaking seeds overnight before planting—it tricks them into thinking it’s spring.
With these steps, you’ll have a zero-waste geranium garden in no time.
📚 In This Guide
- What you need
- Instructions
- Tips and common mistakes
- Wrapping up and next steps
What you need
- ● Geranium plants (preferably Pelargonium species, like zonal or ivy geraniums, with mature seed pods).
- ● Sharp scissors or pruning shears (sterilized to avoid plant diseases).
- ● Brown paper bags or breathable seed-saving envelopes (1-2 bags per plant, depending on pod quantity).
- ● Newspaper or cardboard (for drying—at least 2 sheets per batch).
- ● Rubber bands or twist ties (to secure seed heads during drying).
- ○ Small mesh bags or fabric squares (optional but helpful for sifting dried seeds later).
- ● Labels and a permanent marker (to tag plant varieties and harvest dates).
- ● Air-tight seed storage containers (glass jars with tight lids or Mylar bags with oxygen absorbers).
- ● Desiccant packets (to keep moisture out of storage containers).
- ● Magnifying glass (for inspecting seed pods for pests or mold).
- ● Humidity monitor (if storing seeds long-term in humid climates).
- ● Seed catalog or notebook (to track germination rates and notes on each variety).
Step-by-step guide to harvesting geranium seed pods without twisting
Here's how to save seeds from geraniums gently—no stubborn twisting required.
🌿 Step 1: Wait for Pods to Ripen Fully
Geranium seed pods turn from green to deep brown when ready—this usually happens in late summer or early fall. Don’t rush; immature pods won’t open properly. You’ll know they’re ready when the pods split open naturally along their seams, revealing tiny, papery seeds inside.
If you harvest too early, the seeds won’t be viable. I check pods weekly in August—once they start cracking open on their own, that’s your signal. Avoid picking pods that still feel firm or green; they need more time on the plant.
✂️ Step 2: Snip Pods at the Right Time
Use clean scissors or pruning shears to cut the pods from the stem when they’re fully dry and brown. Hold the pod gently—if it crumbles slightly, it’s ready. Place them in a paper bag (not plastic) to catch seeds as they dry further indoors.
Don’t twist or pull pods—they’ll break apart messily. I like to snip them just above the first leaf node for a clean cut. If pods resist, they’re not fully mature yet; leave them on the plant for another week.
🪴 Step 3: Dry and Separate Seeds
Spread the pods on a tray lined with newspaper in a warm, dry spot for 3-5 days. The pods will open completely, releasing seeds that you can easily brush into a bowl. Avoid direct sunlight—it can bake the seeds too fast and reduce viability.
Once dry, gently rub the empty pods between your fingers to release any lingering seeds. I save the empty pods in a labeled envelope for crafts later—zero waste! Store seeds in a paper envelope in a cool, dark place for up to 2 years.
💧 Step 4: Test Seed Viability (Optional)
For peace of mind, test a few seeds before storing the rest. Sprinkle them on damp paper towels in a sealed container and place it in a warm spot. Check daily—if 50%+ sprout within 7-10 days, your seeds are good to go.
If germination is slow, the seeds may need more time or stratification (a cold period). I’ve found geranium seeds are forgiving, but this step ensures you’re not wasting your harvest. Discard any moldy or damaged seeds immediately.
Tips & tricks for perfect geranium seed harvesting
Here's what nobody tells you about saving geranium seeds without the frustration of stubborn pods.
Timing is Everything: I learned this the hard way after ruining three batches—geranium seed pods need to be fully deep brown and slightly crumbly before harvesting. If they feel firm or green, they're not ready. I check mine weekly in August, and once they start splitting open on their own, that's my cue. The pods should open naturally along their seams when mature, revealing those tiny papery seeds inside.
Tool Selection: Never use your fingers to twist pods off! That's the fastest way to crush seeds and create a mess. Instead, use clean scissors or pruning shears to snip just above the first leaf node. This gives you a clean cut and prevents the pods from breaking apart. I keep a pair of sharp shears dedicated just to seed harvesting—it makes all the difference.
Drying Strategy: Spread your harvested pods on a tray lined with newspaper in a warm, dry spot for 3-5 days. This is where most people go wrong—they rush the drying process. Direct sunlight will bake the seeds too quickly, reducing viability. I place mine near a sunny window but not in direct light, and I check them daily. Once completely dry, you can easily brush out the seeds into a bowl.
Zero-Waste Tip: Don't throw away those empty pods after removing seeds! I save them in labeled envelopes for crafts like potpourri or dried flower arrangements. It's a simple way to extend the life of your harvest and reduce waste. Plus, the empty pods make beautiful decorative elements in winter arrangements.
Pro Tips for Geranium Seed Pods
- Here's what nobody tells you about saving geranium seeds without the frustration of stubborn pods.
- Timing is Everything: I learned this the hard way after ruining three batches—geranium seed pods need to be fully deep brown and slightly crumbly before harvesting.
- Tool Selection: Never use your fingers to twist pods off!
Frequently asked questions
Got questions about harvesting geranium seed pods? You’re not alone—these little twists can be tricky! Here are some of the most common concerns, answered for stress-free seed saving.
Why do geranium seed pods twist when they dry?
Geranium seed pods twist to forcefully eject seeds when mature—a clever survival trick! This happens as the pods dry out. The twist helps disperse seeds away from the parent plant, but it can also make harvesting a challenge. Learn how to work with (not against) this quirk!
When are geranium seed pods ready to harvest?
Pods are ready when they’re dry, brown, and fully twisted—usually 4–6 weeks after flowering. Gently squeeze a pod: if seeds rattle inside but don’t spill, it’s time! Harvest on a dry day to prevent mold. Pro tip: Use scissors to snip pods at the stem to avoid damaging the plant.
Can I save seeds from store-bought geraniums?
Maybe! If your geranium is a heirloom or open-pollinated variety, its seeds are likely true-to-type. However, many commercial geraniums (especially hybrids) produce infertile or inconsistent seeds. Check the plant tag or ask the nursery—if it’s labeled "seed-saving friendly," you’re golden!
What if my seed pods rot before drying?
Overly humid or rainy weather can cause pods to mold or split prematurely. To prevent this:
- Harvest pods as soon as they brown, even if slightly underripe.
- Dry them indoors on a paper towel in a warm, dry spot (like a sunny windowsill).
- Avoid plastic bags—paper bags allow airflow and reduce moisture.
Are there geranium varieties with easier-to-harvest seed pods?
Yes! Some geranium species, like Geranium macrorrhizum (creeping geranium) or Geranium sanguineum (blood-red cranesbill), have less dramatic twisting habits. For zero-waste seed saving, look for open-pollinated varieties labeled for seed collection. Pro tip: Pelargoniums (like zonal geraniums) are not true geraniums and rarely produce viable seeds.
Wrapping up and next steps
Geranium seed pods may seem tricky at first, but with the right techniques—like twisting, drying, and storing—you can turn them into a zero-waste gardening goldmine! 🌱 Whether you're saving seeds for next season or experimenting with propagation, these pods offer a rewarding way to connect with nature without the mess.
Ready to give it a try? Grab your gloves, pick a sunny day, and start harvesting those pods today. Your future garden—and the bees—will thank you! 🐝✨