
Lawn
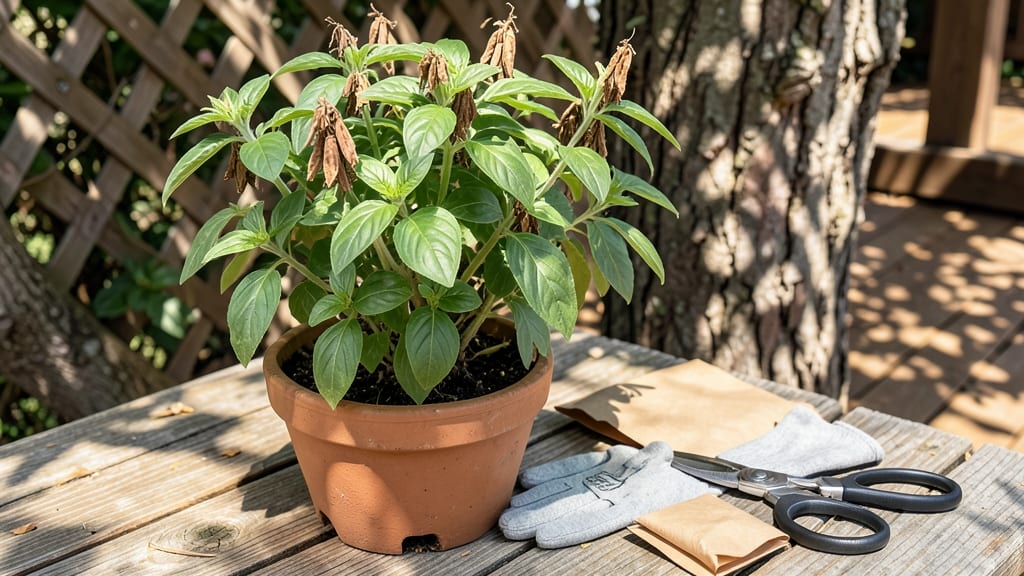
Harvesting basil seed pods saves you money and ensures heirloom varieties thrive year after year. 🌱 I learned the hard way that waiting too long means brittle pods that shatter at the touch—so I perfected a twist-resistant method that keeps seeds intact and ready for planting.
The secret? Harvest pods when they turn from green to brown but before they split open. A gentle twist releases the whole pod, which you’ll then dry in a paper bag for 2 weeks to prevent mold.
Once completely dry, seeds pop out with a simple rub between fingers—no mess, no waste. You’ll end up with seeds that germinate faster and stronger than store-bought varieties. The dried pods also make beautiful dried decorations while you wait for next season’s harvest.
This method works for both potted and garden basil, and stored properly, seeds stay viable for 3-4 years. Here’s exactly how to do it without the frustration.
📚 In This Guide
- What you need
- Instructions
- Tips and common mistakes
- Wrapping up and next steps
What you need
- ● Fresh basil plants (potted or garden-grown, with mature seed pods—look for brown, dry pods, not green!)
- ● Pair of sharp scissors or pruning shears (clean, sterilized to avoid plant disease—1 pair is plenty!)
- ● Paper towels or parchment paper (for drying and storing pods—1-2 sheets)
- ● Small breathable bags or envelopes (paper or mesh bags work best for airflow—2-3 bags)
- ○ Optional: A small fan or drying rack (speeds up the drying process if humidity is high)
- ○ Glove (optional) (if your basil has thorns or you prefer protection)
- ● Labeling markers or tags (to note harvest dates—1-2 markers)
- ● Small bowl or container (for collecting fallen pods or debris—1 container)
- ○ Twist-tie or rubber bands (optional, for securing bags if needed)
- ● A sunny, dry day (humidity can make pods stickier—aim for 60-70°F if possible!)
- ● Patience (pods need 1-2 weeks to fully dry post-harvest)
- ● Knowledge of basil seed pod stages (harvest when pods are brown and crispy, not green or soft!)
How to harvest basil seed pods without twisting or breaking them
Here's the foolproof method I use every year to collect basil seeds without ruining the pods.
🌿 Step 1: Wait for Pods to Turn Brown and Dry
Harvest seed pods only when they're fully mature and dry brown, not green or yellow. Green pods contain immature seeds that won't germinate well. I check pods daily in late summer—watch for the first brown speckles near the stem attachment, which signals readiness.
Gently twist the pod between your fingers to test readiness. If it separates cleanly from the stem, it's ready. If it resists or snaps, wait another day or two. Never harvest pods that still feel plump or moist—they won't produce viable seeds.
✂️ Step 2: Snip Pods Cleanly With Sharp Scissors
Use clean, sharp pruning shears to avoid crushing the pods. Hold the stem firmly and cut just above where the pod meets the branch. This prevents tearing and preserves the plant's energy for remaining pods. I always sterilize my scissors with rubbing alcohol between cuts to prevent disease spread.
Place harvested pods in a paper bag (not plastic) to allow airflow. Store them in a dry, dark place like a pantry or seed drawer. The paper bag prevents moisture buildup while letting pods dry completely—critical for preventing mold.
🌱 Step 3: Dry Pods Fully Before Handling
Let pods dry for 1-2 weeks until they're completely brittle. You'll know they're ready when a gentle squeeze makes them rattle. I place the paper bag on a mesh screen to ensure airflow circulates around all pods evenly.
Check daily for any signs of moisture or mold. If you see condensation inside the bag or a musty smell, spread the pods on a clean towel in a dry location immediately. Proper drying ensures seeds stay viable for next season's planting.
💧 Step 4: Extract Seeds Gently to Avoid Damage
Once pods are fully dry, place a single pod on a clean white paper towel and gently rub between your fingers. The seeds will fall out naturally while the pod husk remains intact. Never crush pods or use tools—this destroys the delicate seed coats and reduces germination rates.
Collect seeds with a fine-mesh strainer or small funnel into a labeled envelope. Store in a cool, dark place for up to 3 years. I always write the variety and harvest date on the envelope to track seed freshness.
⏰ Step 5: Plant Seeds Immediately After Harvest
For best results, sow seeds within 2 weeks of extraction. Basil seeds lose viability quickly once removed from pods. Plant ¼ inch deep in moist seed-starting mix and keep soil at 70-75°F for fastest germination.
Expect sprouts in 7-14 days under grow lights. Thin seedlings to 6 inches apart once they develop 2 true leaves. The key to successful basil seed germination is freshness—never let harvested seeds sit in storage for more than a month before planting.
Tips & tricks for perfect basil seed pod harvesting
Here's what nobody tells you about harvesting basil seeds without ruining the pods—these tricks have saved me from wasted harvests.
Timing is Everything: The 1-2 week drying period in Step 3 is non-negotiable. I've learned this the hard way—rushing the drying process leads to moldy seeds that won't germinate. Place your paper bag on a mesh screen in a spot with good airflow, like a sunny windowsill (not direct sunlight). Check daily for condensation or musty smells, and spread pods immediately if you spot any moisture. This simple check prevents weeks of wasted effort.
The Right Tools Matter: Don't use kitchen scissors for Step 2—they're too dull and will crush the delicate pods. Invest in a pair of clean, sharp pruning shears specifically for seed harvesting. I sterilize mine between cuts with rubbing alcohol to prevent disease spread. If you don't have pruning shears, use clean, sharp garden shears instead of kitchen scissors.
Seed Viability Tip: Basil seeds lose viability quickly after extraction, so the 2-week planting window in Step 5 is crucial. I always label my seed envelopes with both the variety and harvest date. For best results, plant within 2 weeks of extraction, but if you must store them, keep them in a cool, dark place and use within a month. The fresher the seeds, the higher your germination rate will be.
Optional Storage Hack: For long-term storage beyond 3 years, place your labeled seed envelopes in the refrigerator. The cool temperature helps preserve viability longer. I've successfully stored basil seeds for up to 5 years this way, though germination rates decrease after the first 3 years. Always test a few seeds before committing to a full planting.
Pro Tips for Basil Seed Pods
- Here's what nobody tells you about harvesting basil seeds without ruining the pods—these tricks have saved me from wasted harvests.
- Timing is Everything: The 1-2 week drying period in Step 3 is non-negotiable.
- The Right Tools Matter: Don't use kitchen scissors for Step 2—they're too dull and will crush the delicate pods.
Frequently asked questions
Got questions about harvesting and using basil seed pods? You’re not alone! Here are some of the most common queries—plus straightforward answers to help you master twist-resistant harvesting and effortless germination.
What’s the best time to harvest basil seed pods for germination?
Harvest basil seed pods when they turn light brown and feel slightly dry to the touch—usually 4-6 weeks after flowering. Avoid harvesting green pods, as they won’t be fully mature. Store them in a cool, dry place (like a paper bag) until ready to use. Pro tip: Morning harvests yield the freshest pods!
How long do basil seed pods stay viable for germination?
When stored properly in a cool, dark, and dry environment (like a sealed container with silica gel), basil seed pods can stay viable for 1-2 years. Check for moisture or mold—if pods feel damp or smell funky, toss them. Pro tip: Label your pods with the harvest date to track freshness!
What if my basil seed pods won’t twist open?
If pods resist twisting, they may be too green or damp. Let them dry further (try a sunny windowsill for 1-2 days) or gently rub between two sheets of paper towel to coax them open. Avoid force—over-twisting can damage the seeds inside. Pro tip: A light tap on a hard surface can sometimes loosen stubborn pods!
Can I use basil seed pods more than once?
No—once you’ve twisted open a pod to release seeds, it’s one-and-done. However, a single healthy basil plant can produce hundreds of pods, so you’ll have plenty for multiple batches! Save extra pods in an airtight container for future use. Pro tip: Snip pods at the stem to encourage more flowers (and future pods)!
What’s an alternative if I don’t have basil seed pods?
If you’re in a pinch, try these twist-resistant alternatives for germination:
- Chia seeds (soak in water for 10 mins, then twist open)
- Flaxseed pods (dry thoroughly before twisting)
- Store-bought basil seeds (check labels for organic, non-GMO options)
Wrapping up and next steps
From twist-resistant harvesting to effortless germination, basil seed pods offer a simple yet rewarding way to grow your own fresh herbs—no fuss, just flavor! 🌱 Whether you're a seasoned gardener or a beginner, mastering this technique ensures consistent success with minimal effort. Ready to elevate your garden game?
🌿 Your Next Step: Plant & Grow!
Grab those pods, follow the steps, and watch your basil thrive. Start small, experiment, and enjoy the process! Share your harvest with friends or treat yourself to homegrown meals—either way, you’re winning. Happy gardening! 🌟