
Lawn
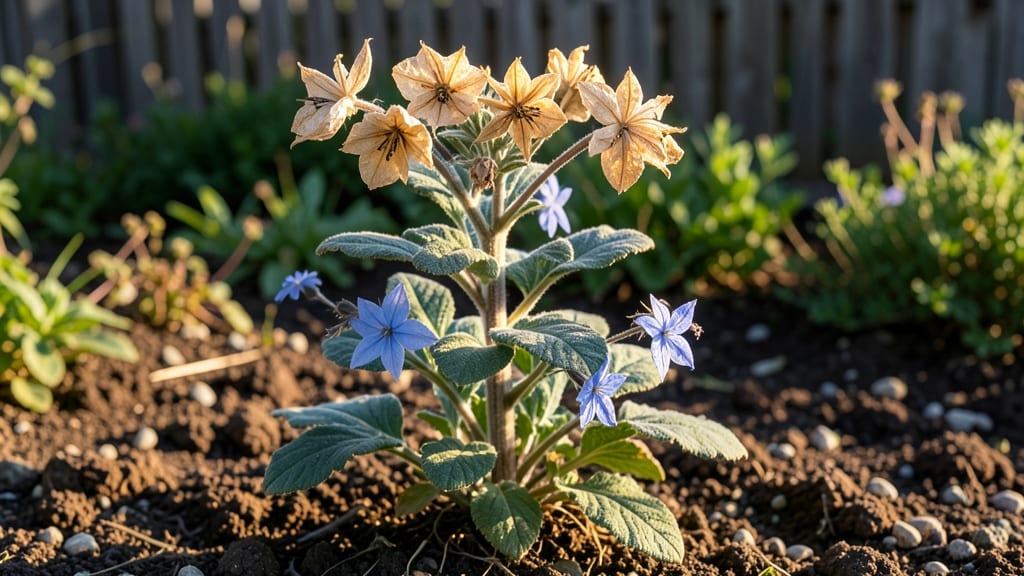
Borage seed pods are nature's way of ensuring you never run out of this self-seeding, bee-loving herb again. 🌱 I've learned that harvesting them at the right stage—when the pods turn brown but haven't split open—means you'll have viable seeds ready for next year's garden by early fall.
The process is simpler than it sounds, and the payoff is a stash of seeds that'll last for years if stored properly.
You'll need just three things: sharp scissors, a paper bag for collecting pods, and a dry, dark spot for drying. The key is patience—let the pods fully mature on the plant before harvesting, or you'll end up with seeds that won't germinate.
I've made this mistake twice, and trust me, you don't want to start over because of it.
Once dried, the seeds are easy to extract and store in an airtight container. You'll have a supply of seeds that's ready to plant as soon as the last frost passes, giving you a head start on the season.
Plus, borage is so resilient that even if you forget to harvest the pods, you'll likely still have volunteers popping up everywhere the next spring.
This method works for gardeners in zones 3 through 10, making it a versatile addition to any herb garden. Whether you're growing borage for its beautiful blue flowers, culinary uses, or medicinal properties, saving your own seeds is a game-changer for self-sufficiency.
📚 In This Guide
- What you need
- Instructions
- Tips and common mistakes
- Wrapping up and next steps
What you need
- ● Borage plants (mature, flowering, and seed-producing—Borago officinalis). Aim for at least 3-5 healthy plants for a reliable harvest.
- ● Sharp pruning shears or scissors (sterilized with rubbing alcohol to prevent disease transfer).
- ● Brown paper bags or breathable mesh bags (5-10 bags, depending on yield). Avoid plastic to prevent moisture buildup.
- ● Drying rack or clean, flat surface (like a wooden board or screen). Ensure it’s elevated for airflow.
- ● Fine-mesh sieve or colander (to separate seeds from chaff after drying).
- ● Air-tight glass jars or seed envelopes (for long-term storage—label with the harvest date!).
- ● Gloves (to protect hands from prickly stems or sap).
- ● Small hand fan or dehumidifier (if drying indoors in humid climates).
- ● Magnifying glass (for inspecting seed viability if you’re feeling fancy!).
- ○ Seed moisture meter (optional, to check seed dryness—ideal range: <10% moisture).
- ● Sunny, dry weather (harvest pods on a clear, warm day to avoid mold).
- ● Patience—borage pods take 4-6 weeks to mature after flowering. Monitor plants closely!
- ● Knowledge of seed maturity: Pods should turn brown and papery (not green) and split open easily.
Step-by-Step instructions for harvesting borage seed pods
Here’s how to collect and store borage seeds with minimal fuss—no fancy tools required.
🌿 Step 1: Identify Mature Seed Pods
Borage seed pods turn from green to a papery brown when ready. Look for pods that feel dry and brittle to the touch—squeeze gently, and if they crumble slightly, they’re ripe. Harvest pods before they split open on their own, ideally when they’ve fully dried on the plant but haven’t released seeds yet.
Use clean, dry pruners to snip the stems just below the pods. Avoid tugging, which can damage the plant. This is the moment that matters: harvesting too early means immature seeds, while waiting too long means lost seeds scattered across the garden.
✂️ Step 2: Dry the Seed Pods Properly
Lay the harvested pods on a clean, dry surface in a single layer. Choose a spot with good airflow—like a mesh screen or a cardboard box with holes—to prevent mold. Keep them out of direct sunlight, which can overheat and ruin the seeds.
Check daily for 5-7 days until the pods are completely dry and brittle. You’ll know they’re ready when a gentle shake releases seeds easily. If pods still feel damp, leave them a few more days—they won’t dry faster if you rush them.
🪴 Step 3: Extract and Store the Seeds
Once fully dry, place the pods in a clean paper bag and shake vigorously to release the seeds. Alternatively, rub two pods together between your fingers—the seeds will fall out naturally. Sift the mixture through a fine mesh strainer to separate seeds from chaff.
Store the seeds in an airtight container, like a glass jar with a tight lid, in a cool, dark place. Label with the harvest date—borage seeds stay viable for 2-3 years if kept dry. Real talk: don’t skip the sifting step, or you’ll end up with a jar full of tiny debris instead of seeds.
💧 Step 4: Optional Cold Stratification for Better Germination
For faster germination, mix the seeds with slightly damp sand and refrigerate for 2-4 weeks before planting. This mimics winter conditions and breaks seed dormancy. Borage seeds often germinate without this step, but cold stratification gives you a head start—especially in warm climates.
After stratification, sow seeds directly in the garden or in pots. Press them lightly into ½-inch deep soil and keep moist until sprouts appear. You’ll see first true leaves in 10-14 days—that’s your signal everything’s working.
Tips & tricks for perfect borage seed pod harvesting
Harvesting borage seed pods doesn't have to be a guessing game—these simple tricks will help you collect the most viable seeds with minimal effort.
Timing is Everything: Harvest pods when they're fully brown and brittle but haven't split open—this is your golden window. I learned this the hard way after harvesting too early and getting seeds that wouldn't germinate. Check pods daily during their drying phase, as conditions can change quickly. The perfect moment is when they crumble slightly when squeezed but still hold together.
Drying Strategy: For the 5-7 day drying period in Step 2, I recommend placing pods on a mesh screen over a tray to catch any seeds that might prematurely release. This prevents seed loss while maintaining airflow. Keep them in a spot with indirect light—direct sunlight can overheat the pods and ruin the seeds. If your kitchen gets humid, add a small fan on low to circulate air without disturbing the pods.
Seed Extraction Hack: When shaking the pods in Step 3, place a clean white paper towel beneath them. The contrast makes it easy to spot any stray seeds that might fall outside your bag or strainer. This simple trick saves time during cleanup and ensures you don't miss any seeds hiding in the corners. For stubborn pods, try rolling them between your palms instead of shaking—this often releases seeds more efficiently.
Storage Wisdom: Label your seed storage containers with both the harvest date and the year. I've found that writing "2024 Harvest" in permanent marker on the lid prevents mix-ups when storing multiple years' worth of seeds. For long-term storage, add a small packet of silica gel to your container—it helps absorb any lingering moisture that could reduce viability. Remember, those 2-3 years of viability start counting from your harvest date!
Pro Tips for Borage Seed Pods
- Harvesting borage seed pods doesn't have to be a guessing game—these simple tricks will help you collect the most via...
- Timing is Everything: Harvest pods when they're fully brown and brittle but haven't split open—this is your golden wi...
- Drying Strategy: For the 5-7 day drying period in Step 2, I recommend placing pods on a mesh screen over a tray to ca...
Frequently asked questions
Got questions about harvesting and storing borage seed pods? You’re not alone! Whether you’re a first-time grower or looking to optimize your yield, these answers cover the most common concerns—from timing to troubleshooting. Let’s dive in!
When is the best time to harvest borage seed pods?
Harvest borage seed pods when they turn tan or light brown and feel dry to the touch—usually 60–90 days after flowering. Avoid harvesting too early (green pods won’t dry properly) or too late (seeds may scatter or lose viability). Morning harvests prevent dew-related moisture issues.
How do I know if the seed pods are ready for collection?
Ready pods should rattle when shaken (indicating dry seeds inside) and split open easily with gentle pressure. If they’re still green or rubbery, wait 1–2 weeks. Overripe pods may burst open, spilling seeds—so check them regularly during peak harvest season (late summer to early fall).
Can I save borage seeds from store-bought flowers?
Unfortunately, no—store-bought borage flowers are often treated with growth inhibitors or pesticides to prolong shelf life, making their seeds non-viable. For successful seed saving, grow your own borage plants from organic seeds or cuttings. It’s a small trade-off for year-round harvests!
How should I store harvested borage seed pods?
Store pods in a cool, dry place (like a paper bag or envelope) away from direct sunlight. For long-term storage (up to 2 years), remove seeds from pods and keep them in an airtight container with a desiccant packet to prevent mold. Label with the harvest date!
What should I do if my seed pods are infested with pests?
Common pests like aphids or spider mites can damage pods. Remove heavily infested pods immediately and isolate the plant to prevent spread. Spray with neem oil or insecticidal soap for organic control. Healthy plants with good airflow resist pests better—so prune regularly!
Still stumped? Drop your question in the comments—we’re happy to help you troubleshoot!
Wrapping up and next steps
Harvesting borage seed pods doesn’t have to be a stressful task—with the right timing, tools, and techniques, you can enjoy a steady supply of high-quality seeds year-round.
Whether you’re a seasoned gardener or just starting out, these methods ensure viability and ease, making borage a rewarding addition to your garden. Now’s the perfect time to put your knowledge into action!
🌱 Ready to Reap the Rewards?
Start by selecting a few healthy borage plants and follow the steps you’ve learned. Before you know it, you’ll be enjoying self-sufficient seed harvesting with minimal effort. Happy gardening!