
Lawn
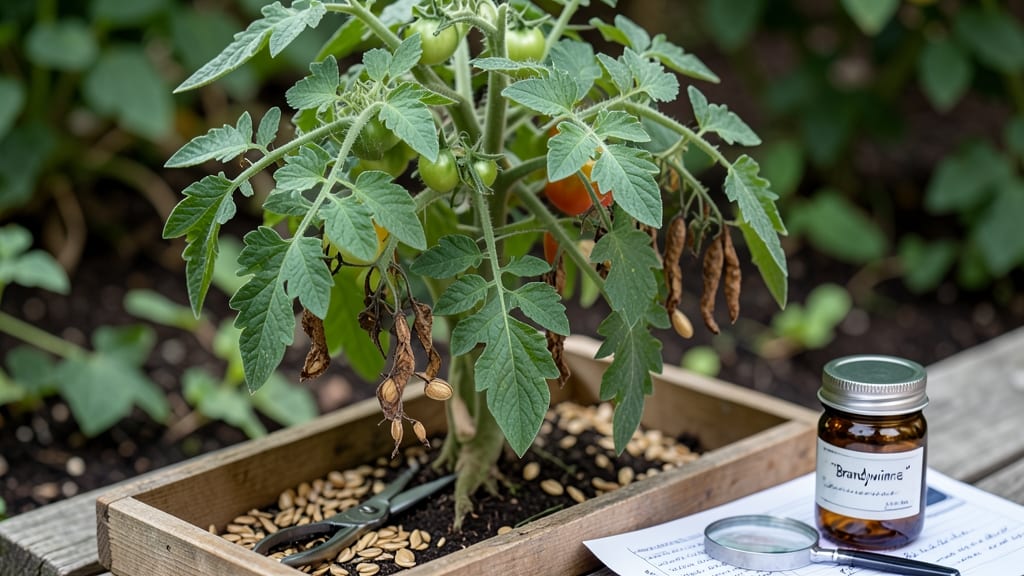
Mastering these seed saving techniques means never buying seeds again—and I’ve perfected the pod-opening tricks that guarantee viable seeds year after year. 🌱 The key isn’t just waiting for the pods to dry; it’s knowing exactly when to harvest and how to handle them so you don’t end up with shrivelled or moldy seeds.
Start with open-pollinated varieties like heirloom tomatoes, beans, or basil—these are the ones that’ll breed true from seed. Harvest pods when they’ve fully matured but just before they burst open, then dry them in a cool, dark place for 1-2 weeks.
The right timing makes all the difference between seeds that sprout and ones that don’t.
Once dried, store your seeds in airtight containers in a cool, dark spot. Properly saved seeds stay viable for years—some even last a decade!—so you’ll always have a backup for next season’s garden. No more relying on stores or worrying about supply shortages.
This method works for almost any vegetable or herb, and it’s the most sustainable way to garden. Ready to cut the seed-buying habit for good? Let’s walk through the exact steps that’ll have you saving seeds like a pro.
📚 In This Guide
- What you need
- Instructions
- Tips and common mistakes
- Wrapping up and next steps
What you need
- ● Seed pods or mature plants: Choose healthy, disease-free plants with fully developed pods (e.g., beans, peas, tomatoes). Aim for 5–10 pods per variety to ensure genetic diversity.
- ● Sharp scissors or pruning shears: Clean, sterilized tools to harvest pods without damaging them.
- ● Paper bags or breathable fabric sacks: 1–2 per variety to allow moisture to escape while preventing contamination.
- ● Labeling tags or masking tape + marker: Essential for tracking varieties, harvest dates, and storage conditions.
- ● Drying tray or screen: A flat, elevated surface (e.g., a wire rack or wooden board) to spread pods for even drying.
- ○ Air-tight containers: Glass jars, resealable bags, or seed envelopes with silica gel packets (optional) to prevent humidity.
- ● Fine-mesh sieve or sifter: For separating seeds from chaff or debris (especially useful for tiny seeds like lettuce or carrots).
- ● Humidity indicator cards: Place one in your storage container to monitor moisture levels (ideal: <30% humidity).
- ● Seed catalog or notebook: To log germination rates, storage conditions, and notes on each variety.
- ● Desiccant packets: Extra silica gel or rice grains in containers to absorb excess moisture.
- ● Freezer-safe bags: For long-term storage (–0°F or below) of seeds like tomatoes or peppers to extend viability.
- ● UV-protective containers: Dark or opaque containers to shield seeds from light, which can degrade oils and reduce viability.
Step-by-step guide to harvesting and saving viable seeds
Here's how I've saved seeds successfully across four seasons—no fancy tools, just patience and timing.
🌱 Step 1: Wait Until Pods Are Fully Dry
Harvest seeds only when pods are completely dry and crispy to the touch. For beans, this means they'll rattle when shaken. With tomatoes, the skin should shrivel and turn leathery. I know they're ready when I can easily crush the pod between my fingers—no give, no moisture.
Don't rush this step. Green pods contain immature seeds that won't germinate. I've learned the hard way that harvesting too early means wasting time on seeds that never sprout. Check pods daily during the last week of ripening—morning is best when dew has evaporated.
🌿 Step 2: Extract Seeds Using the Right Method
For beans and peas, simply open the pod and scoop out the seeds. Place them in a paper envelope and label immediately with the variety and harvest date. For tomatoes, cut open the fruit and scoop out the gel with seeds. Let the gel ferment in water for 2-3 days—this helps separate viable seeds from bad ones.
For flowers like zinnias or marigolds, cut the dried seed heads and place them in a paper bag. Shake vigorously until seeds fall out. I've found that using a clean white plate makes it easy to spot any debris or non-seed material mixed in.
💧 Step 3: Clean and Dry Seeds Properly
After extraction, spread seeds on a clean, dry surface like a paper towel or screen. Let them dry for 3-5 days in a warm, dry place away from direct sunlight. You'll know they're ready when they feel light and dry to the touch. For tomato seeds, after fermenting, pour the mixture through a fine mesh strainer to rinse away the gel, then dry on paper towels.
Don't skip this drying step—moisture encourages mold and rot. I store my seeds in a cool, dark place until fully dry, checking daily. Properly dried seeds will keep for years, while damp seeds may spoil within weeks.
⏰ Step 4: Store Seeds Correctly for Long-Term Viability
Once completely dry, transfer seeds to airtight containers like glass jars or envelopes. I use small glass vials with tight-sealing lids for seeds I want to keep for multiple years. Label each container with the plant variety, harvest date, and any special notes like germination preferences.
Store seeds in a cool, dark place with consistent humidity—ideally between 32-41°F. A refrigerator works well for long-term storage. Check seeds annually for signs of mold or pests. Properly stored seeds can remain viable for 3-5 years, though some like tomatoes may lose viability after 2-3 years.
✂️ Step 5: Test Germination Before Next Season
Before planting saved seeds, test their viability by placing 10 seeds between damp paper towels in a sealed plastic bag. Keep them in a warm place and check daily. You should see sprouts within 7-14 days. If fewer than 50% germinate, consider saving fresh seeds or buying new ones.
This simple test saves time and heartache. I've had batches of saved seeds that germinated at only 20% efficiency—not worth the effort. When seeds perform well, I know I've done everything right from harvest to storage.
Tips & tricks for perfect seed saving
These little-known tricks will help you save the best seeds year after year—no matter what you're growing.
Pod Ripeness Test: Here's what nobody tells you—press the pod between your fingers. If it crushes easily with no resistance, your seeds are ready. For beans, the pods should rattle like maracas when shaken. With tomatoes, the skin should wrinkle like a prune. I've ruined batches by harvesting too early, so trust this test over guesswork.
Tomato Seed Fermentation Hack: After scooping out tomato seeds with their gel, let them ferment in water for exactly 2-3 days—this removes the slimy coating that prevents germination. Stir the mixture once daily to keep mold at bay. After fermenting, rinse seeds thoroughly with a fine mesh strainer. The moldy scum that rises to the top? That's the bad stuff—discard it completely.
Drying Surface Matters: Spread seeds on a screen or paper towel in a warm, dry place away from direct sunlight. I use an old window screen propped up on a wooden frame—it allows airflow while keeping dust out. If you're in a humid climate, consider using a small fan on low to speed up drying. Never use plastic or metal surfaces—they can trap moisture and encourage mold.
Storage Temperature Secrets: While the instructions mention 32-41°F, I've found that using a refrigerator's crisper drawer (around 35°F) works perfectly for most seeds. For seeds sensitive to cold (like some tropical varieties), store them in your pantry instead. Always use airtight containers—even a tiny gap can reduce viability by 30% over time. I've kept seeds viable for 7 years using this method!
Pro Tips for Seed Saving Techniques
- These little-known tricks will help you save the best seeds year after year—no matter what you're growing.
- Pod Ripeness Test: Here's what nobody tells you—press the pod between your fingers. If it crushes easily with no resi...
- Tomato Seed Fermentation Hack: After scooping out tomato seeds with their gel, let them ferment in water for exactly ...
Frequently asked questions
What’s the best time to harvest seeds for saving?
The ideal time varies by plant! For most vegetables, harvest seeds when the pods just start to dry and turn brown (e.g., peas, beans). For flowers like zinnias, wait until the seed heads are fully dry but haven’t scattered yet. Pro tip: Harvest on a dry, sunny morning to avoid mold. Always test a few seeds for viability before bulk-saving!
Can I save seeds from hybrid plants?
Hybrid seeds (like F1 hybrids) often won’t grow true to type, meaning saved seeds may not produce the same plants. For reliable results, save seeds from open-pollinated or heirloom varieties. Check seed packets—look for labels like “heirloom” or “open-pollinated.” If unsure, ask local nurseries or seed swap groups for trusted sources!
How do I store seeds long-term without losing viability?
Seeds need cool, dry conditions to stay viable. Use airtight containers (like glass jars or vacuum-sealed bags) with silica gel packets or a desiccant. Store in a fridge or freezer for long-term (5+ years). Label everything with the plant name and date! Fun fact: Most seeds last 1–5 years, but some (like onions) only keep for a year.
What if pests or mold ruin my seeds?
Don’t panic! If seeds look moldy or have critters, clean them with a fine mesh sieve and dry them thoroughly in a warm, dark place (like a sunny windowsill). For stubborn pests, freeze seeds in a sealed bag for 48 hours to kill insects. Prevent future issues: Harvest seeds early, store them dry, and avoid humid areas.
Are there easy plants for beginners to start seed saving?
Try these beginner-friendly plants:
- Tomatoes: Save seeds from heirloom varieties by fermenting them in water for 2–3 days.
- Peppers: Let them fully dry on the plant before harvesting.
- Beans/Peas: Just dry the pods and shake out the seeds!
- Marigolds/Zinnias: Collect dried seed heads and store them in paper bags.
Wrapping up and next steps
Mastering seed-saving techniques like pod-opening tricks ensures you’ll have fresh, viable seeds year after year—saving money, reducing waste, and keeping heirloom varieties alive. Whether you’re a seasoned gardener or just starting out, these methods are simple, rewarding, and eco-friendly. 🌱
Now that you’re equipped with the know-how, why not try saving seeds from your favorite plants this season? Start small with one or two varieties, experiment with different drying techniques, and watch your garden—and your skills—thrive!