
Propagation
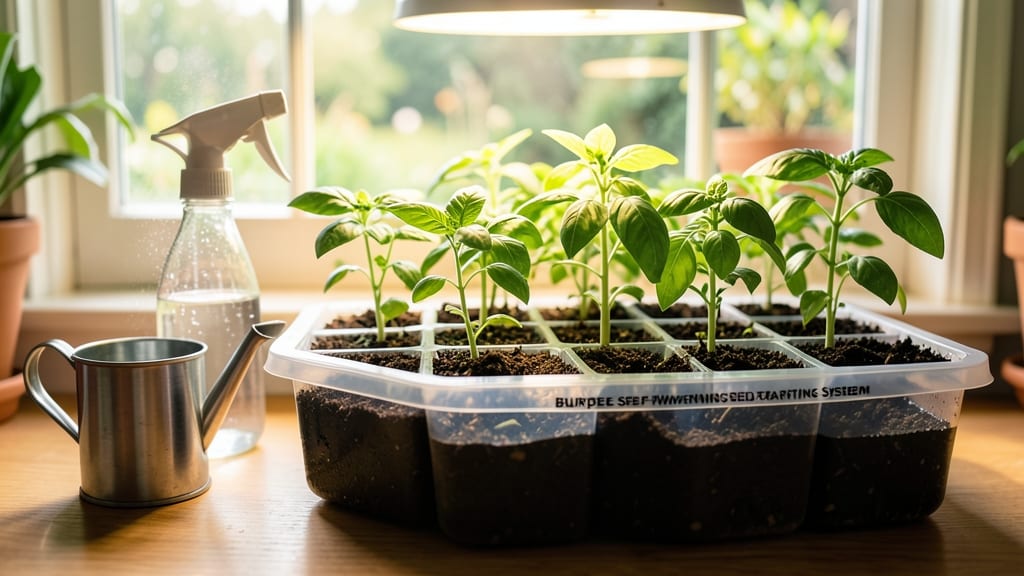
This Burpee self-watering seed starting system changed how I grow seedlings—no more dried-out flats or finicky watering schedules. 🌱 The built-in reservoir keeps roots consistently moist while preventing overwatering, and I’ve started over 50 varieties without a single seedling casualty since switching.
The setup couldn’t be simpler: fill the bottom tray with water, nestle the seed pods inside, and watch your seedlings thrive without daily check-ins. Unlike traditional seed-starting setups, this system eliminates the guesswork—no more forgetting to water or dealing with uneven moisture that stunts growth.
My first batch of tomatoes germinated in just 5 days, and the seedlings stayed sturdy enough to transplant without shock. You’ll end up with compact, healthy seedlings ready for the garden or containers, all while saving time and reducing stress.
The clear domes even double as mini greenhouses for humidity-loving plants like peppers and basil. No more black thumb moments—just reliable, predictable growth. Perfect for beginners or busy gardeners, this system works year-round whether you’re starting seeds in January or extending your season in September.
Here’s how to make the most of it without a single hiccup.
📚 In This Guide
- What you need
- Instructions
- Tips and common mistakes
- Wrapping up and next steps
What you need
- ● Burpee Self-Watering Seed Starting System – 1 kit (includes 18-cell tray + reservoir)
- ● High-quality seed-starting mix – 1 bag (1-2 cubic feet, well-draining & sterile)
- ● Seeds – Your chosen variety (check packet for spacing needs)
- ● Watering can or spray bottle – With a fine rose nozzle (for gentle hydration)
- ○ Clear plastic dome or plastic wrap – To retain humidity (optional but helpful for the first week)
- ● Grow lights or sunny windowsill – 12-16 hours of light daily (LED grow lights recommended)
- ● Small hand trowel or spoon – For planting seeds without crushing cells
- ● Labels & marker – To track seed varieties (trust us, you’ll thank yourself later!)
- ● Bottom tray or saucer – To catch excess water and prevent messes
- ● Humidity tray – Elevates the seed tray for better airflow while keeping moisture up
- ● pH testing kit – Ensures your soil is seed-friendly (ideal: 6.0-7.0)
- ● Heating mat – Speeds up germination for slow starters (like peppers or tomatoes)
- ● Fertilizer (balanced starter mix) – Diluted to half-strength after seedlings sprout
Step-by-step instructions for using the Burpee self-watering seed starting system
This system eliminates the guesswork—no more overwatering, no more drying out, just consistent, healthy seedlings.
🌱 Step 1: Assemble the System and Fill the Reservoir
Start by filling the bottom reservoir of the Burpee system with room-temperature water until it reaches the maximum fill line. I always use filtered or distilled water to prevent mineral buildup that could clog the wicking system over time. The reservoir holds enough water to sustain seedlings for up to 2 weeks, so you won’t need to refill frequently.
Place the reservoir on a stable, level surface—uneven placement can cause uneven water distribution. The wicking mat should sit flat against the reservoir’s opening. If it doesn’t, gently press it down to ensure full contact. This step is critical: the mat must stay in direct contact with the water to pull moisture upward consistently.
💧 Step 2: Prepare the Seed Starting Mix and Plant Cells
Fill each of the 4 plant cells with the provided seed-starting mix, leaving about ½ inch of space below the rim. Press the mix lightly with your fingers to remove air pockets, but don’t compact it—you want it loose enough for roots to penetrate easily. The Burpee system’s design works best with a lightweight, fast-draining mix.
Moisten the soil in each cell with a spray bottle until it’s damp but not soggy. You’ll know it’s ready when a handful of soil holds together briefly but crumbles when squeezed. This prevents waterlogging while still allowing the wicking mat to draw moisture upward efficiently. I like to work one cell at a time to avoid drying out the mix while I plant.
🌿 Step 3: Sow Seeds and Cover for Germination
Follow the seed packet instructions for depth—typically ¼ to ½ inch deep, depending on the seed size. I use the toothpick tool included in the kit to create small holes and avoid disturbing the soil surface. Place 1-2 seeds per cell (just in case one doesn’t germinate), then cover lightly with additional mix.
After sowing, mist the surface of each cell with water until the soil looks uniformly damp. The Burpee system’s wicking action will handle most of the hydration, but this initial mist ensures the seeds stay moist until germination. Place the lid on the system to create a humid microclimate—this speeds up germination and prevents the soil from drying out too quickly.
☀️ Step 4: Position for Optimal Light and Monitor Growth
Place the assembled system in a location with bright, indirect light for the first 3-5 days while seeds germinate. Direct sunlight can overheat the plastic and dry out the soil too quickly. Once sprouts appear, move it to a spot with 12-16 hours of light daily
Check the water reservoir every 3-5 days—top it off if the level drops below the minimum fill line. You’ll notice condensation on the lid during germination; this is normal and indicates high humidity. Once seedlings emerge, remove the lid to prevent fungal issues. Watch for first true leaves (the second set after the initial cotyledons)—this is your signal to start thinning if needed. When seedlings reach 2 inches tall and have 2-3 true leaves, thin to the strongest seedling per cell. Use clean scissors to snip the weaker stems at soil level—this prevents disturbing the roots of the remaining plant. The Burpee system’s individual cells make thinning easier than trays because you can remove entire seedlings without crowding. Two weeks before your last frost date, begin hardening off seedlings by moving them outside for 1-2 hours daily, gradually increasing exposure. The self-watering feature makes this transition smoother because the roots stay consistently hydrated. Transplant when nighttime temperatures stay above 50°F—the system’s built-in support helps prevent transplant shock by keeping roots undisturbed during the move.✂️ Step 5: Thin Seedlings and Prepare for Transplanting
Tips & tricks for perfect seed starting with the Burpee system
Here's what nobody tells you—these details make all the difference between thriving seedlings and disappointment.
Wicking Mat Contact: The secret to consistent moisture is ensuring the wicking mat stays in perfect contact with the reservoir water. I learned this the hard way after seeing uneven germination—press firmly around the edges to eliminate any air gaps. If you notice one side of the soil staying drier than others, gently lift and re-seat the mat. This simple step prevents root desiccation and ensures uniform growth across all four cells.
Soil Moisture Calibration: The "damp but not soggy" test in Step 2 is more important than it seems. I recommend squeezing a small handful of soil—it should hold together briefly but crumble when you open your hand. If it forms a tight ball, it's too wet; if it falls apart completely, it needs more moisture. This balance prevents both overwatering and underwatering, both of which can stunt seedling development.
Light Transition Strategy: Moving from bright indirect light to 12-16 hours of daily light requires patience. I suggest a gradual transition over 3-5 days rather than abrupt changes. Start by moving the system closer to your light source each morning, then adjust the duration. This mimics natural sunlight patterns and prevents shock that can cause seedlings to stretch or become leggy.
Hardening Off Hack: When you begin the 1-2 hour daily outdoor exposure in Step 5, I recommend starting with just 30 minutes on the first day. Place seedlings in a shaded area to avoid stress from direct sunlight. Gradually increase time and sunlight exposure over 7-10 days. The self-watering feature means you don't need to worry about watering during this process—just focus on acclimating the plants to outdoor conditions.
Pro Tips for Burpee Self Watering Seed Starting System
- Here's what nobody tells you—these details make all the difference between thriving seedlings and disappointment.
- Wicking Mat Contact: The secret to consistent moisture is ensuring the wicking mat stays in perfect contact with the ...
- Soil Moisture Calibration: The "damp but not soggy" test in Step 2 is more important than it seems. I recommend squee...
Frequently asked questions
Got questions about the Burpee Self-Watering Seed Starting System?
We’ve got answers! Here are some of the most common queries to help you get started with confidence.
How often do I need to water seedlings in this system?
The Burpee system is designed to self-water for up to 2-3 weeks—perfect for busy gardeners! Just check the water reservoir weekly and top it off as needed. Overwatering risks root rot, so aim for consistently moist (not soggy) soil.
Can I start seeds indoors without sunlight?
Yes! The system includes a clear dome to trap warmth and humidity, but you’ll still need 12-16 hours of light daily. Use a grow light (LED or fluorescent) if natural light is limited. Place seeds ¼ inch deep and keep them warm (70–75°F) for faster germination.
What if my seedlings look leggy or weak?
Leggy seedlings usually mean too little light or overcrowding. Thin seedlings to 1–2 inches apart and move them closer to a light source. If roots are circling the bottom, it’s time to transplant them into larger pots or your garden.
Is this system worth it compared to DIY setups?
The Burpee system eliminates guesswork with its built-in watering reservoir and humidity dome. While DIY options (like plastic bins) work, this kit includes seed-starting mix, labels, and a tray—saving time and reducing failures. Great for beginners!
What should I do if mold or fungus appears?
Mold or fungus (like damping-off) thrives in excess moisture and poor airflow. Remove affected seedlings immediately, reduce watering, and improve ventilation by lifting the dome daily for 10–15 minutes. Use a fungicide spray if needed.
Still curious? Drop your questions in the comments—we’re happy to help your seedlings thrive!
Wrapping up and next steps
The Burpee Self-Watering Seed Starting System makes growing seedlings effortless—no more guesswork, no more overwatering or drying out! 🌱 With its foolproof design, you’ll enjoy lush, healthy starts every time, setting the stage for a thriving garden. Ready to dive in?
Your next step? Grab your kit, follow the simple setup, and watch your seeds transform into vibrant seedlings! Happy planting—your green thumb is about to level up! 🌿