
Lawn
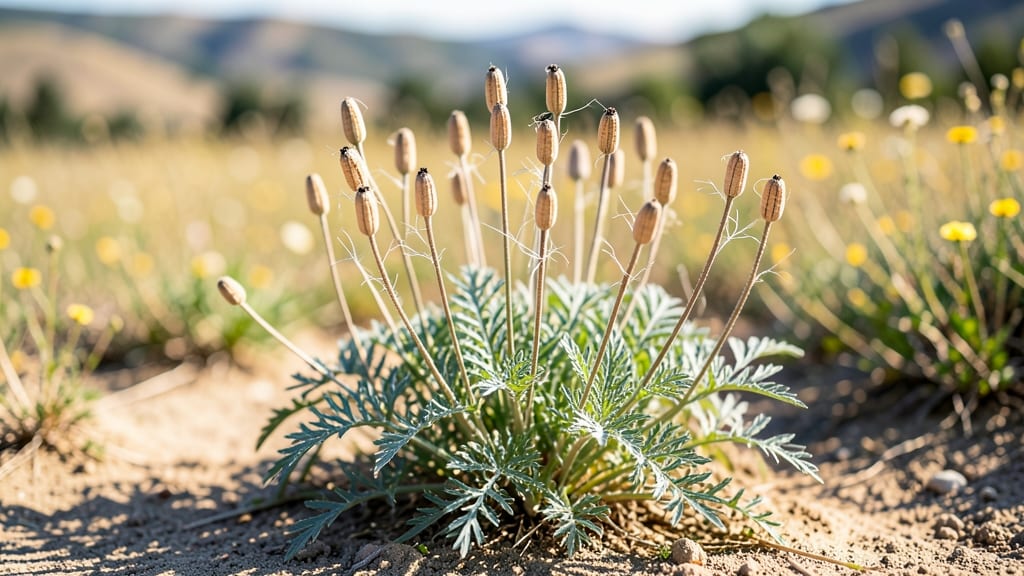
Harvesting California poppy seed pods is like unlocking free plants for next spring—no store-bought seeds needed. 🌻 The key is timing: pods turn from green to dry and papery, usually in late summer or early fall, when they rattle like tiny maracas.
One wrong move and you’ll lose seeds to wind or pests, but get it right and you’ll have a head start on next year’s garden.
You’ll need just a few simple tools: sharp scissors or pruners, a paper bag for collecting, and a dry spot to store them. The pods are delicate—squeeze too hard and they’ll explode all over your hands.
I learned that the hard way after my first attempt left me with more seeds on my shirt than in the bag. Once collected, lay them out in a single layer to dry completely before storing.
What you end up with is a stash of seeds that germinate faster and stronger than anything you’d buy. Plant them in fall or early spring, and watch those bright orange blooms return year after year.
The dried pods also make stunning, rustic decorations—glue them to greeting cards or scatter them in flower arrangements for a touch of wild California charm.
Pro tip: If you’re short on space, let some pods stay on the plant—they’ll self-seed naturally, creating a poppy carpet that spreads effortlessly. Just be ready to thin seedlings in spring.
The whole process takes less than an hour and saves you money while keeping your garden thriving with free, homegrown beauty.
📚 In This Guide
- What you need
- Instructions
- Tips and common mistakes
- Wrapping up and next steps
What you need
- ● California poppy plants (mature, with fully dried seed pods—typically late summer to early fall).
- ● Garden shears or pruners (clean, sharp, and sanitized to avoid spreading disease).
- ● Large paper bags or breathable mesh bags (1–2 per harvest session; avoid plastic to prevent moisture buildup).
- ● Cardboard boxes or trays (for drying pods indoors—size depends on harvest volume).
- ● Rubbing alcohol (70% or higher) and cotton swabs (for sterilizing tools between cuts).
- ○ Glove (optional but recommended)—thin gardening gloves to protect hands from prickly stems.
- ● Seed envelope or airtight containers (for long-term storage—label with the harvest year!).
- ● Fan or dehumidifier (to speed up drying in humid climates).
- ● Magnifying glass (for inspecting pods for pests or damage).
- ● Notebook & pen (to track pod maturity or note growing conditions).
How to harvest California poppy seed pods for next year's garden
Here's the simple method I use every year to collect healthy seeds without losing a single pod.
🌱 Step 1: Identify Mature Seed Pods
California poppy seed pods are ready when they turn from green to a dry, papery brown color. I look for pods that have split open slightly at the top—this is your signal they're mature. The pods should feel crisp to the touch rather than soft or leathery.
Harvest on a dry morning after the dew has evaporated. Wet pods won't dry properly and may develop mold. If you miss the pods at this stage, they'll eventually burst open and scatter seeds everywhere—so act quickly once they turn brown.
✂️ Step 2: Gently Remove Pods from Stems
Use clean, sharp scissors or pruners to snip the entire seed pod from the stem, leaving about an inch of stem attached. This helps prevent damage to the delicate pods. I always work from the bottom of the plant upward to avoid stepping on dry pods that may have fallen.
Place the harvested pods in a paper bag—never plastic, as moisture will build up and cause rot. Handle them gently; squeezing or crushing pods will destroy the seeds inside. If you find any pods with holes or damage, set them aside immediately—they won't produce viable seeds.
🪴 Step 3: Dry the Pods Completely
Spread the pods out in a single layer on a dry, well-ventilated surface like a mesh screen or clean cardboard. Keep them in a warm, dry place away from direct sunlight—too much heat will cause them to dry too quickly and crack open prematurely. I place a small fan nearby to circulate air and speed up the drying process.
Check the pods daily. They're fully dry when they feel light and brittle, and the seeds inside rattle when you shake them. This usually takes about 7-10 days, depending on your climate. If humidity is high, drying may take longer—don't rush it, or the seeds won't store properly.
🌿 Step 4: Extract and Store the Seeds
Once the pods are completely dry, place them in a clean, dry jar and gently roll or shake them to release the seeds. I like to do this over a sheet of paper so I can catch any stray seeds. The seeds will look small and dark, almost like tiny black beans.
Remove any remaining pod fragments or debris, then store the seeds in a labeled envelope or small jar. Keep them in a cool, dark place—like a pantry or fridge—to maintain viability. California poppy seeds can stay fresh for 2-3 years if stored properly, so label them with the harvest year.
⏰ Step 5: Prepare for Next Year's Planting
In early spring, scatter the dried seeds directly onto prepared soil. California poppies thrive in well-draining soil and full sun, so choose a spot with at least 6 hours of sunlight daily. Lightly press the seeds into the soil—they don't need to be buried deep.
Water gently but don't soak the soil. The seeds need moisture to germinate, but they'll rot if they're too wet. In just 2-3 weeks, you'll see tiny green sprouts popping up—proof that your harvest was successful. Keep the area weed-free until the poppies are established.
Tips & tricks for perfect California poppy seed harvesting
Here's what nobody tells you about making this process foolproof every single time.
Timing Secret: Harvest pods at their absolute peak—when they're brown and crisp but haven't burst open yet. I've learned this the hard way after watching seeds scatter when pods dried too long on the plant. Check pods every morning during their mature stage; the difference between a perfect harvest and a scattered mess comes down to these few hours.
Harvesting Technique: Work from the bottom of the plant upward to avoid crushing dry pods that may have already fallen. I use small, sharp pruners instead of my fingers to prevent accidental damage. Place pods immediately in paper bags (never plastic!) to prevent moisture buildup that leads to mold. This single step saved me from losing entire batches of seeds last year.
Drying Wisdom: The 7-10 day drying period is non-negotiable—don't rush it! I've tried using ovens or heat lamps, but they cause pods to crack prematurely. Instead, use a small fan to circulate air gently. Test for readiness by shaking pods—if seeds rattle, they're ready. If humidity is high, extend drying by 2-3 days rather than risking moldy seeds.
Storage Strategy: Label your seed storage with the harvest year immediately. I also include the date of planting on the label to track germination rates. Store seeds in small jars with tight lids in the fridge for maximum freshness. The cool, dark environment prevents premature sprouting and maintains viability for those 2-3 years.
Pro Tips for California Poppy Seed Pods
- Here's what nobody tells you about making this process foolproof every single time.
- Timing Secret: Harvest pods at their absolute peak—when they're brown and crisp but haven't burst open yet. I've lear...
- Harvesting Technique: Work from the bottom of the plant upward to avoid crushing dry pods that may have already falle...
Frequently asked questions
Got questions about harvesting California poppy seed pods?
You’re not alone! Here are answers to the most common queries to help you collect viable seeds like a pro.
When is the best time to harvest California poppy seed pods?
Harvest pods when they’re dry and brown but before they split open—usually late summer to early fall (August–October in most of California). Morning harvests prevent humidity from causing premature seed loss. Pro tip: Tap a pod—if seeds rattle inside, it’s ready!
How do I know if the seeds inside are still viable?
Viable seeds should be plump, dark, and firm (not shriveled or hollow-sounding). For extra assurance, perform a float test: Drop seeds in water—viable ones sink, while empty or damaged ones float. Store seeds in a cool, dry place for up to 2 years.
What’s the easiest way to remove seeds from the pods without making a mess?
Use a paper bag or fine-mesh sieve to catch seeds as you gently press or roll pods over it. Avoid shaking pods directly into your hand—seeds scatter like confetti! For stubborn pods, lightly crush them with a rolling pin or mortar and pestle.
Can I replant California poppy seeds from store-bought flowers?
Most commercial flowers (like those from nurseries) are hybridized for color and may not produce true-to-type seeds. For reliable regrowth, harvest seeds from wild or heirloom plants in your area. If unsure, test a few seeds—nature’s lottery!
What should I do if my seed pods mold or get wet before harvesting?
If pods mold, discard them immediately—moldy seeds won’t sprout. To prevent future issues, harvest on dry mornings and avoid storing pods in humid areas. For slightly damp pods, lay them out to dry in a single layer with airflow (no heat!).
Bonus Tip: Label your seed packets!
Write the harvest date and location on a small bag or envelope. This helps track seed freshness and growing conditions for next year’s garden. Trust us—future you will thank present you!
Wrapping up and next steps
Harvesting California poppy seed pods doesn’t have to be a daunting task—with the right timing, tools, and techniques, you can ensure a bountiful yield for next year’s blooms! 🌸 Whether you’re a seasoned gardener or a beginner, these stress-free methods will help you collect viable seeds while keeping your garden thriving.
Now that you’re equipped with the how-to’s and answers to common questions, it’s time to roll up your sleeves and enjoy the process.
Ready to take the next step? Mark your calendar for late summer or early fall, gather your supplies, and start harvesting those golden pods. Your future poppy patches—and maybe even a few extra seeds to share—will thank you!