
Lawn
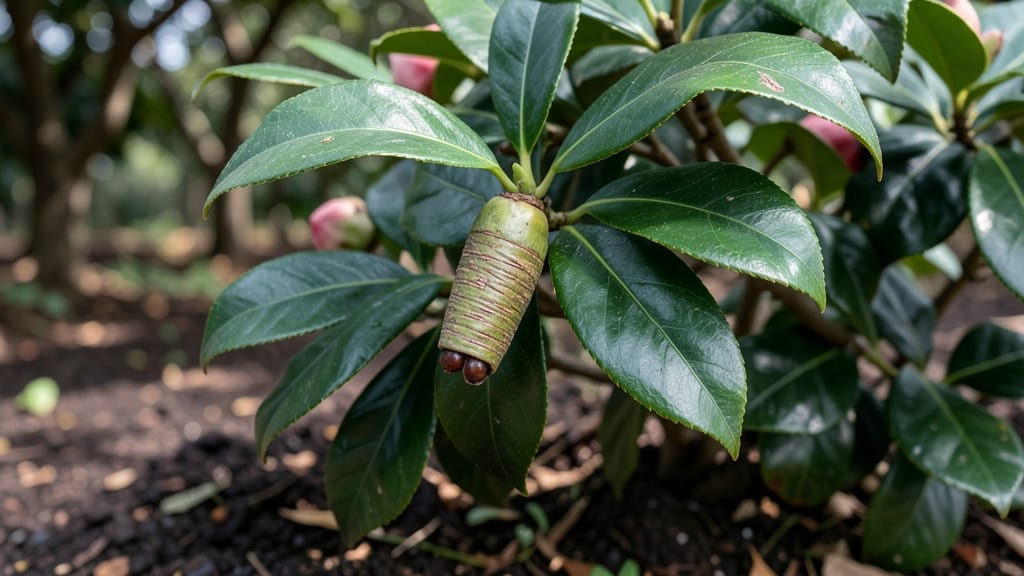
Harvesting camellia seed pods at the right moment means viable seeds for next year's lush shrubs. 🌱 The key is patience—wait until the pods turn brown and split open naturally, usually in late winter or early spring.
Twisting them off too early ruins the seeds inside, but leaving them too long risks losing them to birds or rot.
Once you've collected the pods, crack them open to reveal the shiny black seeds nestled in their fibrous shells. These seeds need a cold stratification process to break dormancy—simply mix them with damp sand and refrigerate for 60-90 days. This mimics winter's natural conditions and dramatically improves germination rates.
After stratification, plant the seeds in a well-draining potting mix, keeping them moist but never soggy. Germination can take 4-12 weeks, so consistency is key. Young seedlings need bright, indirect light and occasional misting to prevent damping off—a fungal disease that strikes when conditions are too wet.
Common challenges include low germination rates and leggy seedlings, but proper timing and care solve most issues. With this method, you'll grow sturdy camellias that thrive for decades—just like the ones in your neighbor's yard that make everyone stop and admire them.
📚 In This Guide
- What you need
- Instructions
- Tips and common mistakes
- Wrapping up and next steps
What you need
- ● Mature camellia seed pods: 5–10 fully ripe, brown pods (harvest in late fall/winter).
- ● Sharp pruning shears: Bypass pruners (for clean cuts without crushing seeds).
- ● Paper towels or coffee filters: 2–3 sheets (for seed drying).
- ● Small paper bags or envelopes: 5–10 (for seed storage).
- ● Potting mix: 1–2 gallons of well-draining, sterile seed-starting mix (e.g., 50% peat moss + 50% perlite).
- ● Seed trays or small pots: 4–6 (3–4" deep, with drainage holes).
- ● Spray bottle: For gentle watering.
- ● Plastic wrap or humidity dome: To retain moisture during germination.
- ● Labeling tags: Waterproof markers + tags (to track seed varieties).
- ○ Heat mat (optional): For faster germination (70–75°F ideal).
- ○ Grow lights (optional): LED or fluorescent (12–14 hrs/day if natural light is low).
- ○ Fungicide (optional): Mild solution (e.g., hydrogen peroxide 3%) to prevent mold.
- ○ Gloves (optional): For handling prickly pods or messy soil.
- ● Patience: Camellia seeds can take months to germinate—don’t rush!
- ● Warm, humid climate: Ideal for outdoor planting (Zones 7–10); indoor starts need consistent warmth.
- ● Space: Seedlings need 6–12" of vertical room before transplanting.
Step-by-Step instructions for harvesting camellia seed pods
Here's how to collect viable seeds without damaging your plant or future blooms.
🌱 Step 1: Identify Mature Seed Pods
Camellia seed pods mature in late winter to early spring, typically 3-4 months after flowering. Look for pods that have turned from green to a deep brown or tan color—they should feel dry and papery to the touch. Avoid harvesting pods that are still green or have soft spots, as these won't contain viable seeds.
Gently inspect the pod for any signs of pests or disease, like holes or mold. If you notice damage, discard the pod immediately to prevent spreading issues to healthy parts of the plant. Healthy pods will also feel slightly lighter than immature ones, almost hollow when tapped lightly with your fingernail.
✂️ Step 2: Harvest Pods Without Twisting
Use a pair of clean, sharp pruning shears to snip the pod from the stem, leaving about ½ inch of stem attached. Twisting or pulling the pod can damage the branch and leave unsightly scars. Hold the pod firmly at the base and make a clean cut at a 45-degree angle to encourage water runoff and prevent rot.
Place the harvested pods in a paper bag (not plastic) to allow airflow and prevent moisture buildup. Label each bag with the camellia variety and harvest date—this helps track seed viability and germination potential. Handle pods gently to avoid crushing them, as this can damage the seeds inside.
🪴 Step 3: Dry and Extract Seeds
Spread the harvested pods in a single layer on a dry, well-ventilated surface, like a mesh screen or a piece of window screen. Place them in a warm, dry location (around 65-75°F) for 2-4 weeks to fully dry. The pods should crumble easily when squeezed gently—this indicates the seeds are ready for extraction.
Once dry, place the pods in a clean cloth or paper towel and gently rub or crush them to release the seeds. Avoid using your hands directly, as the seed coating can be sticky. Sift the mixture through a fine mesh sieve to separate seeds from debris. Store the seeds in a paper envelope in a cool, dry place until ready to plant.
⏰ Step 4: Stratify Seeds for Germination
Camellia seeds require stratification to break dormancy. Place the seeds in a moistened paper towel and fold it to enclose them completely. Seal the towel in a ziplock bag and refrigerate for 3-4 months at 35-40°F. Check the towel monthly to ensure it stays moist but not soggy—dampness encourages mold growth.
After stratification, plant the seeds in a well-draining potting mix (like a 50/50 blend of peat moss and perlite) at a depth of ¼ inch. Keep the soil consistently moist but not waterlogged, and place the container in a warm, bright location (around 70-75°F) with indirect light. Germination can take 4-12 weeks, so patience is key.
Tips & tricks for perfect camellia seed pod harvesting
Took me years of trial and error to master these key details—here's how to avoid common pitfalls and maximize seed viability.
Pod Maturity Check: In Step 1, when testing for maturity, gently squeeze the pod between your fingers—it should feel like crumbling dry paper, not a firm green pod. Immature pods (still green) contain undeveloped seeds, while overripe ones (blackened or cracked) may have lost viability. The deep brown or tan color is your best indicator, but the crumble test confirms readiness.
Tool Technique: For Step 2, invest in a pair of bypass pruning shears specifically designed for clean cuts. The 45-degree angle isn't just decorative—it creates a natural water runoff channel that prevents rot at the cut site. I've seen too many gardeners use dull tools that crush pods during harvesting, so always keep your shears sharp and clean.
Drying Environment: During the 2-4 week drying period in Step 3, avoid placing pods near heat sources like radiators or direct sunlight. The ideal 65-75°F range should come from ambient room temperature, not forced heat. I learned this the hard way when my first batch dried too quickly and lost viability—patience is key here.
Stratification Safety: When refrigerating seeds for 3-4 months in Step 4, place the sealed bag in a crisper drawer rather than the main fridge compartment. The crisper maintains more consistent 35-40°F temperatures and higher humidity, which mimics natural winter conditions. I also recommend writing the date on the bag so you don't forget when to plant!
Pro Tips for Camellia Seed Pod
- Took me years of trial and error to master these key details—here's how to avoid common pitfalls and maximize seed vi...
- Pod Maturity Check: In Step 1, when testing for maturity, gently squeeze the pod between your fingers—it should feel ...
- Tool Technique: For Step 2, invest in a pair of bypass pruning shears specifically designed for clean cuts. The 45-de...
Frequently asked questions
Got questions about camellia seed pods?
You’re not alone! Here are answers to the most common queries—whether you’re harvesting for propagation or just curious about these unique pods.
When is the best time to collect camellia seed pods?
Harvest seed pods when they turn tan or light brown and begin to dry out—usually late winter to early spring, just before they split open naturally. Avoid collecting green or shriveled pods, as seeds inside won’t be viable. Pro tip: Check pods weekly for readiness, especially if you’re in a warmer climate where they may dry faster.
How do I know if the seeds inside are still good?
Viable camellia seeds should be plump, firm, and dark brown inside the pod. If they’re shriveled, hollow-sounding, or moldy, they won’t sprout. To test viability, float seeds in water: good seeds sink (like a pebble), while bad ones stay afloat. Store viable seeds in a cool, dry place until planting.
What do I do if my seed pods won’t open on their own?
If pods stay stubbornly closed, gently squeeze them with gloves (they’re tough but brittle!) or use a small knife to make a tiny slit. Avoid crushing seeds—just enough to release them. Troubleshooting tip: If pods are still green, wait 1–2 weeks; if they’re dry but sealed, they may need a few extra days of warmth to soften.
Can I use camellia seed pods for anything other than planting?
Beyond seeds, dried pods add rustic texture to floral arrangements or crafts. Just clean them thoroughly and let them air-dry completely first. For a unique twist, toast seeds lightly for a coffee-like aroma (though they’re not edible). Caution: Avoid using pods from non-native camellias, as some may contain mild toxins.
What should I avoid when handling camellia seed pods?
Skip these mistakes:
- Harvesting too early—green pods won’t yield viable seeds.
- Storing pods in humidity—mold ruins seeds faster than you think!
- Skipping the float test—it’s the easiest way to check seed quality.
- Forcing pods open with tools—gentle pressure works best.
Wrapping up and next steps
Growing camellia seed pods is a rewarding journey that connects you to nature’s cycles—from vibrant blooms to the promise of next year’s garden. By following the right steps—like timing your harvest, extracting seeds carefully, and storing them properly—you’re setting the stage for a thriving camellia garden.
Don’t let hesitation hold you back; your future blooms are waiting!
Next step: Grab those pods, get growing, and share your progress with fellow gardeners—your success might just inspire someone else to try! 🌱