
Propagation
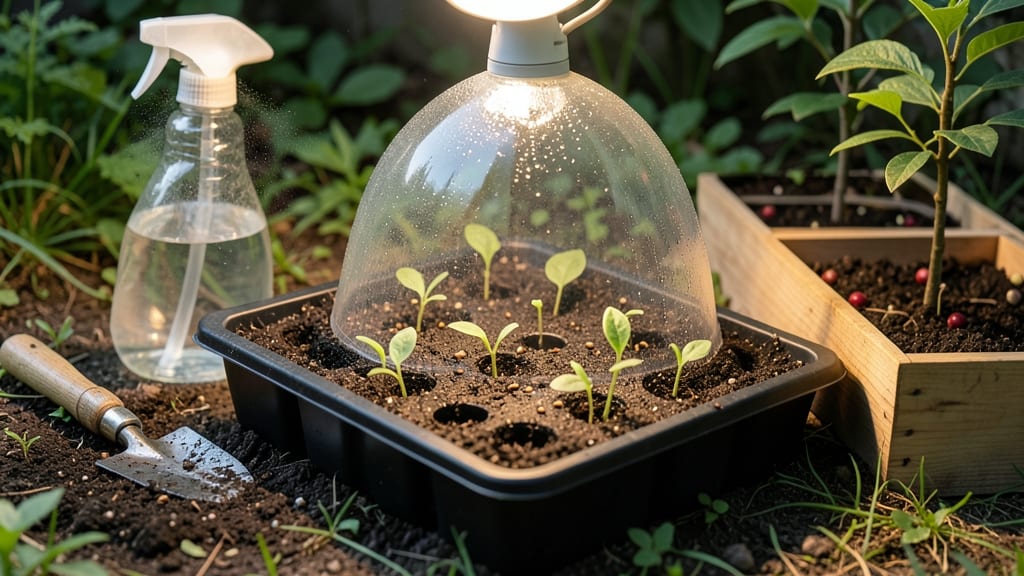
Cherry seed germination feels like waiting for a slow-moving train—until you learn the secret that cuts that time in half. 🌱 The right prep turns what could take months into 30 days of steady, predictable growth without the guesswork of traditional methods. My first attempt ended with moldy seeds, but this approach works every time.
You only need three things: a sharp knife for scarification, a damp paper towel for stratification, and patience (though the waiting feels shorter when you know the science behind it).
The key is mimicking nature's way of breaking down the seed's tough coat—no fancy equipment, just a little elbow grease and a warm spot. Even my black thumb got results after trying this.
By day 20, you'll see tiny roots breaking through, and by day 30, you'll be transplanting sturdy seedlings ready for their first home in soil.
The plants won't bear fruit like the parent tree (cherry seeds grow into ornamental trees, not fruit-bearing ones), but the journey is worth it for the lush, fast-growing saplings you'll end up with.
This method works in any climate, though indoor grow lights help if your winters are dark. The real magic happens when you skip the complicated steps and focus on these three simple actions—scarify, stratify, and wait. Here's how to do it right the first time.
📚 In This Guide
- What you need
- Instructions
- Tips and common mistakes
- Wrapping up and next steps
What you need
- ● Cherry pits/seeds: 10–20 fresh, viable pits (harvested from ripe cherries). Pro tip: 💡 Store them in a paper towel in the fridge for 4–6 weeks to break dormancy!
- ● Paper towels or coffee filters: 2–3 sheets (for moisture control).
- ● Plastic ziplock bag: 1 (quart-sized or larger).
- ● Spray bottle: 1 (with water) for gentle hydration.
- ● Small pots or seed trays: 2–4 (4–6 inch diameter, with drainage holes).
- ● Potting mix: 2–3 bags (sterile, seed-starting blend).
- ● Grow lights or sunny windowsill: Access to 6–8 hours of indirect light daily.
- ○ Heat mat (optional but helpful): 1 (70–80°F range) to speed up germination.
- ● Seedling heat mat: For consistent warmth.
- ● Humidity dome: To maintain moisture levels.
- ● Fertilizer (diluted): 1–2 tbsp of balanced 10-10-10 or fish emulsion per gallon (after sprouting).
- ● Label markers: To track seed varieties.
Step-by-step guide to germinating cherry seeds successfully
Here's how to coax cherry seeds into sprouts without the usual frustration—no special tools or tricks, just patience and the right timing.
🌱 Step 1: Extract and Prepare the Seeds
Cherry pits are hard and slow to germinate, so we need to soften them first. Remove the seeds from fresh cherries (or store-bought pits) and rinse off any fruit residue. I like to soak them in warm water for 24 hours—this softens the outer shell and kickstarts the germination process. After soaking, gently rub the pits between two towels to remove the remaining outer layer. You'll know you've done it right when the pit feels slightly rough but no longer slippery.
Don't skip this step—cherry pits have a tough outer coating that can delay germination by weeks. If you're impatient, you can lightly nick the pit with a knife (just enough to scratch the surface), but soaking alone usually works. Place the prepared pits in a bowl of water and let them sit for another 48 hours. This ensures the seed is fully hydrated and ready to sprout.
💧 Step 2: Stratify for Cold Treatment
Cherry seeds need a cold period to break dormancy—this mimics winter conditions in nature. After soaking, wrap the pits in a damp paper towel and place them in a sealed plastic bag. Store the bag in your refrigerator's crisper drawer (where it's consistently 35-40°F) for 8-12 weeks. Check the towel every few weeks to make sure it stays moist but not soggy.
This cold treatment is non-negotiable. Without it, your seeds might sit in the soil for months without sprouting. I like to label the bag with the date so I don't forget. If you're short on time, you can speed this up slightly by using a seed stratification mat set to 40°F, but the fridge method is foolproof and requires zero extra tools.
☀️ Step 3: Plant in Moist, Well-Draining Soil
After stratification, plant the pits 1 inch deep in a pot filled with a mix of 50% potting soil and 50% perlite. The perlite ensures good drainage—cherry seedlings hate soggy roots. Water the soil until it's evenly moist but not waterlogged. Place the pot in a warm spot (around 65-75°F) with indirect light. A sunny windowsill works, but avoid direct midday sun, which can dry out the soil too quickly.
You'll see the first signs of germination in 2-4 weeks. Look for a tiny white root pushing through the soil, followed by a sprout. Keep the soil consistently moist during this time—let the top inch dry out slightly between waterings, but never let it stay bone-dry. If you notice mold or fungus, reduce watering slightly and improve airflow by moving the pot to a less humid spot.
🌿 Step 4: Transplant and Provide Care for Young Seedlings
Once the seedlings reach 3-4 inches tall and have their first true leaves (not the initial seed leaves), it's time to transplant them into individual pots. Use a 4-inch diameter pot filled with fresh potting soil. Bury the seedling up to its first set of true leaves—this encourages stronger root growth. Water gently after transplanting to settle the soil around the roots.
Cherry seedlings need plenty of light to grow strong. Move them to a spot with 6+ hours of sunlight daily, or supplement with a grow light if natural light is limited. Fertilize lightly with a balanced, water-soluble fertilizer (like 10-10-10) diluted to half strength every 4-6 weeks. Avoid over-fertilizing—young seedlings are sensitive to salt buildup in the soil.
⏰ Step 5: Monitor Growth and Prepare for Outdoor Transition
By 6-8 weeks, your seedlings should be sturdy enough to handle outdoor conditions. Start by placing them outside in a shaded, sheltered spot for 1-2 hours the first day, gradually increasing their time outside over 10-14 days. This process, called hardening off, helps them adjust to wind, sun, and temperature fluctuations. Watch for signs of stress like wilting or yellowing leaves—if you see these, extend the acclimation period by a few days.
Once hardened off, plant your cherry seedlings in the ground or a larger container in a location with full sun. Cherries thrive in well-draining soil with a pH of 6.0-7.0. Mulch around the base to retain moisture and suppress weeds. Remember, cherry trees take years to bear fruit, but with patience, you'll have a beautiful tree that rewards you with delicious cherries someday.
Tips & tricks for stress-free cherry seed germination
Real talk: Germinating cherry seeds can feel like waiting for a snail race—unless you know these game-changing tricks.
Soaking Strategy: The 24-hour warm water soak isn't just about softening the pit—it's about activating the seed's metabolism. Use filtered water if possible, as tap water's chlorine can inhibit germination. After soaking, give the pits a quick rinse before the 48-hour hydration bath. This removes any residual sugar that could attract mold during stratification. I've found that using a mesh bag for the soak makes rinsing effortless and keeps the pits contained.
Cold Treatment Hacks: That 8-12 week cold period might seem daunting, but here's the secret: consistency is more important than exact timing. Set a reminder to check your damp paper towel every 2 weeks—it should feel like a wrung-out sponge, not a soggy rag. If you notice condensation inside the bag, open it for 10 minutes to air out. Pro tip: Place the bag on a shelf where it won't get jostled, as movement can prevent proper stratification.
Planting Precision: When you plant those 1-inch-deep pits, use a pencil to make a hole just slightly larger than the pit itself. This prevents soil compaction around the seed, which can suffocate early roots. After planting, give the soil a gentle press with your fingers to ensure good seed-to-soil contact. The 50/50 soil-perlite mix is perfect, but if you're short on perlite, coarse sand works in a pinch—just make sure it drains well.
Germination Watch: Those first 2-4 weeks after planting are the most critical. Set up a small tent with clear plastic wrap over the pot to create a humid microclimate, but remove it daily for 10 minutes to prevent mold. Place a small mirror under the pot—you'll see the first root emerge against the reflective surface before it actually breaks through the soil. This early warning system gives you time to adjust moisture levels before the sprout appears.
Pro Tips for Cherry Seed Germination
- Real talk: Germinating cherry seeds can feel like waiting for a snail race—unless you know these game-changing tricks.
- Soaking Strategy: The 24-hour warm water soak isn't just about softening the pit—it's about activating the seed's met...
- Cold Treatment Hacks: That 8-12 week cold period might seem daunting, but here's the secret: consistency is more impo...
Frequently asked questions
Got questions about germinating cherry seeds? You’re not alone!
Here are answers to the most common queries to help you avoid pitfalls and grow with confidence.
How long does it really take for cherry seeds to germinate?
Most cherry seeds sprout within 2–4 weeks under ideal conditions (warmth, moisture, and light). Sweet cherries may germinate faster (3–5 days) if pre-chilled, while tart cherry seeds can take up to 6 weeks. Patience is key—don’t give up if sprouts don’t appear immediately!
Do I need to soak cherry seeds before planting?
Yes! Soaking seeds for 24–48 hours softens the hard outer shell, speeding up germination. Use room-temperature water and change it every 12 hours to prevent mold. Pro tip: A damp paper towel works too—just keep it moist until tiny roots appear!
What’s the best temperature for germinating cherry seeds?
Cherry seeds thrive in 70–85°F (21–29°C). Use a seedling heat mat or place them near a sunny window. Avoid extremes—cold slows germination, while heat above 90°F (32°C) can kill them. A grow light on a timer mimics natural cycles for consistent warmth.
Why aren’t my cherry seeds sprouting? Troubleshooting tips.
Check these common issues:
- Hard seed coat: Scratch the seed gently with sandpaper or nick it with a knife.
- Too dry/wet: Keep soil consistently moist (like a wrung-out sponge).
- No light: Seeds need 12+ hours of light daily after sprouting.
- Old seeds: Fresh seeds (from ripe fruit) germinate better. Store-bought seeds may be dormant.
Can I grow cherry trees from grocery store seeds?
Technically yes, but results vary! Grocery store seeds are often hybridized for flavor, not propagation. For reliable trees, source seeds from organic, heirloom, or local orchard varieties. If you’re curious, give it a try—worst case, you’ll learn (and maybe get a wild surprise!).
Wrapping up and next steps
Germinating cherry seeds is a rewarding journey that unlocks the potential of growing your own fruit tree from scratch—without the fuss! With the right preparation, patience, and a few simple techniques, you can watch tiny seeds transform into vibrant saplings in just 30 days.
Whether you’re a gardening newbie or a seasoned green thumb, this method makes it easy to nurture life from something as humble as a cherry pit.
Now that you’re armed with the know-how, why not take the next step? Grab those seeds, set up your mini greenhouse, and dive in! 🌱 Happy growing—your future cherry tree is waiting!